Maybe you finally won the lottery and got that "golden ticket" in the form of an email confirming that you were successful in scoring a tent site at Lake O'Hara this summer. If not, I have every finger and toe crossed for you to be successful getting spots on a day use bus to O'Hara.
I was one of the lucky ones last summer when I managed to get a campsite at Lake O'Hara for a night in September. We enjoyed two glorious days hiking most of the popular trails around the lake, and even climbed a mountain on our second day. We were blessed with perfect weather, a warm weekend, and no bugs (thank you autumn!)
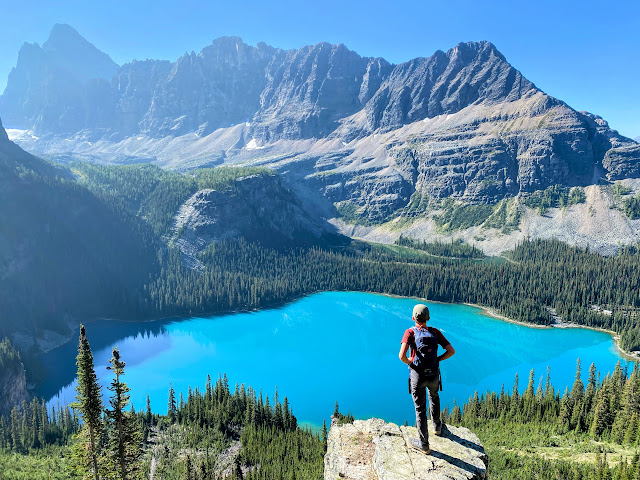 |
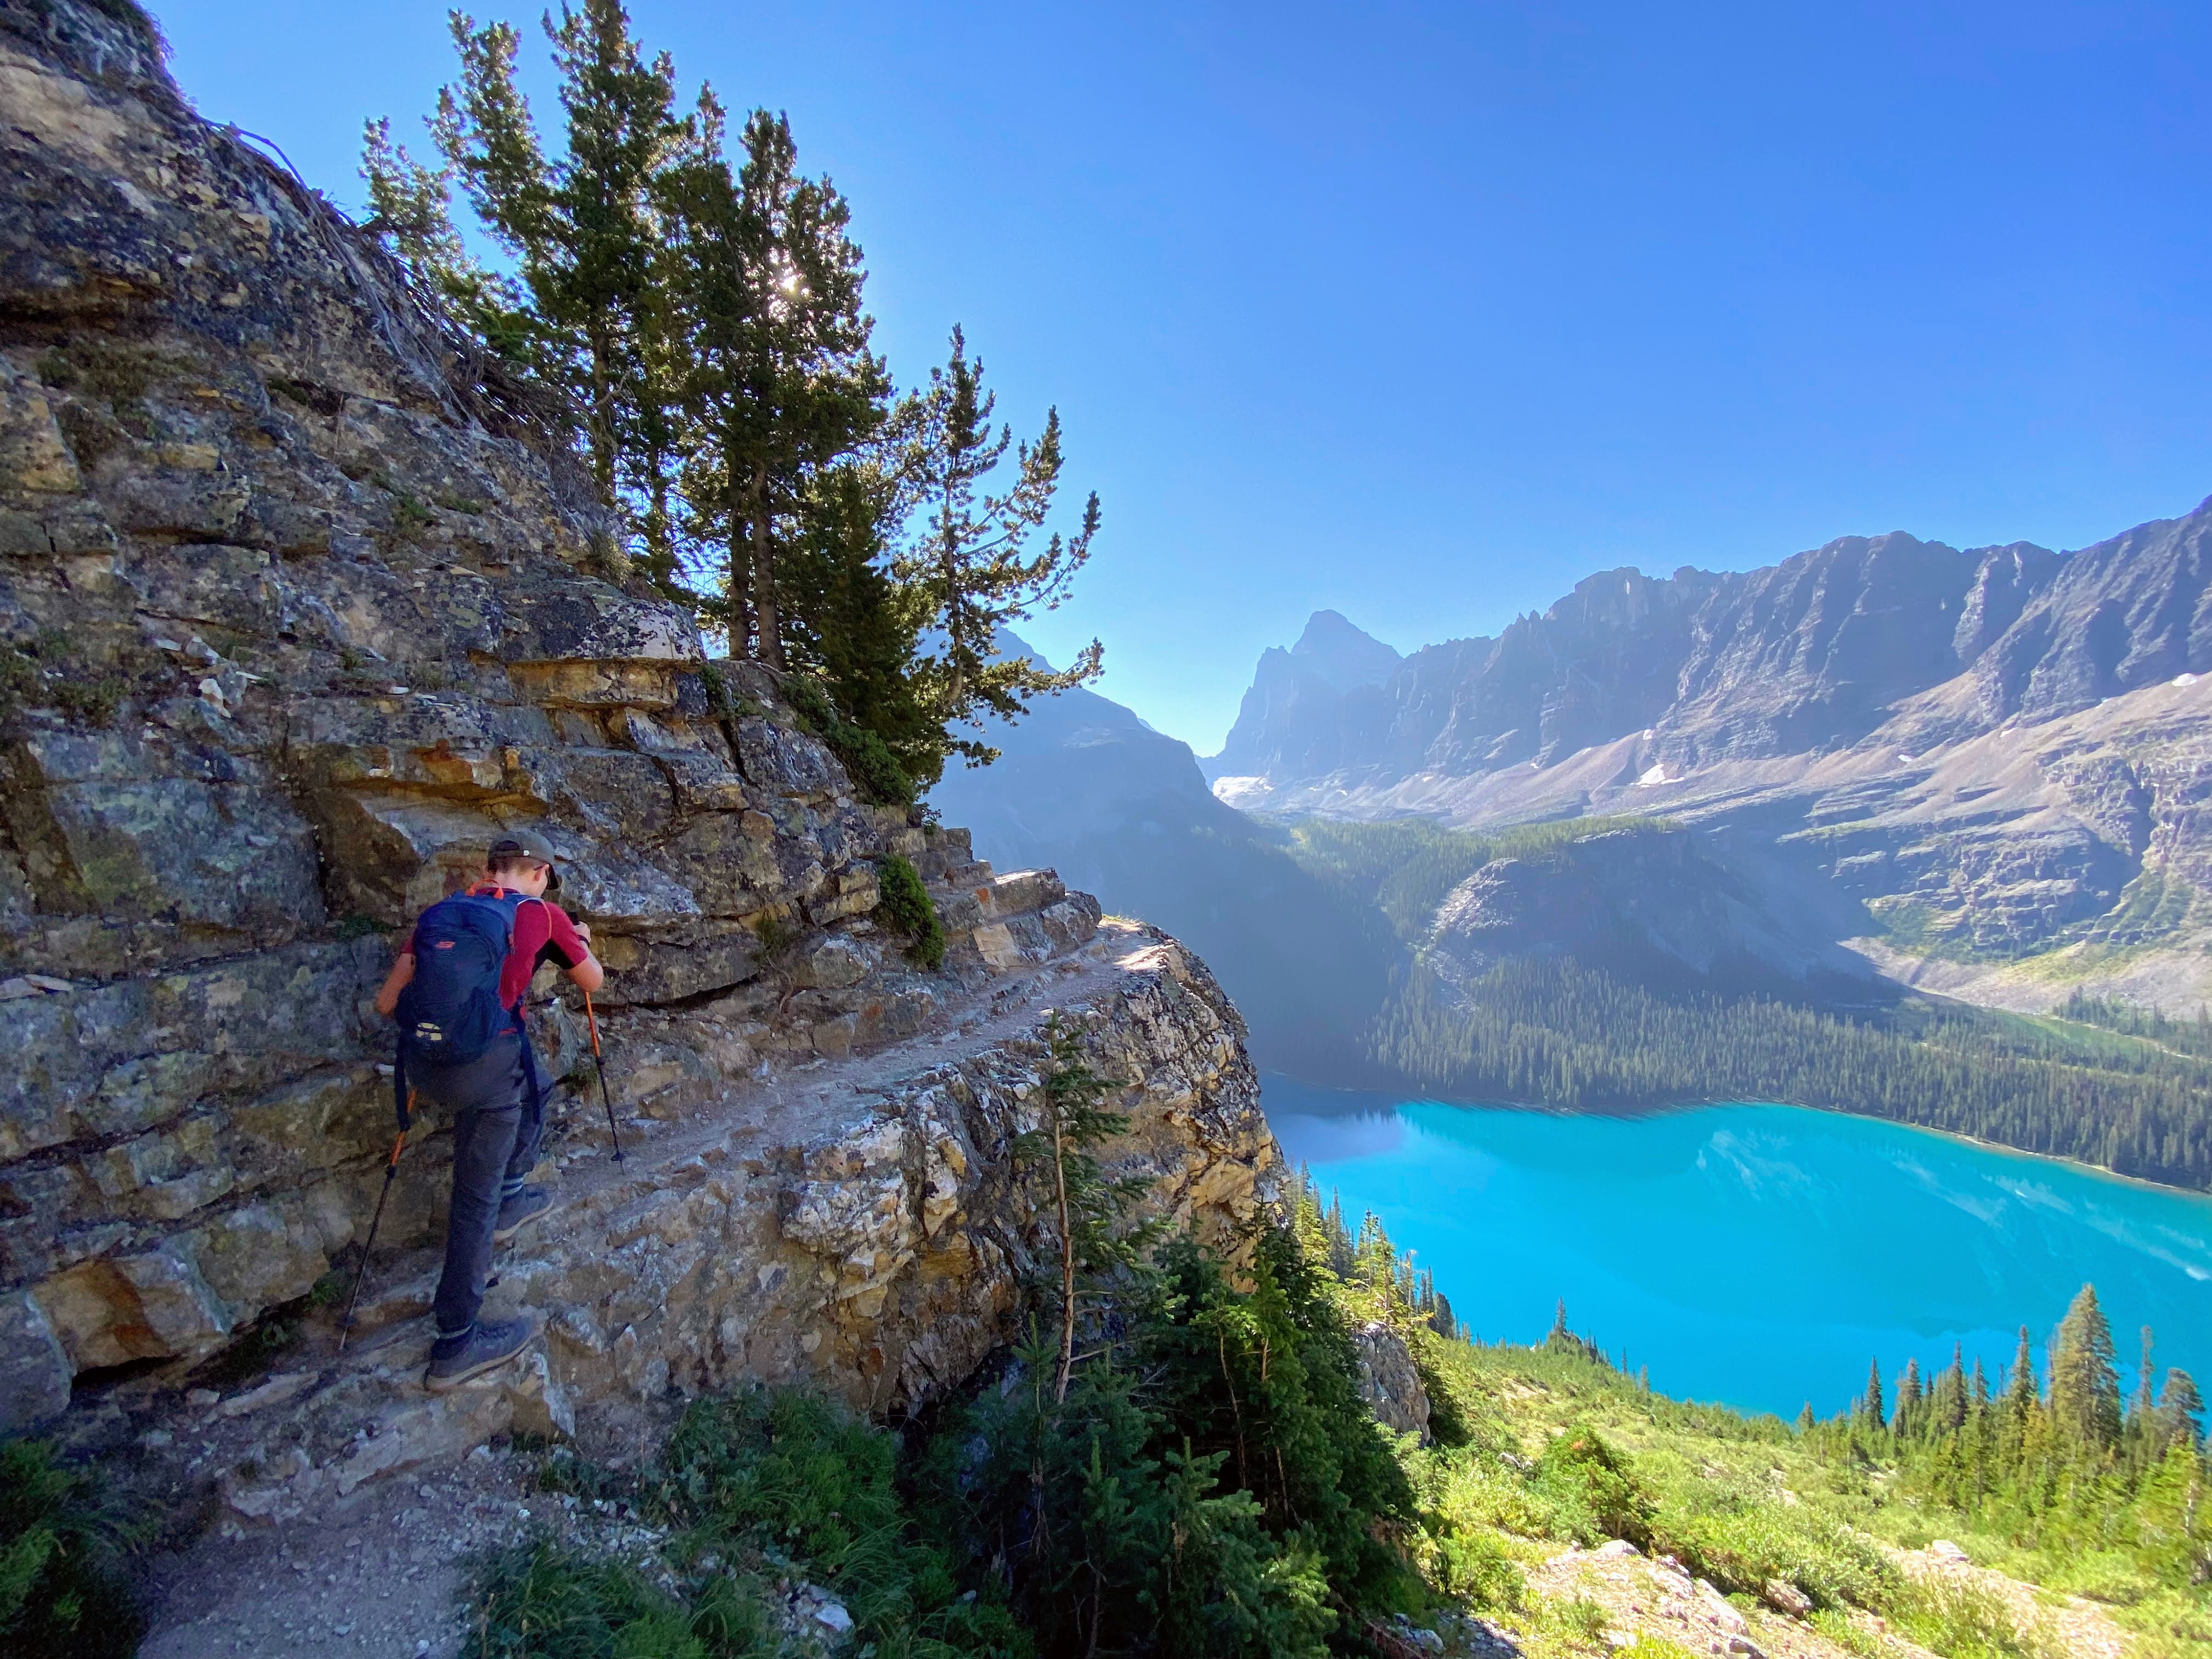
| Looking down on gorgeous Lake O'Hara from the Alpine Circuit hike |
** The first few sections below focus on providing an introduction to the area, access, camping, etc.
To read about hiking at O'Hara skip ahead to where I've outlined the number one hikes for the area. **
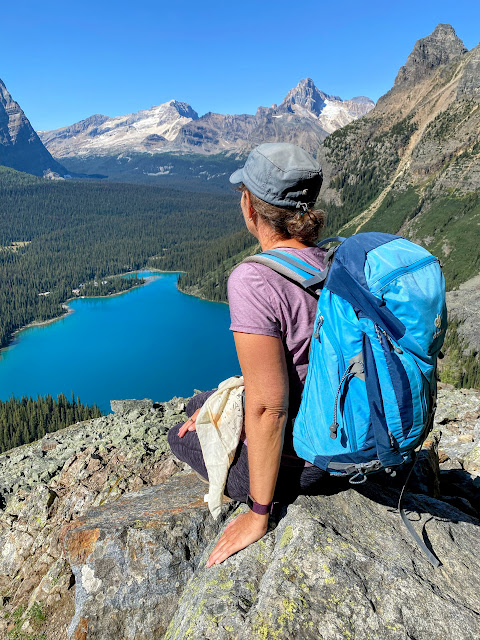 |
| Lake O'Hara is a world-famous hiking destination in the Canadian Rockies |
Table of Contents
- An Introduction to Lake O'Hara (and how to access the area)
- The Lake O'Hara Quota System Explained
- The Best Time to Visit Lake O'Hara
- Visiting Lake O'Hara for a Day
- Camping at Lake O'Hara
- Last Minute Cancelations for the Campground
- The best Day Hike at Lake O'Hara (for a perfect one-day visit)
- Shorter day hikes at Lake O'Hara for a day hike or multi-day visit
- Climbing Mt. Schaffer at Lake O'Hara
- A sightseeing Guide to Lake O'Hara for Non-hikers
- So you didn't get a campsite or bus seats... Now what??
- Recommended Reading
 |
| Looking down on Lake O'Hara from the Opabin Prospect |
An Introduction to Lake O'Hara (and how to access the area)
Lake O'Hara is located in Yoho National Park, British Columbia, and a short drive from Lake Louise.
"This sensitive alpine environment is home to exquisite hanging valleys, jewel-blue lakes and breathtaking vistas. An excellent trail network for the region is maintained by the Lake O’Hara Trails Club and Parks Canada.
Access to this area is limited to provide high-quality and meaningful experiences for visitors and maintain Lake O’Hara’s unique alpine environment." - Parks Canada
Due to a quota system in place meant to limit the number of visitors Lake O'Hara sees per day, access to the lake is prohibited by private vehicle. You either hike in (22 km round trip) or you take a Parks Canada shuttle bus.
And know that IF you choose to hike the road in to Lake O'Hara, it's 22 km of road walking PLUS the distance you want to hike when you reach the lake.
There are four main ways to access Lake O'Hara for a day (assuming you don't want to endure the hike in and out on the road.)
- Visit for a day by taking one of the Parks Canada shuttle busses to the lake. Reservations are required and seats are won via a lottery that you enter in the winter season. You must pay to enter the lottery and chances of winning a coveted bus seat are pretty slim. I've given up personally.
- Camp for up to three nights at the backcountry campground located a short walk from the lake. Reservations are required and include the bus ride to/from the campground.
You can make a reservation for the backcountry campground in January each year. Watch the Parks Canada website for the opening day. All sites will be fully booked for the season ahead within 30 minutes.
- Stay at the Elizabeth Parker Hut, a short walk from the lake, and operated by the Alpine Club of Canada (and equally challenging to get space at.) Spots at the hut also include the bus ride.
- Stay at the Lake O'Hara Lodge (the priciest option) which is perched on the shore of the lake. Stays at the lodge include all meals and transportation to/from the lodge.
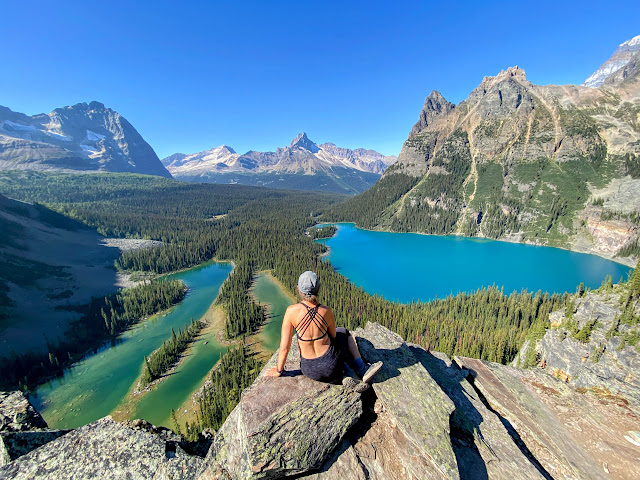 |
| Enjoying a glorious autumn day from the Opabin Prospect at O'Hara |
Visit the
Lake O'Hara website for information on visiting the lake, making reservations on the bus or at the campground, and planning your trip.
Reservations are required to take a bus to Lake O’Hara for day use visits and camping from mid-June to early October. Before/after this period, you must walk the access road to reach the lake (a distance of 11 km one way.) In winter you can also ski to the lake, and the road is often groomed and trackset for Nordic Skiing.
You can walk the access road any time of the year (including through the summer season) but you can not bike the road nor can you drive it with your own vehicle.
And note as of 2024, there are no walk-ons for in-going busses to Lake O'Hara. You can not show up early hoping to get a last minute bus seat!
 |
| Looking down on Lake McArthur from the summit of Mt. Schaffer |
The Lake O'Hara Quota System Explained
A few clarifications about the bus system and why there are empty busses going up the road, why they won’t pick you up, and why you’re being forced to walk 11 km up a road to access the lake:
First: There is a daily quota system in place to protect this fragile alpine environment so that it doesn’t turn into Lake Louise with thousands of hikers every single day on the trails!
The daily quota only allows 30-40 day users along with overnight visitors staying at the park’s 30-site backcountry campground, Alpine Club of Canada backcountry hut, and a small private lodge.
All overnight stays receive bus seats, so in total, there are approximately 200 people that get bus seats per day.
Second: The visitor staff and the shuttle bus drivers at Lake O’Hara are not allowed to fill the busses up, they are not allowed to stop for you on the road, they are not allowed to sell extra bus seats at the parking lot, and it’s not that they don’t care. They just are not allowed to! They would lose their jobs if they did.
The quota dictates how many people can ride up per day. Some busses may be relatively empty because they have four scheduled times per day to ride up (two for overnight use only) and filling each of these busses would exceed the quota.
Third: If you want to hike the road up, you’re more than welcome to do it, but Parks Canada does not guarantee you a ride out. You can try to purchase a bus ticket down (with cash) but campers, overnight guests, and day users with actual tickets get first dibs. Be prepared to walk both ways (22 km round trip) and that does not include your hike around the lake or around any of the trails at O’Hara.
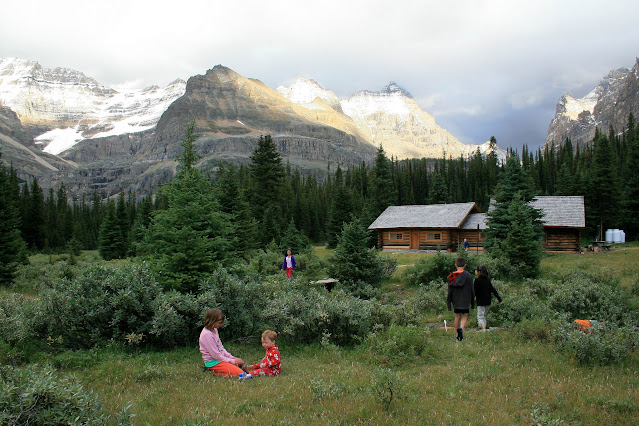 |
| The Elizabeth Parker Hut at Lake O'Hara |
The Best Time to Visit Lake O'Hara
I wouldn't plan a visit before mid-July because it takes a while for the snow to melt. It would be disappointing to discover the lakes still frozen or the trails too icy to hike.
Late July through the end of August is the most popular time to visit and where the weather promises to be the most stable. This is also the best time for camping at the lake when temperatures are warmer.
Personally, I prefer autumn for crisp clear skies, cooler temperatures for comfortable hiking, and no bugs. There's usually less risk for forest fire smoke as well. Camping can be chilly though with temperatures dropping below zero overnight, so make sure you're prepared for that aspect if you want to camp in the fall.
September also brings early snow on occasion but I've had good luck with fall hiking at Lake O'Hara on several occasions over the years.
Finally, if you want to time your visit to see the golden larch trees, you'll want to aim for the third week of September. It's not an exact science, but anytime after the 20th is generally a safe bet.
 |
| The Opabin Plateau is a beautiful place to hike in larch season |
Visiting Lake O'Hara for a Day
If you've secured bus tickets, make sure you arrive at least half an hour early. They will start checking people in 30 minutes before departure time.
The bus ride takes approximately 20 minutes at most and there are two options for ingoing times (8:30 and 10:30 am.) Personally, I always choose 8:30am so that I have the full day to hike, and I don't feel rushed.
If you are not a morning person, or you are planning a shorter hike, choose the 10:30 bus time. This could be a smart option in fall as well when mornings are very chilly.
Pets are not allowed on the bus or at the campground. If you need to bring Fido with you, your only option is to hike the road. I recommend leaving your pup at home.
Outgoing bus times are 2:30, 4:30, and 6:30 in the afternoon. Arrive early to ensure you get a seat on the bus of your choice. (And don't lose the return bus token they'll give you when you arrive.)
 |
| Lake Oesa is a great short hike at O'Hara |
Dressing for Lake O'Hara:
The temperature can easily start below zero in the parking lot or by the lake when you first start hiking. Bring your gloves, a toque, warm coats, and layers. Last September I started out dressed for winter, and had stripped down to my sports bra by mid afternoon (failing to wear a tank top.) By late afternoon I was back in my puffy jacket.
Be prepared for all weather conditions when you visit Lake O'Hara (even if it's going to be 30C in Calgary!)
Le Relais Day Shelter and the World Famous Carrot Cake:
And... don't forget the world-famous carrot cake that you can purchase from Le Relais Day Use Shelter by the bus stop at the lake!! They only take cash so plan ahead, and they sell out early in the day. You can also get trail information here and buy a hot drink.
And pro-tip: Bring a fork if you plan to buy the carrot cake. You'll thank me for this. It's also served on a napkin, so if you want to take it with you for the trails, bring a container.
And here's my (I can't believe I have to say it) speech: BE KIND! Your family, friends, or co-workers at home do not need their own piece of carrot cake. Don't buy up the entire pan or buy extra pieces to bring home.
Everybody wants some, and the supply is extremely limited, so buy enough for the guests in your party at the lake, one per person max, and consider sharing. Perhaps in a group of 5, you can share 3-4 pieces.
It's become so difficult to get cake, we actually had to send our son running up to Le Relais on our second day from camp so that he'd be first in line. That's crazy.
New batches of carrot cake arrive each day at 8:30 am and 1:30 pm.
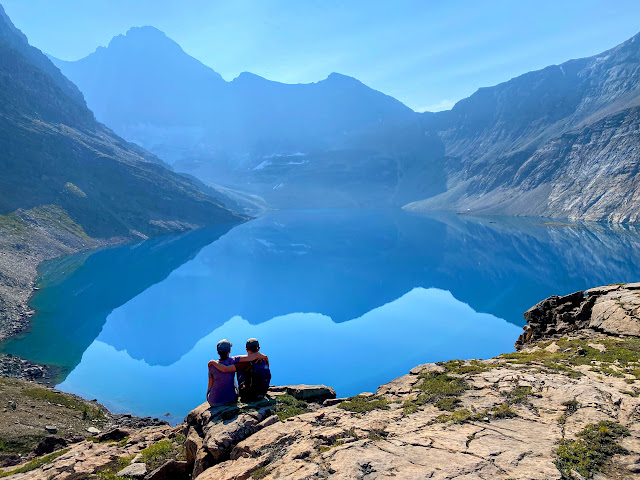 |
| Lake McArthur is another great short hike at O'Hara |
Camping at Lake O'Hara
There are 30 campsites at Lake O'Hara and you must make a reservation online. Competition is intense and I encourage you to check the website for cancelations regularly.
The maximum stay is 3 nights and you can fit up to 4 people on one tent pad (which is challenging if you have more than two children.)
The Lake O'Hara Campground is open from mid June through the beginning of October.
The inbound buses to Lake O'Hara depart the parking lot at 8:30 and 10:30 in the morning, and 3:30 or 5:30 in the afternoon.
Fight for the 8:30am bus departure time:
If you plan on hiking after setting up your campsite, you'll want an 8:30am bus. If you're coming out after work or after a long drive, the 5:30pm bus time is convenient.
Note you won't be given a choice for the 8:30 or 10:30 bus departure time in the morning. It is "randomly" assigned to each group of campers.
From experience, they will try to assign you to the 10:30am bus! They don't like putting campers on the 8:30am bus because they want the previous campers to have time to pack up first before the new campers arrive.
You'll receive an email from Parks Canada telling you which bus you've been assigned to. I encourage you to respond to the email prior to your trip, requesting to switch to the 8:30am bus if you plan to do a big hike that first day. If you catch the 10:30 bus, you won't be at the lake hiking until noon!
For my recent trip, I had to email Parks Canada 3 times before they finally moved us to the 10:30am bus (claiming that they now had room for us on that bus.) I suspect they always had room for us on that bus but hoped we'd give up.
 |
| A typical campsite at Lake O'Hara |
This is a backcountry campground and as such there is no electricity, and the bathrooms are simple pit toilets. It's one of the more "comfortable" backcountry campgrounds you'll ever find though.
Expect to find:
- Well separated tent pads for privacy
- A large cooking area with one assigned food locker per campsite, several picnic tables, two warming shelters with wood stoves, a large communal fire pit, firewood, and potable water for cooking/drinking. There is a large dish washing area as well.
Make sure you bring your own backpacking stove for cooking. The wood stoves are intended for heat. (A full packing list is available on the Lake O'Hara website.)
- Recycling and garbage. You don't have to pack your garbage out with you.
- A storage shed that you can use for your overnight gear if you want to go hiking on your last day before taking your return bus home. - Note the shed isn't locked, so don't leave valuables.
Also note you must set up your campsite when you arrive and put your food in your locker. You can't just dump your gear in the shed when you get to camp. You also need to clear out your food locker when you check out the day of your departure to prepare for the next group coming in. That would mean either leaving all remaining food in the storage shed (inside a backpack or soft cooler bag) or carrying it with you on your hike.
Recommended Packing Tips:
- Bring a small soft cooler bag with an ice pack to keep your food cold for the first night. - Remember though that it has to fit in your locker, so keep it small!
- Fill up your water when you arrive at the campground for your day's hike. You don't have to pack it in with you from the city.
- Pre-make your lunch for both days. It made it easier for me to make all of the sandwiches for our two days before leaving.
- Skip the toilet paper. The campground is well stocked.
- Bring bum pads for the table benches. They're pretty cold in the mornings!
- Bring backpacking chairs. - They don't allow lawn chairs but you can bring collapsible backcountry chairs.
And try to choose a quiet campsite where people won't be walking by your site constantly if you like to go to bed early. We found that many people stayed up late by the communal fire pit and then they'd walk by our site with headlamps shining on our tent walls after we'd gone to bed.
 |
| The communal cooking area at the Lake O'Hara campground |
How it works with checking in / departing from the campground:
The bus will stop at the campground to let campers off before taking day users up to the lake. A staff member will give you an orientation to the campground, and then you are welcome to go choose a campsite.
I encourage you to quickly set up your tent, put your food in your locker, and then prepare your day packs for your hike. After this you can walk up to the lake. We took the 8:30am bus and were up at the lake to hike by 10:00am.
On your last day, pack up your tent site, and store everything that you don't need for your hike in the storage shed. Walk up the lake for your hike, and then walk back down to the campground to grab your overnight gear.
The bus will pick you up from the campground so you don't have to walk back up to the lake. - and make sure you're at the campground early for your trip home! They'll count how many campers are waiting for the bus as they drive up to the lake, and will save that many spots on the bus.
Don't be "those people" who show up at the campground 5 minutes before departure time, forcing them to add another bus just for you! - We saw it happen this year.
Departing bus times are 9:30 and 11:30 in the morning if you don't want to stay to hike, and 2:30, 4:30, and 6:30 in the afternoon.
Visit the
Lake O'Hara website for more information on how to pack, tent pad sizes, how to make a reservation, and to read more about the campground.
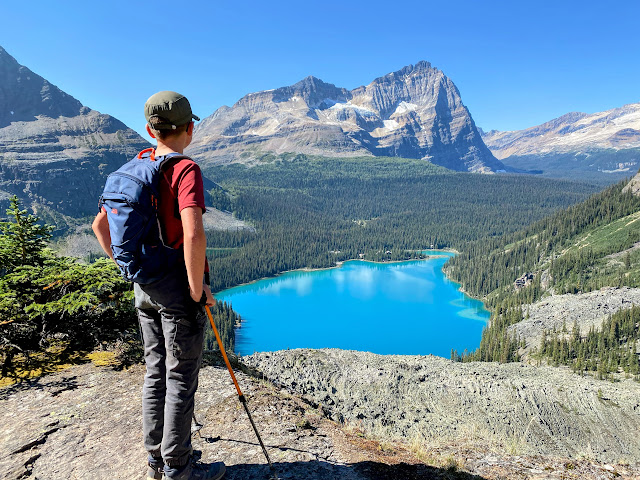 |
| Set up your tent and then hit the trails for a magical day of hiking at Lake O'Hara |
Last Minute Cancellations for the Campground
Here's something most people don't know: There are vacant campsites at Lake O'Hara almost every night!
People often book sites for several nights but decide to leave early for a variety of reasons. It's too late at this point to re-sell the sites on the Parks Canada website, so they sit empty - which is a huge shame when people all over the world want to visit this magical place.
How to score one of these last minute campsites:
- Call the official number for Lake O'Hara after 8am. Ask if they have any campsite cancelations for that night.
- Call the Field National Park Visitor Centre at noon and ask if there are any last minute cancellations tor the O'Hara backcountry campground. (Do not call earlier. They won't know till noon who is leaving early.) Obviously you'll need to be close by and ready to jump if you're going to catch an afternoon bus.
This is "last minute" camping and not looking for sites for next weekend! You won't get to hike that first day, but you'll get to enjoy a nice long day hike the following day before taking the bus out.
- Just show up for the 3:30 or 5:30 bus at the Lake O'Hara parking lot, camping gear in hand. If there's been a cancelation, a no-show, or they have a vacant site, they'll sell you that site on the spot (bring cash!) - and arrive early!!
Also, don't bother trying the earlier bus times (and mid week is more likely to work.) - You'll want a backup plan if you don't get a site.
Final tips:
If you only get a site for one night, bring extra food with you + cash. They can often get you in for extra nights (again if people cancel or leave early.
This is for camping only!! They do not release last minute bus seats for day hikers by showing up or calling in the morning.
 |
| Morning reflections on Lake O'Hara |
The Best Day Hike at Lake O'Hara (for a perfect one-day visit)
The full loop is 11 km with just under 900 metres of height gain. You don't have to do the full loop though, and it can be customized.
The Alpine Circuit combines three alpine routes in the basin above the lake. They are intended for intermediate/advanced hikers, but most novice hikers will do fine in a group with a strong leader to coach them through difficult sections.
"There are five alpine routes above the O'Hara basin for experienced hikers who are comfortable with route finding, heights and traversing exposed terrain.
Alpine routes are often shown by cairns, and may involve scrambling on scree slopes or over boulder fields where the way is marked by painted blue and yellow symbols. Expect early season closures on the alpine routes due to avalanche hazard. Hikers must be aware of avalanche conditions year round and follow protocols for travelling in avalanche terrain." - Parks Canada
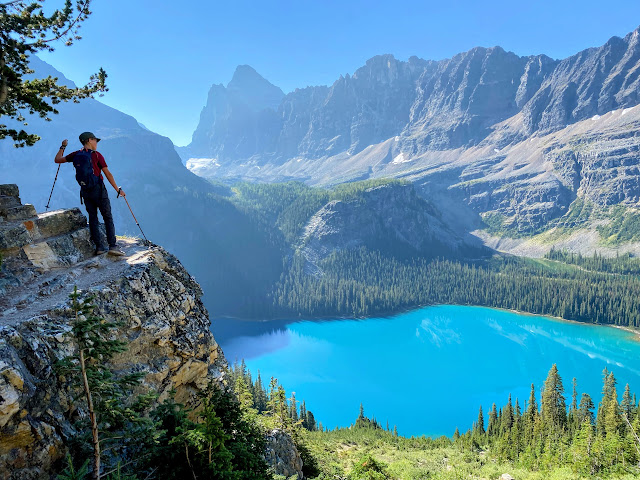 |
| The Alpine Routes definitely get narrow in spots with mild exposure |
As long as you visit Lake O'Hara when the Alpine Circuit is dry and snow free, the trail is always easy to follow as long as you watch for the painted blue and yellow symbols on the rocks. There is no scrambling on the Alpine Circuit that I am describing below and only a few short sections with scree or loose rock.
The loop is very steep in places and is not recommended for hikers who prefer hiking on flat ground. There are also a few narrow sections where a fear of heights might not be your best friend for this trail. I've included photos below with optional bypass routes for any exposed section of the loop.
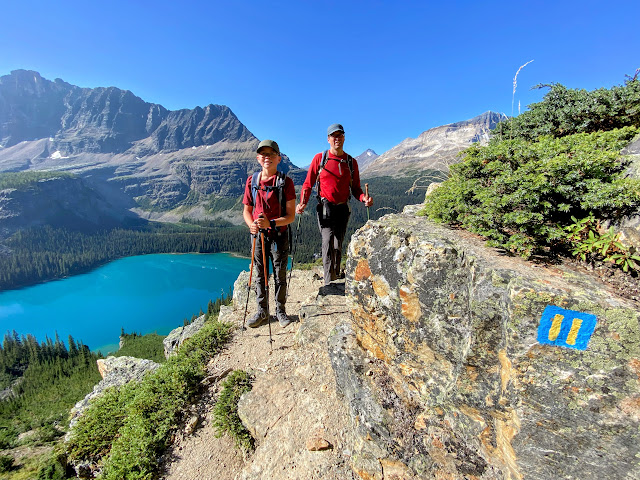 |
| Watch for the blue and yellow painted markers and you'll never get lost on the Alpine Circuit |
Hiking the Lake O'Hara Alpine Circuit
Alpine Route: Wiwaxy Gap and the Huber Ledges - Distance: 2 km to Wiwaxy Gap with 500 metres of height gain. This will be the biggest, steepest, climb of the day, and novice hikers will definitely feel as if they just climbed a mountain. Even experienced hikers will be huffing and puffing their way up the switchbacks to the top of the viewpoint (so take it slow!)
 |
| The trail is generally easy to follow with wide switchbacks and only a few narrow spots |
 |
| Photo breaks will help you make it up the steep trail here |
After you reach the top, the hiking becomes much more pleasant as you enjoy the views and pleasant traversing above the lake.
We usually have a good break here before starting on the narrow ledge system, the Huber ledges. This next section of trail is much flatter, and you'll actually lose 300 metres of height as you descend to Lake Oesa over a distance of 2 km.
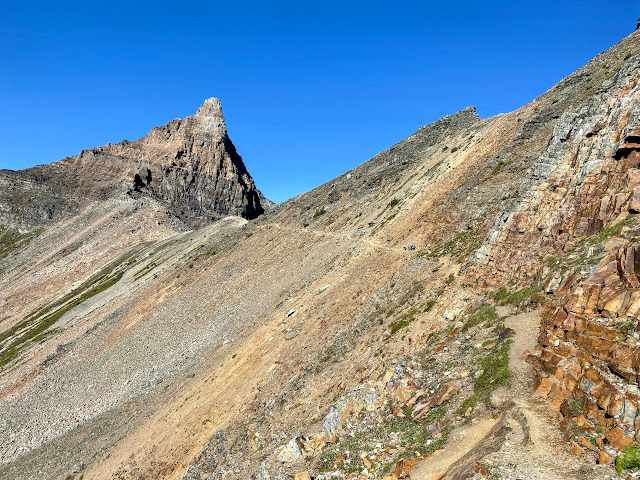 |
| Looking back at the Wiwaxy Gap and the faint trail across the Huber Ledges |
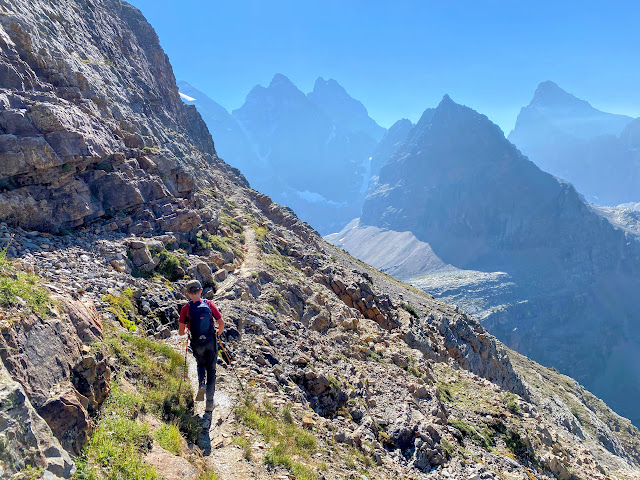 |
| The trail is a tad narrow along the Huber Ledges and some may find it exposed |
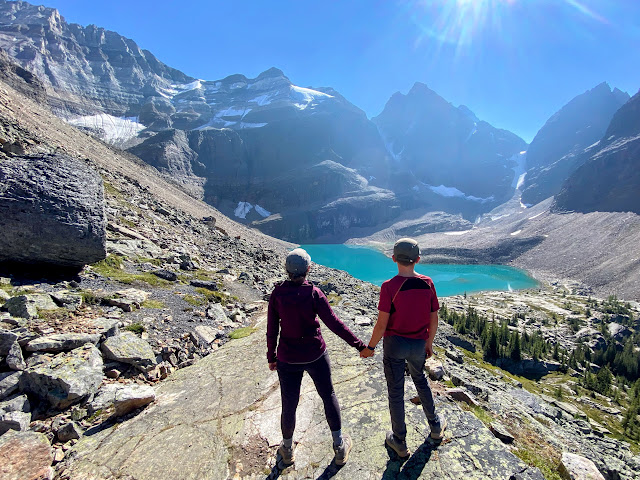 |
| Lake Oesa is the reward for making it across the Huber Ledges |
Easy bypass option: Lake Oesa Trail - Skip the Alpine Route by taking the Lake Oesa Trail instead. This trail starts from the Lake O'Hara Shoreline Trail and is only 3 km (one way) with less than 300 metres of climbing.
This is a good half day hiking option as well which can be combined with the full Shoreline Trail Loop (a relatively flat 3km loop.)
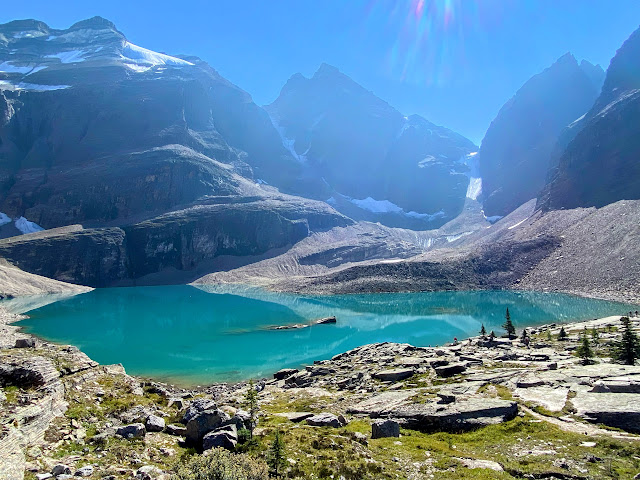 |
| Lake Oesa is a small lake that sits in a basin above Lake O'Hara |
Taking the direct route to Lake Oesa is also a great option for hikers who want to do the Alpine Circuit without the climb to Wiwaxy Gap. Continue on from Lake Oeasa across the Yukness Ledges to Opabin Lake. From here you can hike around the Opabin Plateau before descending on either the East or West Opabin Trail. This loop is approximately 5-6 km with no more than 400 metres of height gain total.
If you're undecided on which trail to take to reach Lake Oesa, look at the photo of the Huber Ledges route below. It's fairly alarming to think that there's a hiking trail across this cliff face!
The Wiwaxy Gap is at the left in the photo below, and Lake Oesa is at the bottom right.
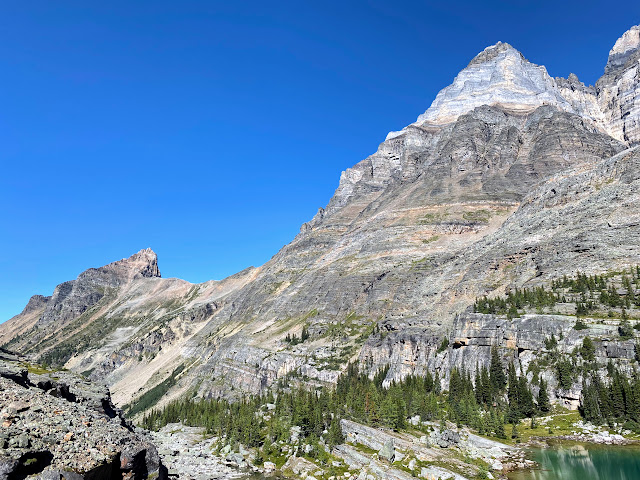 |
| The trail across the Huber Ledges crosses this giant cliff face from the Wiwaxy Gap |
Alpine Route: Lake Oesa to Opabin Lake via the Yukness Ledges - Distance: 3 km and maybe 30 metres of climbing total! It's relatively flat as you traverse between Lake Oesa and the Opabin Plateau.
There are a few sections along this route with scree and loose rock, and you'll have to watch for the markers carefully as you pass through boulders high above Lake O'Hara. As long as you make it to the Opabin Plateau though, this is the end of the Alpine Circuit for many hikers who choose to descend directly back to Lake O'Hara.
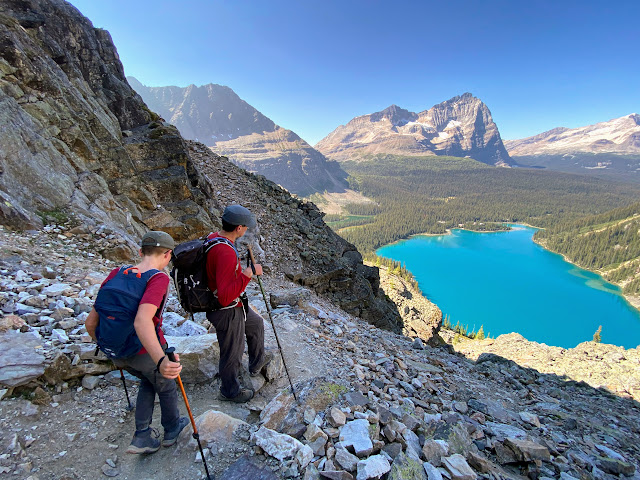 |
| There are several rocky sections along the Yukness Ledges |
 |
| The Yukness Ledges are narrow, but very doable when dry and snow-free |
Easy day hike option: The Opabin Plateau Loop - For hikers who don't like exposed ledges, a great loop can be made around the Opabin Plateau using the East and West Opabin Trails from the Lakeshore Circuit. This is one of my favourite hikes in late September for golden larch trees. (You won't see many larch trees on the Alpine route sections.)
 |
| The Opabin Plateau will make you feel as if you were hiking in the Alps |
The loop is approximately 6 km with 250 metres of climbing. There are a few steep sections on the West Opabin Trail so hiking poles are recommended.
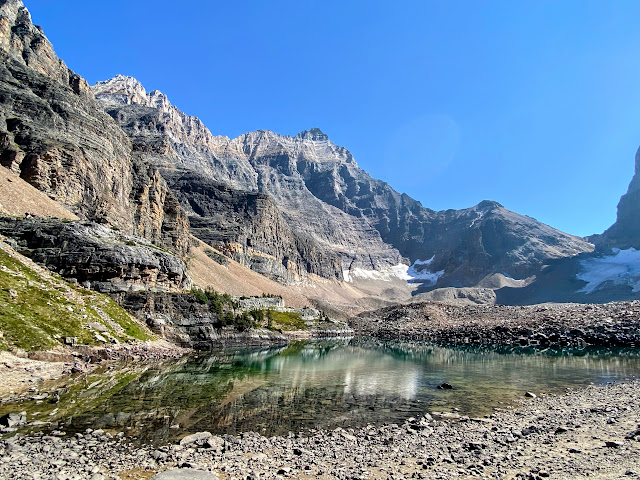 |
| Opabin Lake is a very small glacial lake at the back of the Opabin Plateau |
Must-do add on Viewpoint: The Opabin Prospect - Whether you take the Alpine Circuit to reach the Opabin Plateau or you hike directly up to the basin, you need to visit the Opabin Prospect Viewpoint which looks over the entire Lake O'Hara area below. You can perch on giant boulders over the lake for the perfect photo that will get you all that Instagram fame you're after (or at the very least, get you a good Christmas card photo.)
From the Opabin Prospect you will get an amazing view down over Lake O'Hara and Mary Lake (which looks like three separate lakes.)
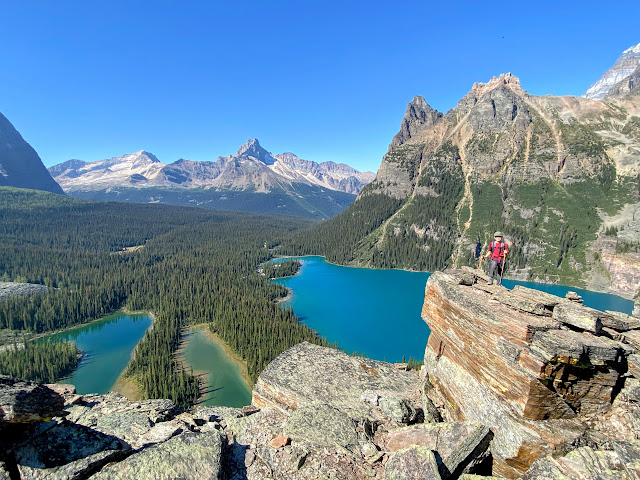 |
| The Opabin Prospect is the best viewpoint in the O'Hara region |
It should be mentioned that you'll want to keep a close eye on young children here!! You are perched at the top of a giant cliff overlooking the lake. You do not want to fall here.
There is very little distance or height gain required to reach the viewpoint once you're at the Opabin Plateau.
 |
| If you do ONE easy hike at Lake O'Hara, this should be it! |
Alpine Route: All Souls' Prospect - Distance: 2.8 km to the top of the All Souls' Prospect viewpoint with 200 metres of height gain.
This is where we called it quits after completing the rest of the circuit and looping around the Opabin Plateau to the Opabin Prospect. We hiked down the Opabin West Trail straight back to the lakeshore and to our campground (and got the last piece of carrot cake at Le Relais!)
For those that want to continue, there's one final viewpoint (usually in the shade by this point in the day) and then there is a gigantic (very steep) descent down the other side.
You'll lose 300 metres of height over a kilometre as you descend from the Prospect to Schaffer Lake. From this small lake it's another kilometre back to the front side of Lake O'Hara where the bus stop is located.
In total, you'll hike 5 km from the Opabin Plateau if you choose to hike over the All Souls' Prospect. Or you can go back the short way along the West Opabin Trail (3 km in length, and all downhill.)
In the photo below, the Opabin Prospect viewpoint is the small bump at the back of the lake. That's where you get the best viewpoint over Lake O'Hara and Mary Lake. The All Soul's Prospect viewpoint is at the far right end of Mt. Schaffer in the background. (It's a low point along the cliffs, not the top of the mountain.)
And if you want to climb Mt. Schaffer, keep reading where I've described the route below.
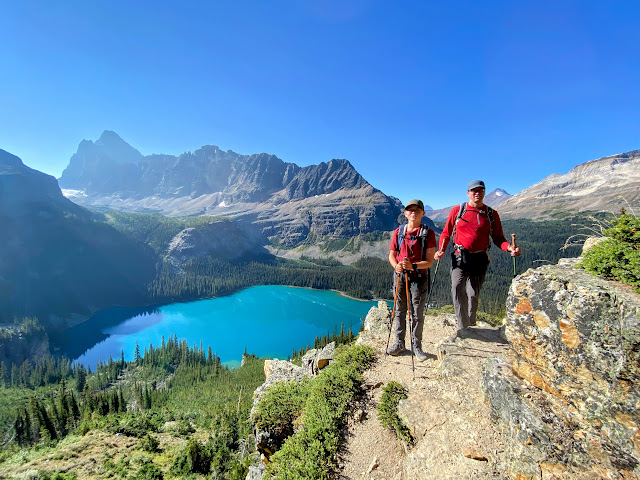 |
| Looking back at Mt. Schaffer and the All Soul's Prospect |
Shorter Day Hikes at Lake O'Hara for a Day Hike or Multi-day Visit
Another option is the
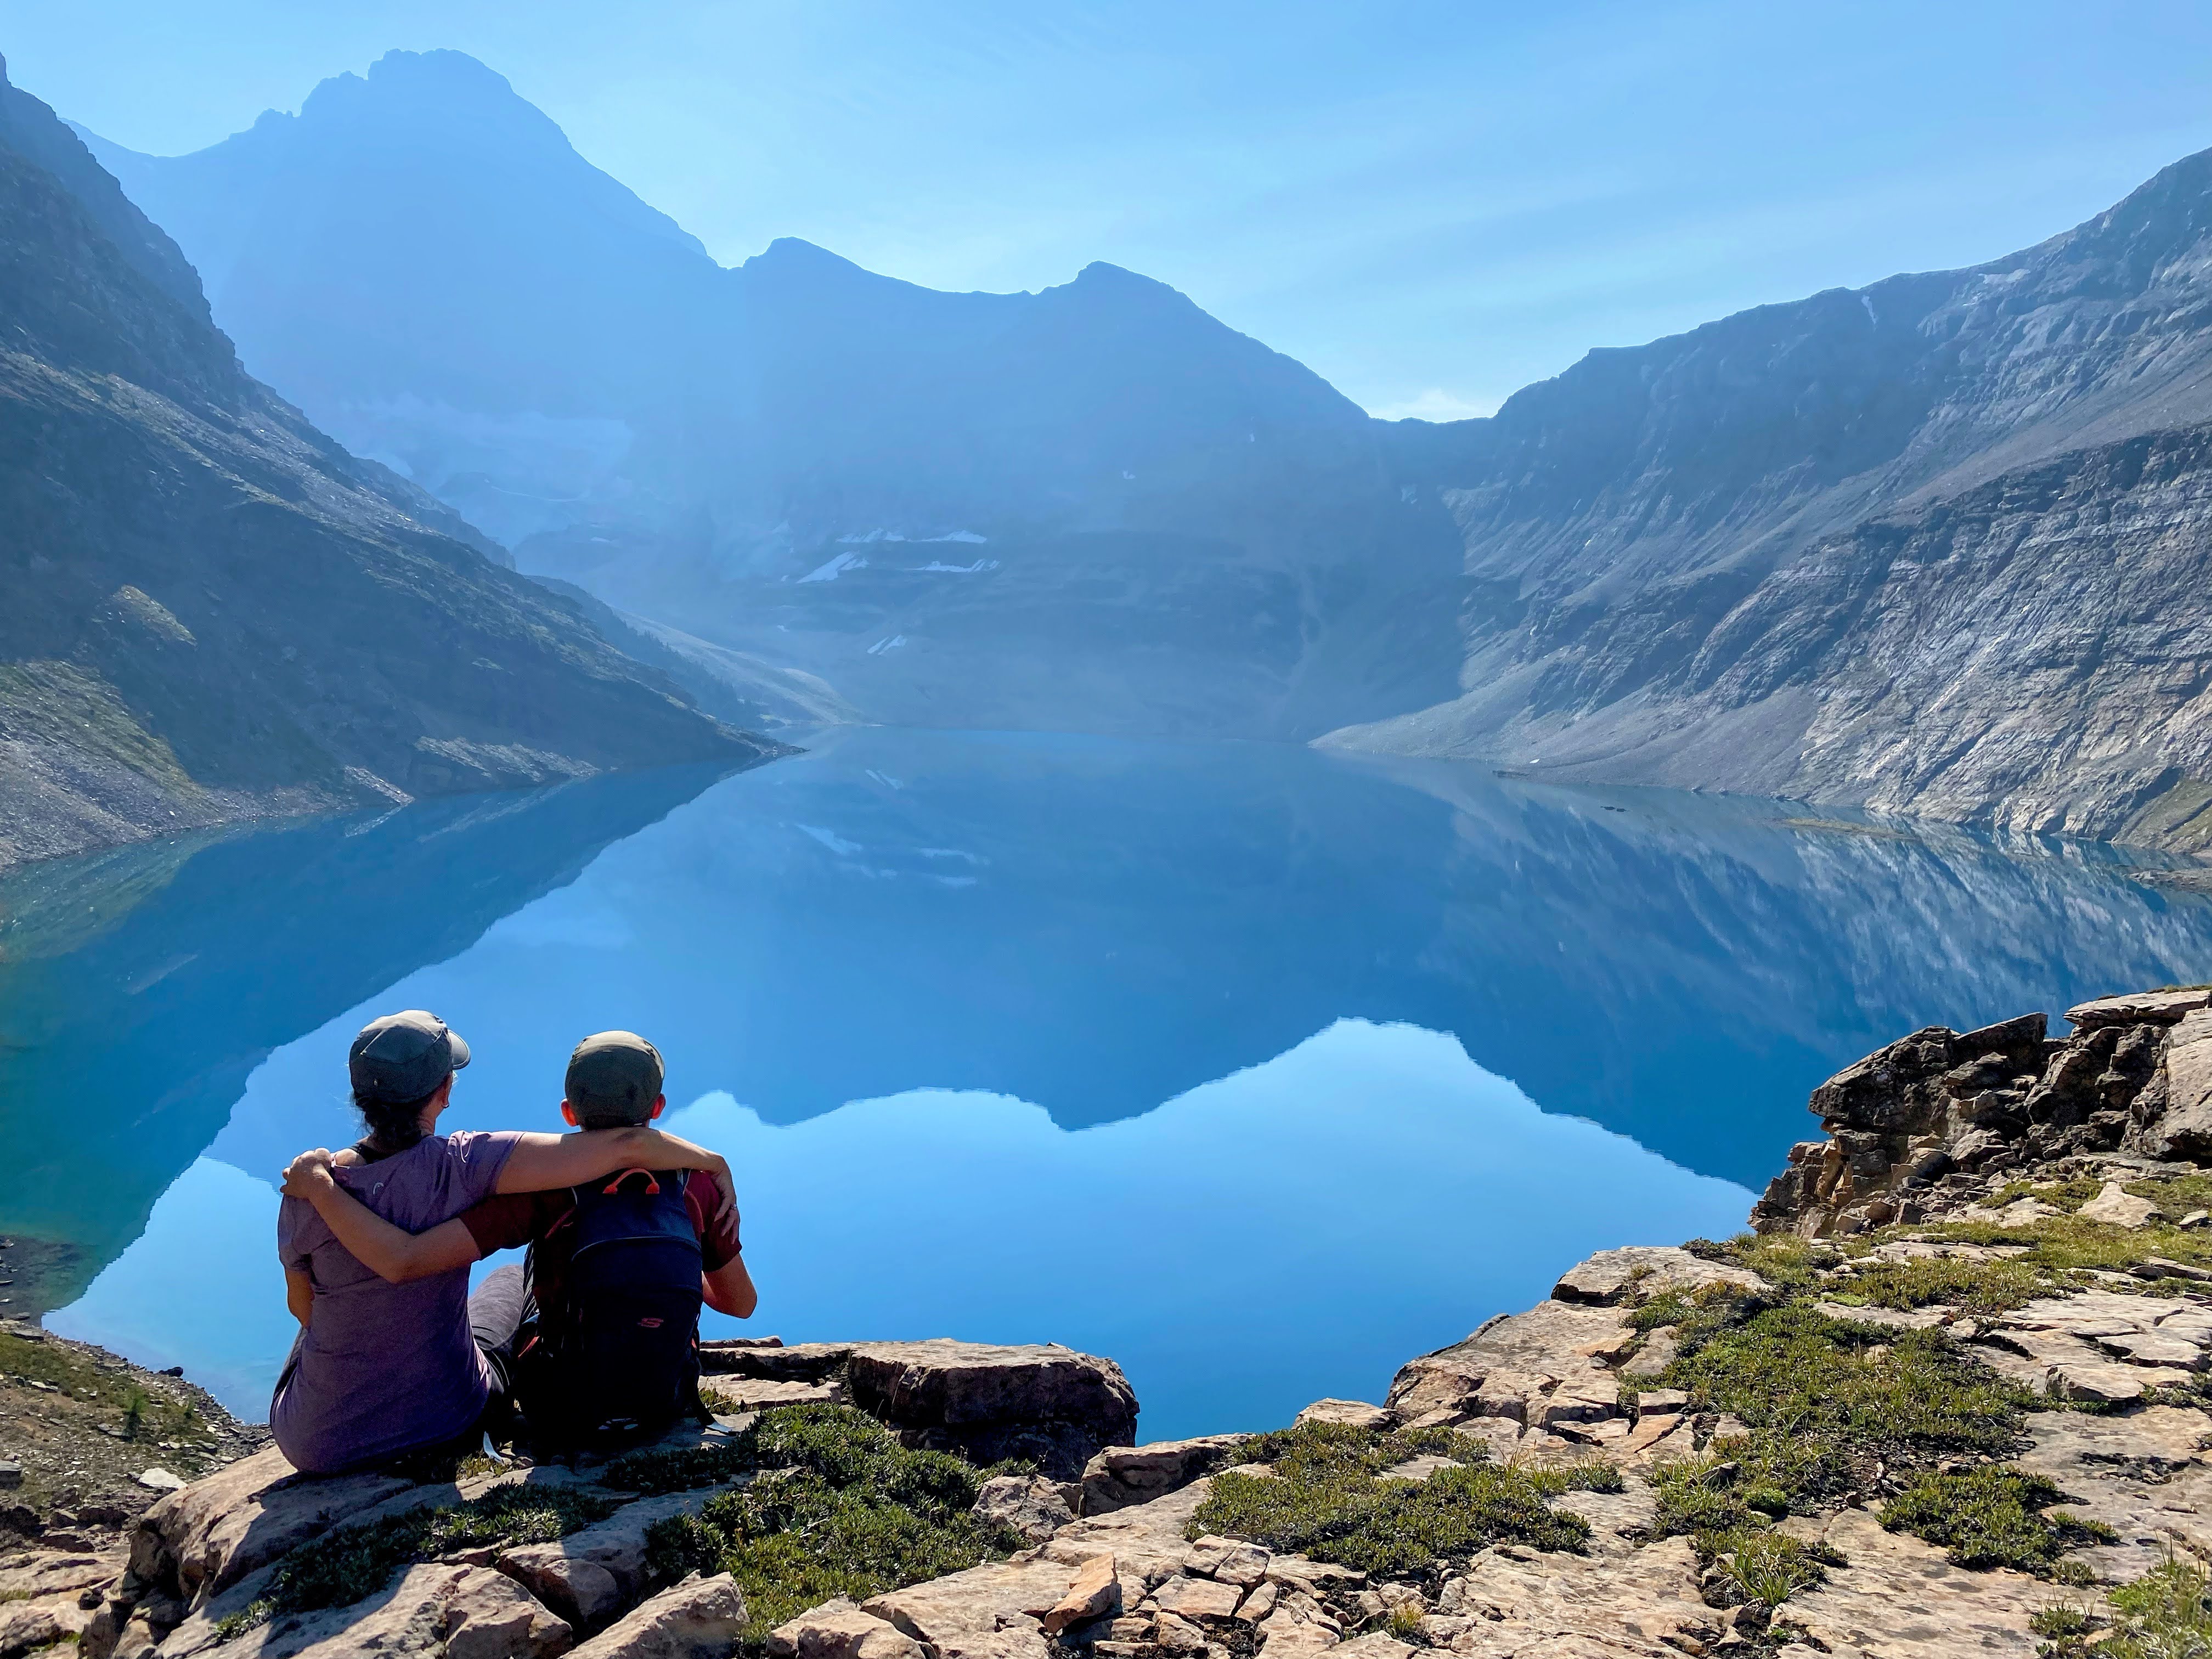
trail to Lake McArthur which is approximately 7 km in length (return) with 370 metres of height gain. This is a very beautiful alpine lake and I highly recommend either adding the hike on to the Alpine Circuit (skipping the All Souls' part) or visiting the lake on your second day at O'Hara before you leave - which is what we did.
All links go to the All Trails website. Note that if you don't have a premium subscription you won't be able to navigate using the app while hiking at Lake O'Hara where there is no cell coverage. I recommend buying a trail map before you go or stopping in at Le Relais Day Use Shelter for a map. I also like my
"Classic Hikes in the Canadian Rockies" Guide Book.
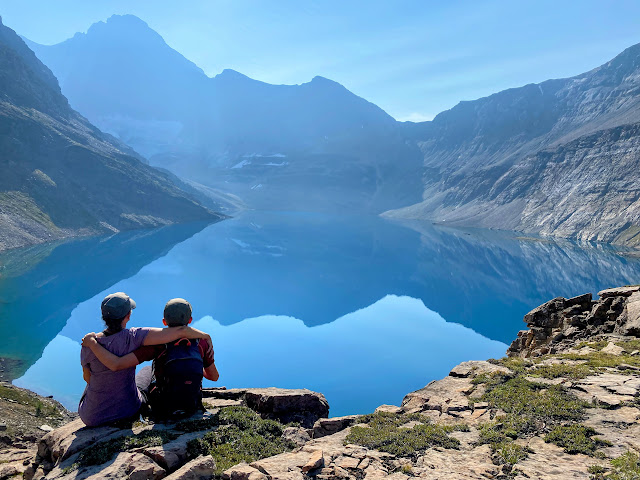 |
| Lake McArthur is a great half day hike |
Climbing Mt. Schaffer at Lake O'Hara
There are a few moderate scrambles in the Lake O'Hara area, but the one we enjoyed was the ascent of Mt. Schaffer from Lake McArthur.
A. We got to visit the beautiful Lake McArthur
B. It's a FUN scramble (not just gross scree and loose rock)
C. The views are gorgeous looking down on Lake McArthur
This is also a very short scramble so you can easily tackle it on your second day at the lake before taking a return bus home.
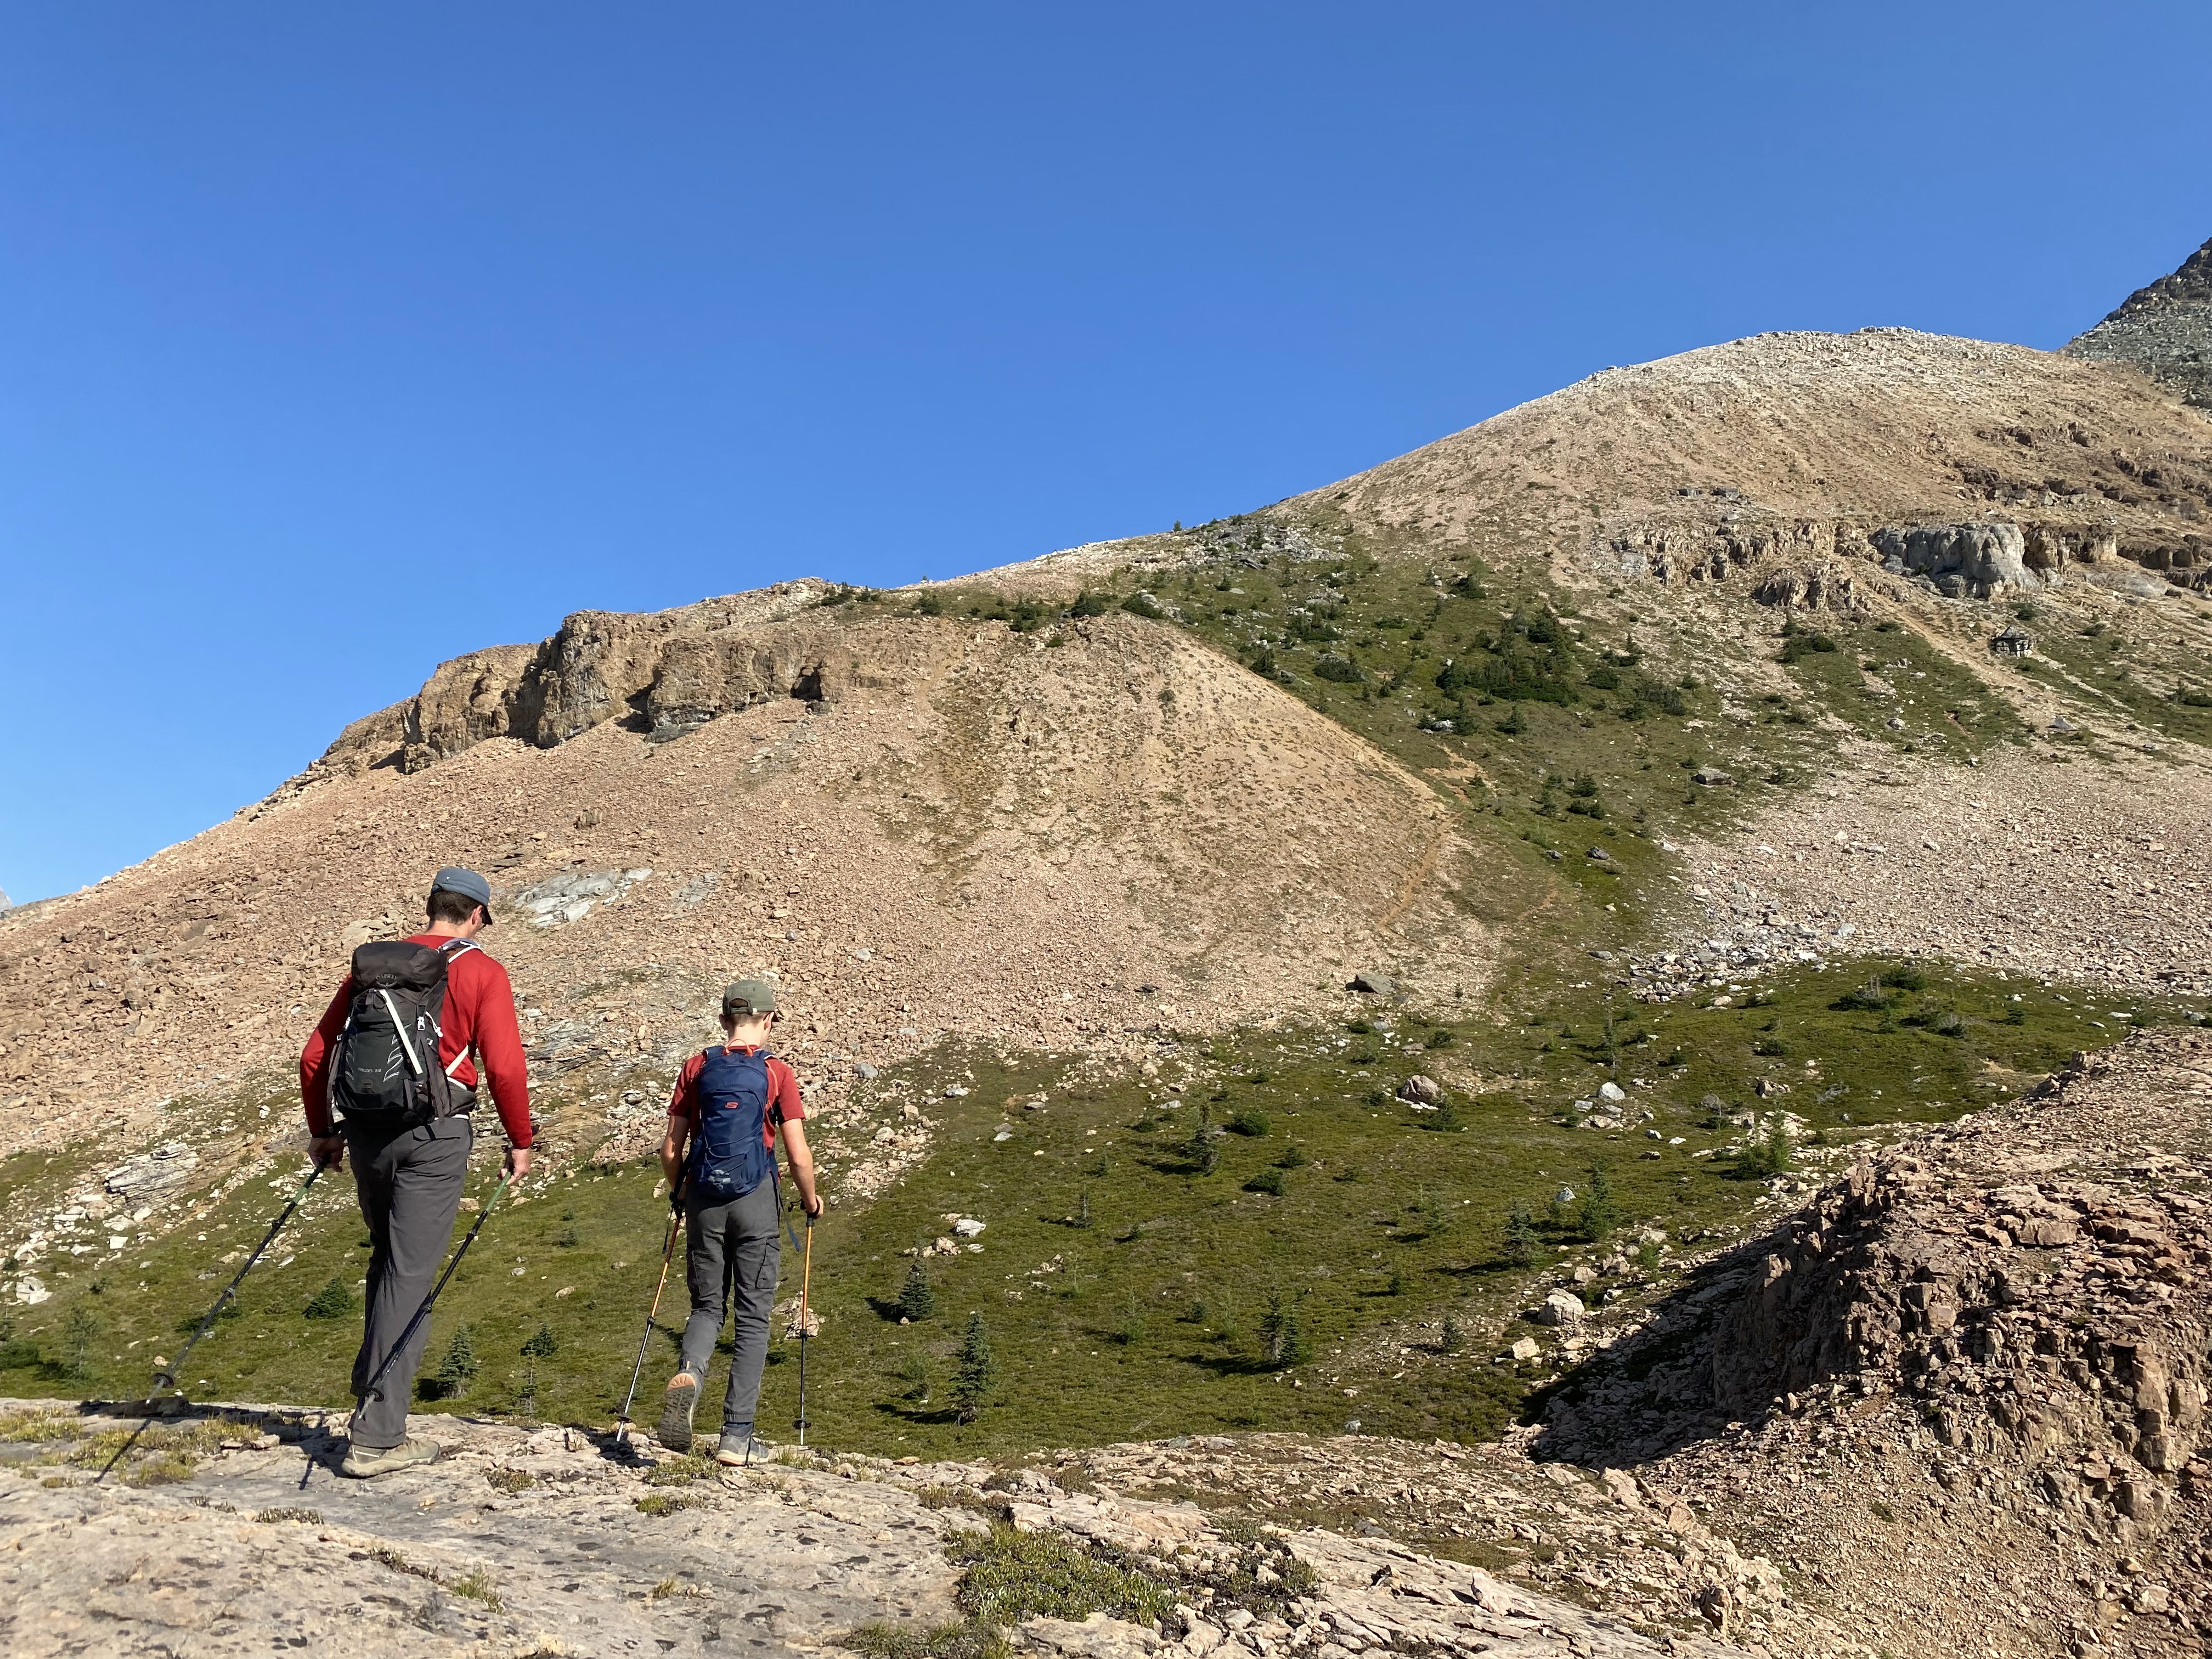
And, if you only make it to the top of the rounded bump in the photo below, you'll still get a fabulous view down over all of Lake McArthur.
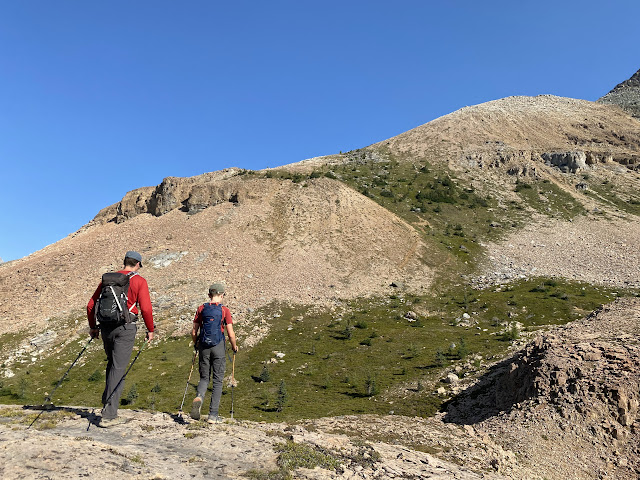 |
| From Lake McArthur start hiking above the lake aiming for this rounded bump |
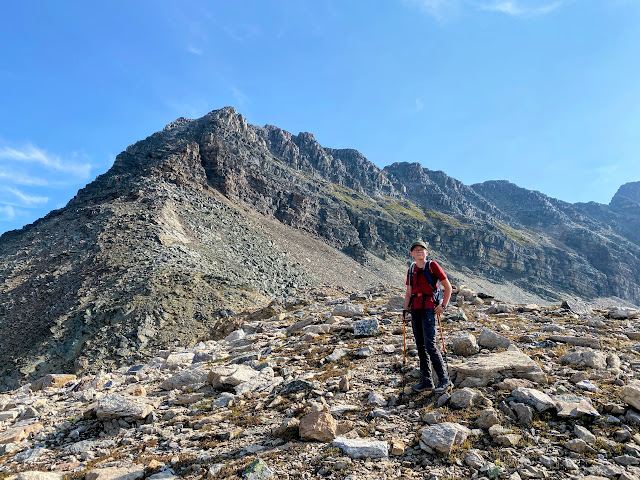 |
| From the top of the rounded bump above, this is your view. You're heading for the top of the ridge! |
I'm not going to describe the scramble in detail because it is a moderate/advanced scramble. I recommend helmets and you'll need solid route finding skills! This is a moderate scramble with hands-on sections, and not just walking up steep terrain. You also might want to bring a short length of rope if you have children with you (though I don't really recommend this one for kids.)
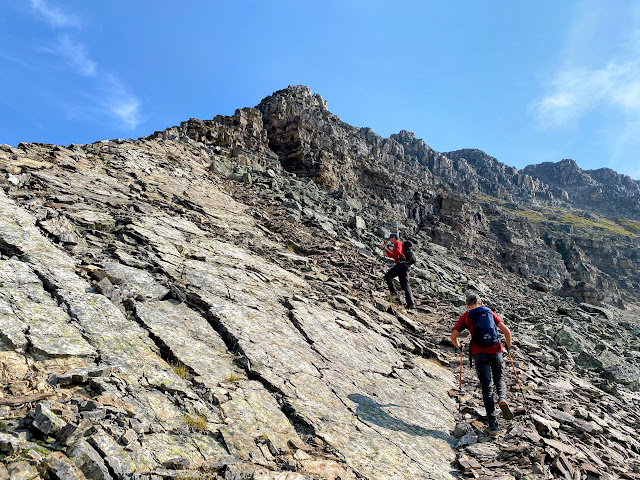 |
| The scree was shockingly firm on this route and easy to hike up! |
We did not have helmets (and felt comfortable with the risk,) and our son has significant scrambling experience, so this was a piece of cake for him.
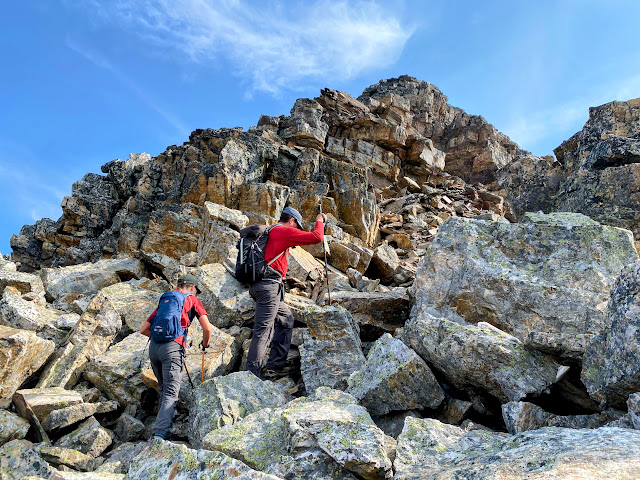 |
| The blocky terrain was actually a LOT of fun on this route! |
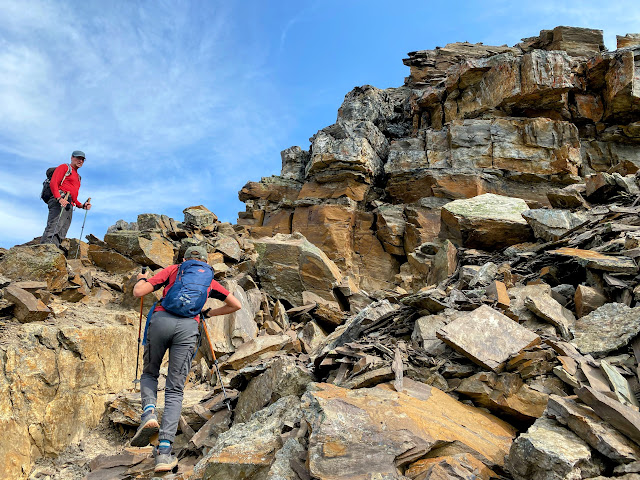 |
| Mt. Schaffer was one of the most enjoyable scrambles we did all summer! |
I did a LOT of research for this scramble and I believe the route on All Trails is actually the best route for this hike. You can see the
All Trails Route for Mt. Schaffer here.
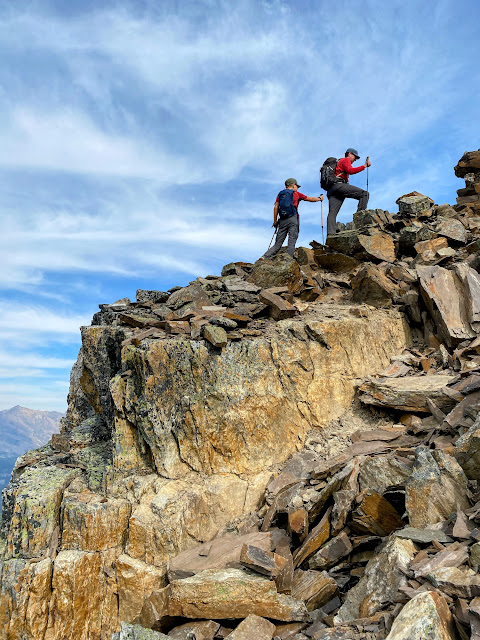 |
| The route certainly had its mildly exposed moments |
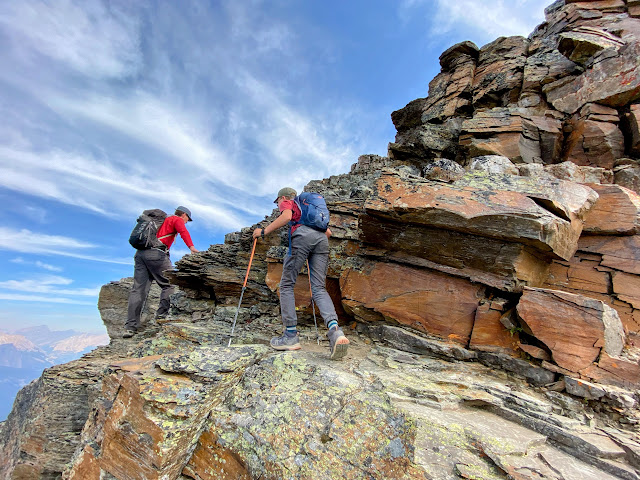 |
| You probably won't want to take young children up this route! |
Advice for the route finding:
- Start from Lake McArthur and NOT from Schaffer Lake. The route from McArthur is pleasant and follows a ridge up rather than bashing your way up scree.
- Descend back the same way you came!! We descended the steep short way to Schaffer Lake and I was not a fan of the loose scree. I much preferred the easy ridge walk up from McArthur.
- Use All Trails to HELP you, not to GUIDE you. It is a great app for hiking. It fails at scrambling. My husband is amazing at route finding and he kept running ahead the entire time to choose the best path up. You can't just follow a dot on your phone. There are cliff bands on this route and you have to look around to choose the path of least resistance. Our All Trails app helped us find the beginning of the route. That was about it.
- If you don't like exposure, don't even think about this trip.
- If you get scared or find that the trip is too difficult, turn around and return the way you came up. There are great views along the lower ridge, even if you don't make the summit.
 |
| Poles were VERY helpful on this route! |
 |
| This photo alone should tell you if this scramble is something you'd enjoy |
 |
| You need a healthy enjoyment of mild exposure for this route |
And if you complete this scramble, you definitely don't need to do the All Souls' part of the Alpine Circuit. You'll be in the same area, but much much higher!!
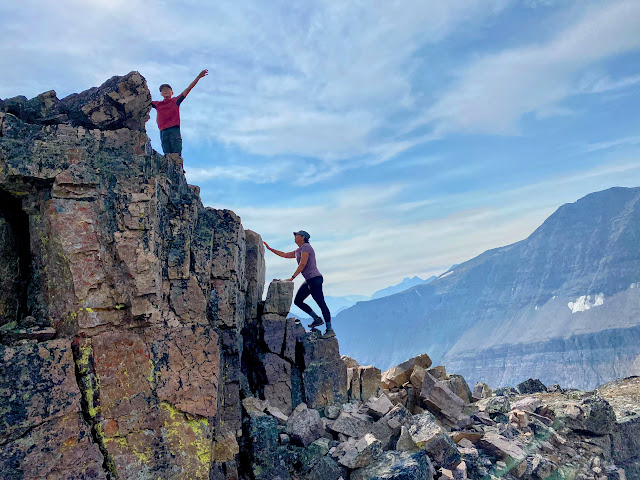 |
| Most of the hands on scrambling was in the final traverse along the summit ridge |
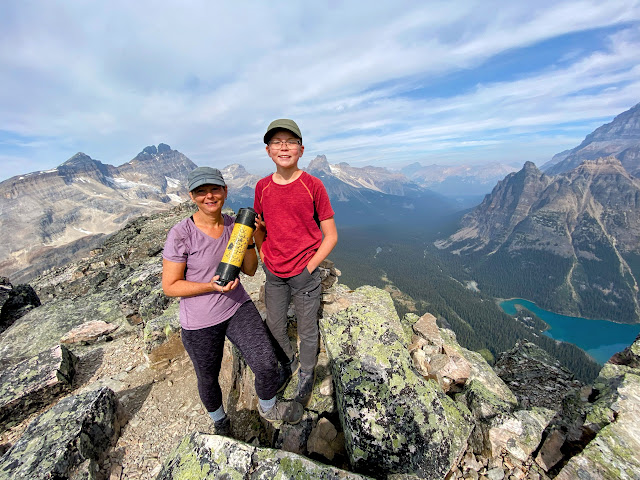 |
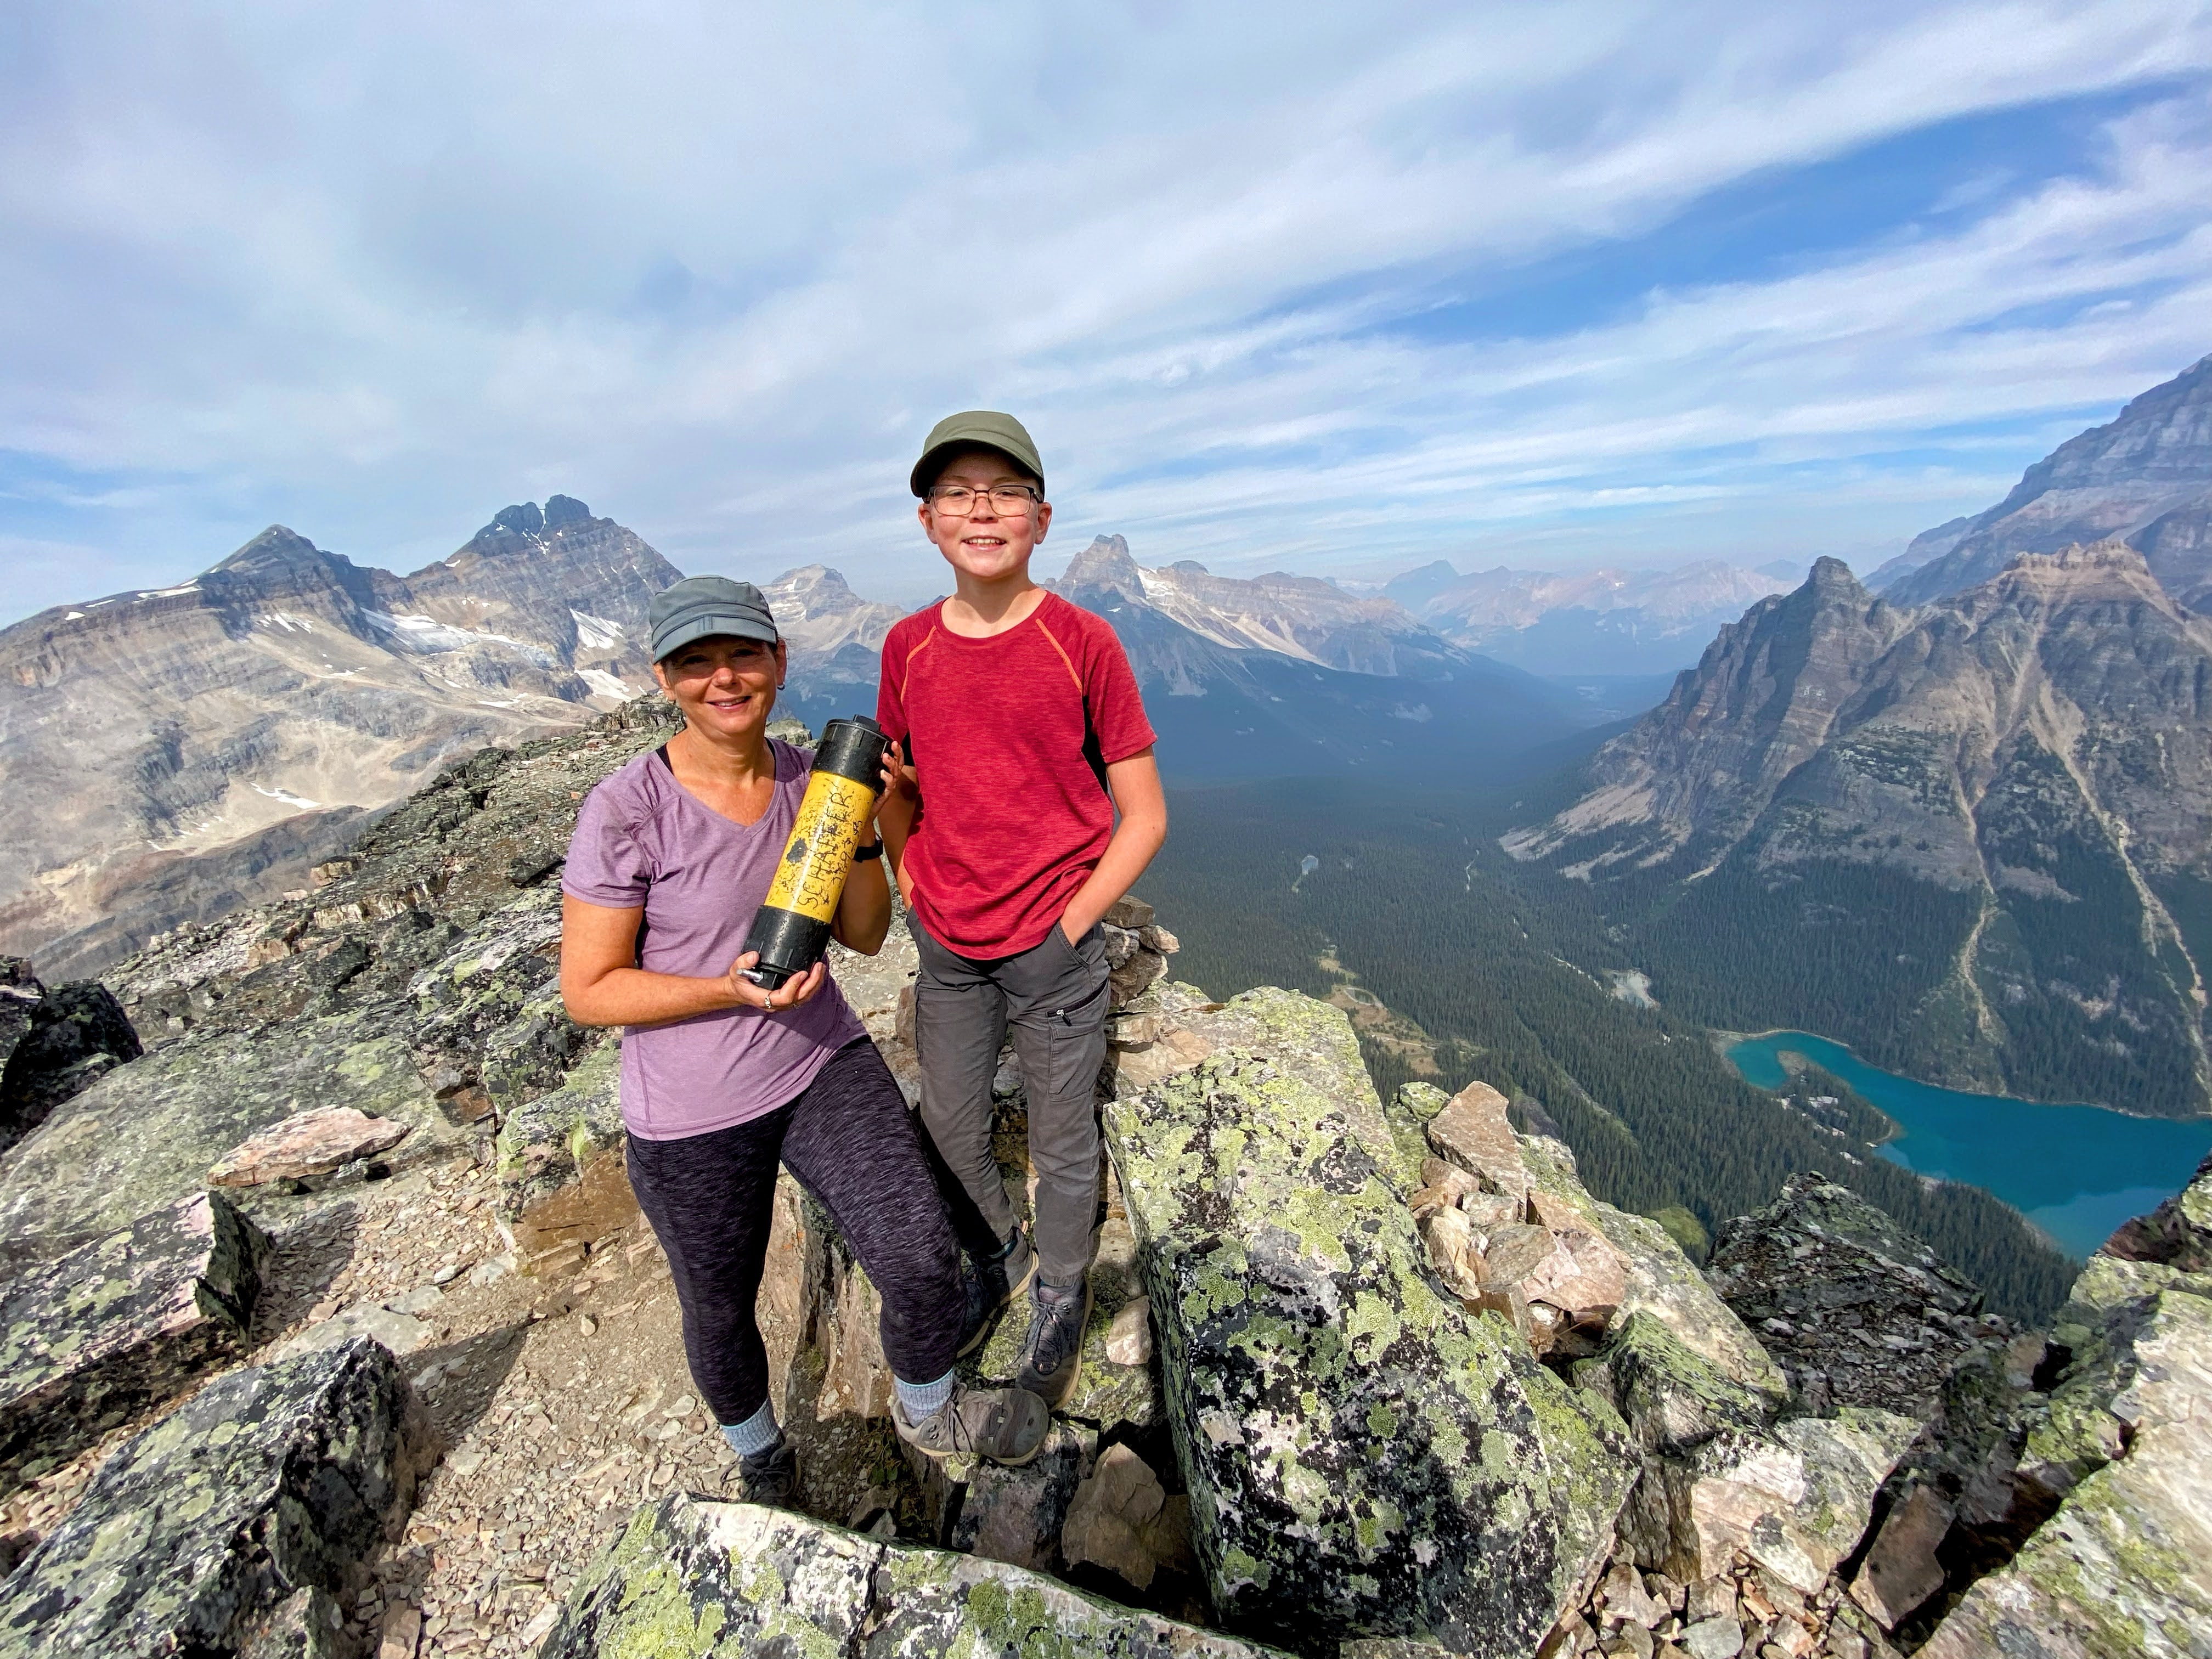
| You'll know you've reached the summit when you find the register |
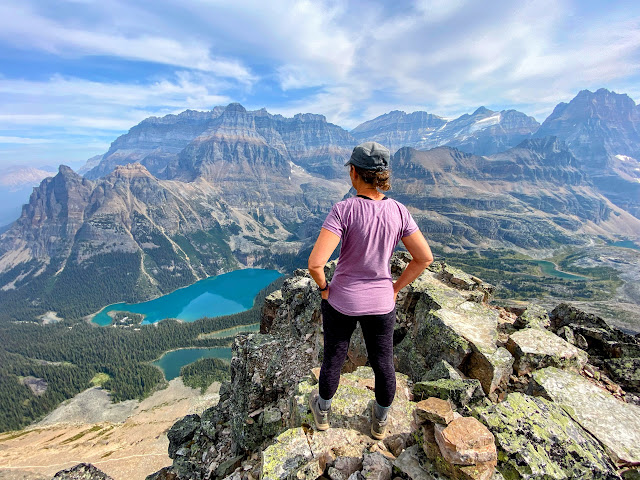 |
| Mt. Schaffer summit with Lake O'Hara below (Wiwaxy Gap in the background) |
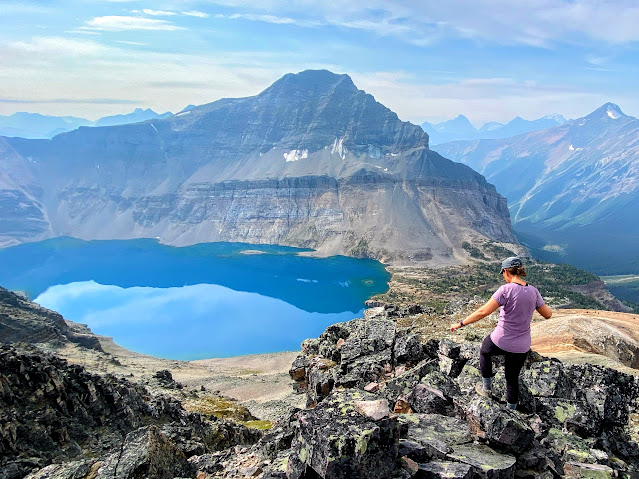 |
| Descending Mt. Schaffer with Lake McArthur below |
 |
| We descended the rubble slope directly to Schaffer Lake (which I don't recommend) |
A Sightseeing Guide to Lake O'Hara for Non-hikers
So, a family member wants to come along, but they don't really hike. A friend wants to come, but doesn't like steep trails... You get the idea. Is there a point in going to Lake O'Hara if you aren't a strong hiker?
My answer in a nutshell, you should be able to hike at least 6 km, climb at least 300 metres, and handle some steep terrain. If not, you might as well hike around Emerald Lake for the SAME experience. Both are beautiful lakes and both have lakeshore circuits. Emerald Lake however does not require an expensive shuttle bus booking or incredible luck to even get a bus seat.
If you can hike the East/West Opabin Loop or hike to Lake Oesa, then yes, Lake O'Hara is a fabulous destination, even for a short day hike.
The other challenge with Lake O'Hara for non-hikers, is that there is no coffee shop, no restaurant, no "retreat" where you can go hang out while you wait for others that are hiking. You pretty much have to sit outside by the lake and wait.
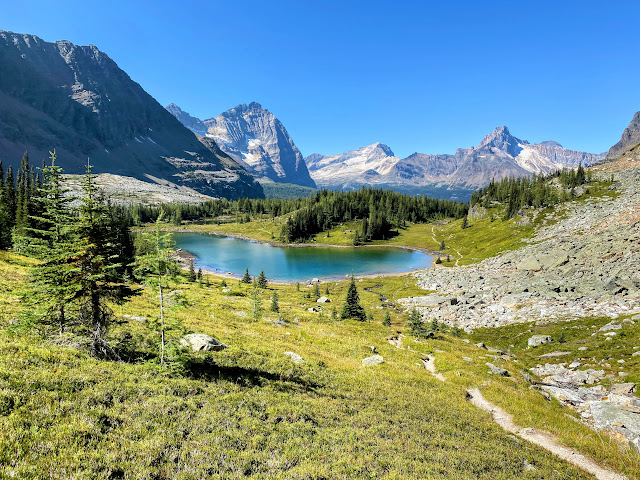 |
| Visitors to Lake O'Hara should be able to hike at least 6 km with 300 metres of climbing (Opabin Plateau) |
So you didn't get a campsite or bus seats... Now what??
Check the Parks Canada website often for cancelations. Other than that, the good news is that there are MANY other beautiful hikes in the Canadian Rockies.
10 other Recommended Day Hikes for strong hikers in Banff/Yoho National Parks
- The Iceline Trail, Yoho National Park (21 km, 1000 metres height gain)
- Read my blog post
- Paget Lookout and Sherbrook Lake, Yoho National Park (10 km, 580 metres height gain)
- Emerald Lake Triangle, Yoho National Park (19.5 km, 900 metres height gain)
- Saddleback Pass and Fairview Mt., Lake Louise (9.7 km, 1000 metres height gain)
- Read my blog post
- Lake Agnes and Mt. St. Piran, Lake Louise (13 km, 900 metres height gain)
- Read my blog post
- Lake Agnes and The Plain of Six Glaciers Tea House Traverse, Lake Louise (10 km, 650 metres height gain)
- Sentinel Pass, Moraine Lake - Shuttle bus required (11 km, 800 metres height gain)
- Moraine Lake to Lake Louise Traverse over Sentinel and Saddleback Passes, Lake Louise - Shuttle bus required (23 km, 1200 metres height gain)
- Aylmer Lookout, Lake Minnewanka, Banff (23 km, 1000 metres height gain)
- Helen Lake, Icefields Parkway, Banff (11 km, 500 metres height gain)
Check your favourite guide book for information on each hike above or visit the All Trails website/app.
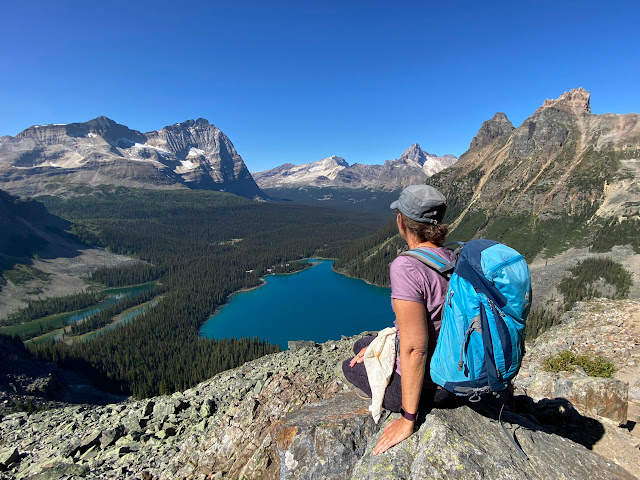 |
| While Lake O'Hara is beautiful, there are many other premier hikes across the Canadian Rockies |
Recommended Reading
A Local's Guide to Exploring the Best of Banff and Jasper
Family Guide to Banff National Park - Top 10 Places to Explore with the Kids
A Family Guide to the BEST Adventures on the Icefields Parkway (Lake Louise to Jasper)
The BEST of Summer in the Canadian Rockies
First Summits for Families in the Canadian Rockies
2023 Campsite Reservation Guide for Alberta and BC