Tuesday, October 26, 2021

7 Days of Big Mountain Skiing in the Canadian Rockies for $400!

Save BIG this winter with a Lake Louise Plus Card where you'll receive three free days of skiing along with discounts on every other ski day at four major mountain resorts across Alberta and British Columbia.

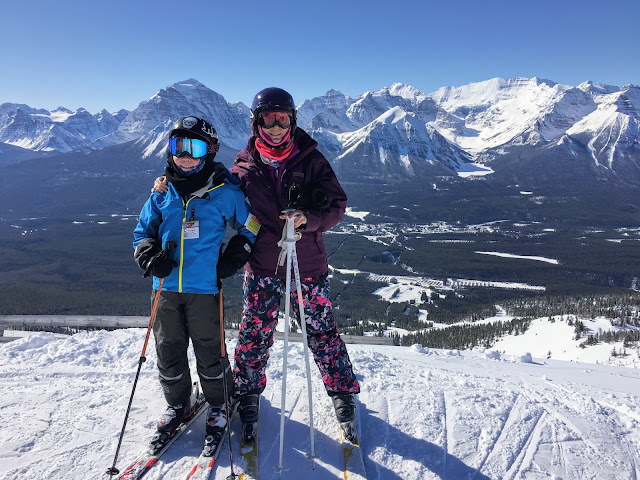
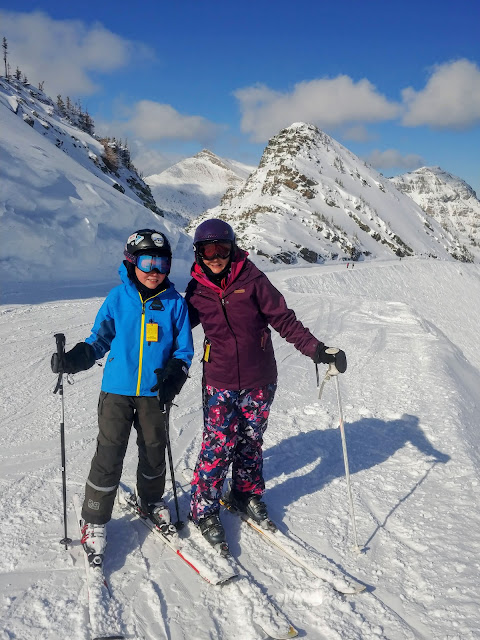
Ski days at Lake Louise are pretty glorious!

The Details! What you get with a Lake Louise Plus Card


The Lake Louise Plus Card costs $134.00 + GST. Purchase a card for each adult or teenager (age 13+) in your family and you'll get the following benefits:

  • Free skiing on your first, fourth, and seventh day

  • 20% off full-day, full-priced lift tickets on paid visits to the four participating resorts

  • You can use your card at Lake Louise, Castle Mountain in Southern Alberta, Panorama Mountain Resort outside Invermere in BC, and RED Mountain in Rossland, BC. 

  • Spring Value Days - Save 30% OFF full-day lift tickets for you and up to two friends daily plus get up to two free child lift tickets on paid visits from mid April through the end of the ski season early May. 

  • Free direct-to-lift upgrades! Link the discount card to your credit card and go straight to the chairlifts at Lake Louise when you arrive at the hill. Your credit card will be charged the discounted rate on your paid days and you will not be charged on your free days. 

    The upgrade also includes two free Child Direct-To-Lift Cards (for kids under 13) which saves you 20% off your child’s full-price, full-day lift tickets. Children will get their own direct-to-lift card tied to your credit card. (Note kids do not get free days.)  - Children's lift tickets should cost ~ $32.00 + GST.

  • Lake Louise Plus cardholders are also entitled to benefits and savings on ski or snowboard lessons, rentals, dining, hotel accommodations, discounts on lift tickets at partner hills, tours, and retail purchases. Read more about additional benefits here.


Follow this link for complete information on the benefits associated with the Lake Louise Plus Card


Note the Lake Louise Plus Card isn't available for purchase until at least mid October most years. Watch the website for updates. 

This story is updated annually but prices may change slightly year to year. The official website should be your source for most up to date information.

Very happy child skiing at Lake Louise 

Doing the Math to get you 7 days of Skiing for $400! 


First of all: Ask for a Lake Louise Plus Card for an early Christmas present. This way you truly get a "free" first day. - and it's an easy gift for family members who don't like shopping or who have to mail gifts across Canada. 

Next, do the math and you'll end up with something similar to what I've got below:

Day 1. Louise Ski Day - FREE

Days 2 and 3. Castle Mountain Ski Weekend - roughly $88 per day with your 20% discount + GST

Day 4. Louise Ski Day - FREE

Days 5 and 6. Panorama Ski Weekend - roughly $107 per day with your 20% discount + GST

Day 7. Louise Ski Day - FREE

Crunch the numbers and you'll see that you're spending just over $400 per person once you add in GST for 7 days of skiing this winter at amazing resorts!!

Continue skiing through the winter and you'll still get the 20% discount on all subsequent days.

And while I focused on Louise, Panorama, and Castle, you'll find that it's a similar price for adding on RED Mountain as well.

Disclaimer: the rates above change slightly each season per resort, so it is an approximate $400. Current lift pass prices aren't usually released until November.

Enjoy epic skiing at Castle Mountain Resort this winter

Where to buy a Lake Louise Plus Card


You can buy your card online (which is great news if you have family buying the cards as Christmas presents.) The cards will be mailed to you after purchase.

You can also buy them at many different places in person (skipping the need to have them mailed to you - which is good news if you plan to ski in November when the hill opens.)

Purchase cards here:

  • The Calgary Lake Louise Sales Office  (934 15 Ave SW)

  • Experience Lake Louise (101 Lake Louise Dr #2, Lake Louise Village)

  • SkiBig3 Adventure Hub (114 Banff Ave in the Town of Banff)

  • Grocery stores across Calgary (Sobeys, Safeway, Save on Foods, CO-OP)

  • Sports stores in Calgary (Sport Check, Decathlon, Atmosphere, MEC, Sporting Life)

  • AMA offices across Alberta

Disclaimer: Check the link above before heading out to buy your pass. New locations are added each year and previous ones sometimes change.

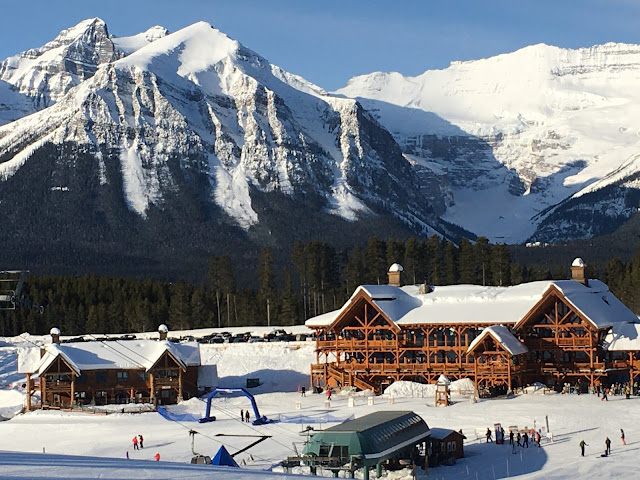
Spring skiing at Lake Louise Resort


Activate your Card and Upgrade to Direct-to-Lift


Once you purchase your card, the first step is to activate it on the Lake Louise website! Do not forget this step or you won't be able to use it when you arrive at the resort this winter.

Once it's activated, you want to upgrade it to direct-to-lift with your credit card linked to it so that you can show up at the lifts without having to go to guest services first.

You can also link your card to the ski resort so that all food purchases scan with it (avoiding the need to have your credit card with you at the hill at all.) - And this would be extremely useful if you have teens using their own cards. Link your credit card to their ski cards so that they can stop in and grab a drink or snack when hungry at the hill if you get separated.

Where to upgrade your card

You can go direct-to-lift right from the start when you purchase your pass online.

Buy your Louise+ Card online with this free upgrade already included! Make sure to upload your photo in your online profile and complete your online waiver (emailed to you after purchase). Once everything is completed you can pick up your card at the the Resort, the Calgary Sales Office, The Ski Big 3 office in Banff, or Experience Lake Louise in Samson Mall. It will also be automatically activated and you will be entered into the activation contest before January 31, 2023!

Alternately, purchase your card first and upgrade after at any of the locations above.

A photo, email address, and a credit card are required. You can either bring photos with you or have your photos taken on site.

You'll also need to fill out a waiver and list each person on it that will be using one of the cards. (So make sure you have everybody with you to sign their own waiver.)

Follow this link for the hours of operation for the Calgary office. (This is by far the easiest way to upgrade without having to do it at the hill on your first visit.)

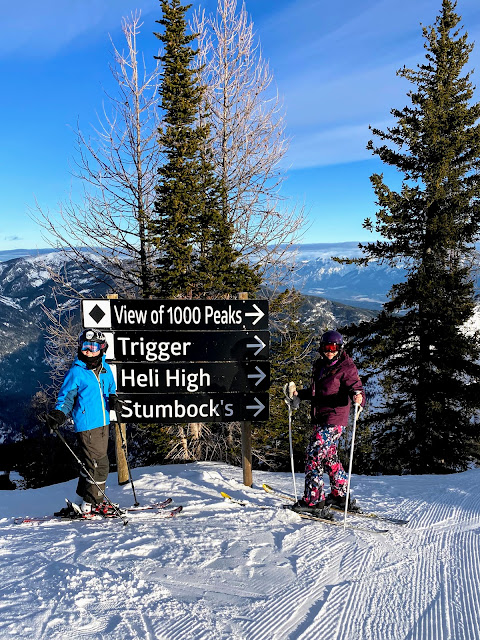
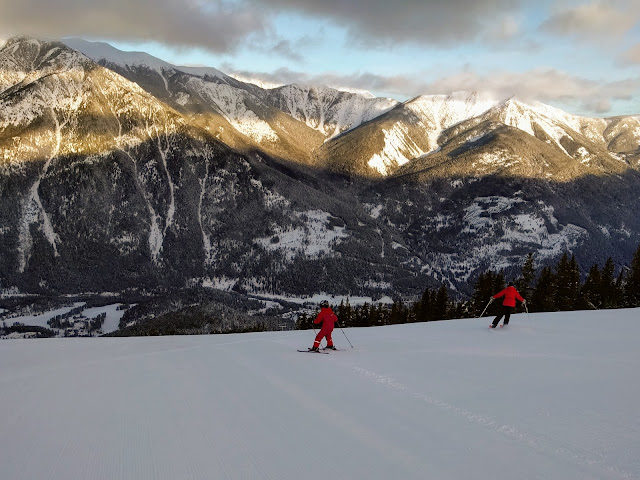
Big Mountain Views at Lake Louise

How to Claim your Ski Days at Partner Resorts


Your upgrade for direct-to-lift only works at Lake Louise. If you visit other partner resorts you'll have to go in to guest services when you arrive with your Lake Louise Plus card. 

Show your Direct-To-Lift Lake Louise Plus Card to Guest Services at Castle, Panorama, and RED for free days or discounted lift tickets. 

Note that at Panorama, you'll have to pay a small $5 fee for a RFID enabled lift ticket. Save this card because you can bring it with you on all future visits and they'll reload it for you.

Top of the Summit Chair at Panorama


Skiing with Kids under 13 


Your free direct-to-lift upgrade includes two free Child Direct-To-Lift Cards (optional), which save you 20% off your child’s full-price, full-day lift tickets. 

You'll pay approximately $32 + GST per ski day per child 12 and under. Age is based on how old your child is at the end of December. Even if your child turns 13 in January, they can still get a child's companion card (though they will pay youth pricing.)

Show your child's direct-to-lift card at partner resorts for a discounted lift ticket. At Lake Louise, just show up at the lifts and your credit card will be charged for the ski day. (Note kids do not get the free days.)

Once your children turn 13, they can get their own Lake Louise Plus Card.

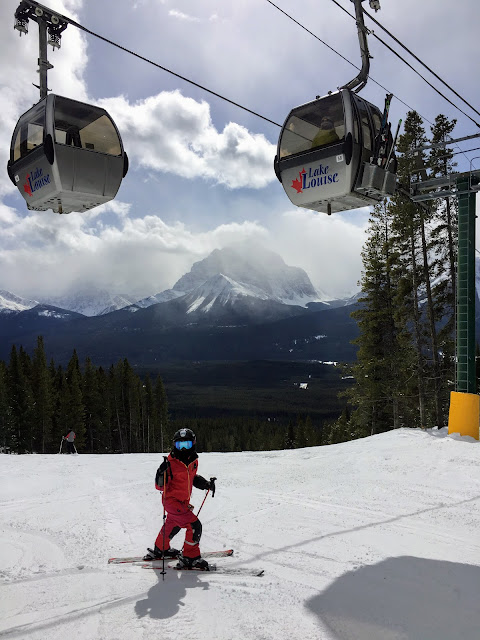
Get the kids direct-to-lift cards for Lake Louise

Affordable Ski Getaways at Lake Louise, Panorama, and Castle Mountain 


These are the three resorts we focus on as a family for our ski getaways because all three can be reached in a 3 hour drive (or less) from Calgary.

For affordable accommodations, I have the following suggestions for you:

Affordable Getaways to Lake Louise


This is the easiest one because you can make it a day trip from Calgary if you are willing to leave the city by 6:30am. To make this happen, pack the car the night before and leave a list out for the "last minute items" you want to throw in the following morning. 

Skip breakfast and stop at the Tim Hortons at the Casino at the junction of Highway 40 to grab a fast breakfast. You could also stop in Canmore for breakfast to break up the drive a bit. You can even have the kids change into their base layers for skiing while you stop for breakfast if you just want to start the drive out in pjs. 

If you'd like a more relaxed trip, I recommend spending a night or two at the HI Lake Louise Alpine Centre where you'll receive discounts as either a member of the Alpine Club of Canada or Hosteling International. 

For a one-night ski weekend at Louise, drive out Saturday, ski, stay overnight at the Alpine Centre, ski Sunday, and drive home. It's rushed, but it allows you to ski for two days with only one night accommodations.

LLP cardholders also get discounts off several hotels in the Banff/Lake Louise area. More information can be found here on discounted stays.

Read more about ski getaways at Lake Louise here:


Plan affordable ski weekends from Calgary at Lake Louise this winter

Affordable Getaways to Castle Mountain


This resort is far enough from Calgary that you'll probably want to spend two nights here (unless you live in deep south Calgary and can make it out for a day.) 

For the most affordable accommodations close to the resort, stay at the Castle Ski Lodge located across the parking lot from the resort. You can either stay in hostel style rooms or in the hotel style rooms. 

The Castle Ski Lodge hostel style rooms have 6 or 8 beds per room (bunk beds) with a shared kitchen on site. The hotel style rooms come with either 2 queen sized beds (for 4 people) or a queen bed and a double / single bunk (for 4-5 people.) 

We've stayed at the Castle Ski Lodge a couple of times in the hotel style room and found them to be quite comfortable.

Alternately you can find affordable accommodations nearby in the Town of Pincher Creek. 

Read more about ski getaways at Castle Mountain here:


Disclaimer: The Castle Ski Lodge has not operated their hostel or shared kitchen since 2020. Check to see if it will be open for this coming season. Otherwise, the hotel rooms upstairs are still affordable and there are options for your meals mentioned in the stories above.


We love skiing Castle Mountain Resort for the gorgeous views and epic ski terrain!

Affordable Getaways to Panorama Mountain Resort


This is another resort that will require an actual 2-3 night getaway. Fortunately, you'll save money on lodging with your Lake Louise Plus Card.

For the best "value" on accommodations at Panorama, consider staying at the Approach Inn, a modern motel style property that's been recently renovated. It's a great deal with ski in ski out accommodations right in the Upper Village, free outdoor parking, restaurants just a short stroll away, and access to the Panorama Springs Hot Pools.

Usually Louise Plus card holders get discounts at slopeside condos at the resort as well which allow you to do your own cooking.

Read more about ski getaways at Panorama Mountain Resort here:


Escape to British Columbia's sunny valley for a ski weekend this winter at Panorama Mountain Resort 

Other Cost Saving Tips for Affordable Family Skiing 


Kids 5 and under ski for free!- Get them out when they're young! Just pick up a free lift ticket in the day lodge at your resort of choice.


Grade 2 Passes - Get a Lake Louise Grade 2 Pass for $40 (for an entire winter of skiing at Lake Louise!)


Snow Pass Cards - If you have a child in grade 4 or 5, you can purchase a Snow Pass card for $29.99  allowing the child to ski for two days at pretty much every resort across Alberta and BC. So that's two days at Louise, two days at Panorama, two days at Castle, etc. - Note, they only get two days per resort total spread over the two years, so if you use both days at Lake Louise in grade 4, you'll have to visit other resorts in grade 5. 


Save money on Discovery Zone Lift Tickets at Panorama - The Discovery Zone tickets give you access to the Discovery Quad, Silver Platter, Red Carpet, and Little Ripper Carpet for a discounted cost. 


Save money on beginner chairlifts at Castle Mountain Resort - Buy a lift ticket for the green beginner chair or for the beginner/intermediate Huckleberry Chair at a discounted cost. 


Mornings are glorious at Panorama Mountain Resort 


Monday, October 18, 2021

First Summits - Mount Burke to the Cameron Fire Lookout, Kananaskis

This has been the summer of visiting fire lookouts for us (three so far by September.) Mount Burke gave us the opportunity to visit the historic Cameron Fire Lookout in Southern Kananaskis, decommissioned in 1953 when the Raspberry Ridge lookout was built instead.

Reaching the summit of Mount Burke and the Cameron Fire Lookout


Stats for the Hike 

Distance:  11 km return


Height gain
: 900 metres 


Time it took us to complete the return hike: 
It took us 5.5 hours (just over 4 hours moving) with two youth ages 10 and 12.


Best time to do this hike: This trail is accessible between May 15th - September 1st each year when the gate is open past the Cataract Creek Day Use Area. After that it is still possible to hike to the summit in later fall (or early spring,) but you'll have to walk an extra 1.7 km return from the gate. (Bring a bike and a lock.)


Rating
: This is an intermediate hike. While the trail is steep at times, there's always a well defined trail and you'll never have to use your hands to scramble up anything. There is no exposure. Note that this is still an "unofficial trail" meaning there are no signs along the way to guide you.


Best Guide Book
Kananaskis Country Trail Guide, Volume 5, Gillean Daffern - Amazon affiliate link 


All Trails Link 
- Mount Burke on All Trails. I recommend using the All Trails app so you know where to park at the Cataract Creek Campground in South Kananaskis. Once you get on the trail though it is relatively easy to follow it all the way to the summit.

Note to download the map, you'll need to have a premium paid subscription. I find it to be worthwhile, even just so I can see how far I am from the summit every time somebody asks "how much further?" 

The Cameron Fire Lookout on Mount Burke in Southern Kananaskis


Parking at the Cataract Creek Campground


The trailhead for Mount Burke is at the entrance of the Cataract Creek Campground (Google Maps link.) The campground is south of Highwood Junction at the intersection of Highway 40 and Highway 541 west of Longview.

You can either access the area from Longview or from Highway 40, driving all the way south past Kananaskis Village and over Highwood Pass. At Highwood Junction you turn south on the Highway 940.

Note if you are choosing  to access the trail via Highway 40 from the north, there is a gate past the junction for the Kananaskis Lakes and it's closed between December 1st and June 15th each year. You likely won't be hiking up Mt. Burke in winter, but if you're doing an early spring hike, make sure you drive down south towards Longview.

And as mentioned earlier, there is a gate just off the Highway 940 at the Cataract Creek Day Use Area until May 15th when the campground opens. It closes again on September 2nd when the campground again closes for winter. When the gate is closed you have to walk down a short road to the trailhead (1.7 km return.)

Once you get inside the Cataract Creek Campground there is a small parking lot on the right hand side of the access road that has a sign for Mount Burke.

Mount Burke as seen from the parking lot at Cataract Creek


Step One: Parking Lot to Ridge Line


This was the most painful part of the hike for me, and honestly why we probably won't repeat this hike very often. Once you reach the ridge, the hike is gorgeous! Getting to the ridge however is a loooong boring slog through the trees.

I still recommend doing this hike at least once though because it is very beautiful once you get up to the ridge, the fire lookout is very cool to see, and as with all things, the best achievements have to be worked for. It's also a great spring hike when you're ok with a long hike through the trees because it feels so good to just be hiking again.

Hiking towards Mount Burke out of the parking lot

The hike starts with a flat walk across a meadow out of the parking lot. You then climb up through the forest where the trail has a couple of short steep hills (in both directions.)


You can see the trail as it follows along the edge of the trees above

Then, comes the part that honestly sucks. I don't think I'll get any opposing opinions here. Bring candy because you're going to be heading up an old cut line (in a complete straight line) which goes up with no switchbacks, no turns, no views... just straight up for a full kilometre! And it's steep at times!

There's also one hill that you'll have to climb back up on the return. (Save some candy!)

Head down, straight up for a kilometre here

Finally, however, you get to the switchbacks and then the grade eases up a bit. Apparently there are ~ 30 switchbacks, but it felt like 100. Thankfully they weren't that steep and it was actually a great way to make progress climbing the mountain.

The switchbacks were annoying on the way down though because they were too gradual and we wanted a more "direct" route. If that's you too, you will find short cuts through the trees which bypass the switchbacks. (I'm not sure if it's recommended to take them or not, but I'll leave that to you.)

I didn't actually take a single photo of the switchbacks because trees, more trees, and just more trees. Thankfully my girlfriend took the photos above because I actually didn't take a single photo until we reached the ridge. (I guess I wasn't inspired until then.)

Hiking distance from parking lot to the ridge: 4 km. So allow for 90 minutes to reach the ridge at a good pace. This does however mean that you'll have 4 km of "boring" hiking before you reach the 1 km of good hiking. Thankfully that one kilometre is spectacular so keep reading. 

We finally reached the ridge and it quickly becomes much rockier

Step Two: Climbing the Ridge to the Summit of Mount Burke


The final kilometre becomes more scrambly but you'll never have to use your hands. There's always a good trail through the rock, and the ridge is never overly exposed. Best of all, there's no nasty scree. This is always a hike.

Starting up the ridge where the views finally appear

Following a good rock trail up the ridge

You'll know you're almost there (maybe 100 metres vertical to go) when you get your first good glimpse of the final push to the summit and the lookout.

Chances are you'll stop here, and at least one person in your group will loudly scream "I have to climb up there?!!" 

Rest assured it's not as bad as it looks in the photo below and there's always a good trail through the rock and scree.

Our first glimpse at the final approach to the summit

The final trail up to the summit of Mt. Burke

Reaching the historic Cameron Fire Lookout on Mt. Burke


Mount Burke Summit 


Everybody loves fire lookouts (they do tend to have good views after all, typically being perched on top of mountains.) The Cameron Lookout is no exception and it really makes you wonder how somebody could live in this tiny little shack for at least 4 months out of the year, all alone! There are no trees so the house would have been completely exposed and at the mercy of every storm that blew through. (No thank you!)

The lookout looks a little worse for wear since being decommissioned in 1953

Careful where you walk inside the lookout

The Cameron Fire Lookout perched on top of Mt. Burke

We truly lucked out upon reaching the summit after hiking up the trail in thick smoke from forest fires. The smoke lifted and the sun came out as we approached the top allowing us to enjoy our summit experience and the gorgeous views.

This is why you hiked all the way up here!

Fire lookouts are amazing destinations for a family hike!

The Return Hike Down from Mt. Burke


Maybe it's just me, but I tend to take a LOT more photos on the hike down because I can finally breathe, relax a bit, keep up to my son, and actually feel motivated to stop without the pressure of reaching the summit.

Enjoying the interesting ridge walk on our way along the Mt. Burke trail

Hiking down along the ridge (You go up and over the hump in the background)

On this particular hike the sun had finally cleared away the smoke too so suddenly we had amazing views for the return trip down the mountain. (We probably took more time on descent than we did on the way up because we stopped so often to take photos!)

The hike goes up and over the bump in this photo as you hike along the ridge

Hiking along the ridge of Mt. Burke with all the misty mountains in the background

On this particular day, the surrounding mountains had an ethereal look to them, all misty and layered with dozens of unique shades of blue! I had no idea blue had so many different hues.

Looking back up at the summit, the fire lookout, and the final approach

A brief narrow section on the ridge was my fav. part of the entire hike

There was one short section along the ridge where it gets narrower and this was my favourite part of the entire hike. It wasn't exposed, but you actually felt like you were on a ridge! And there were dozens of fantastic photo opportunities in this section (as in the photo above.)

One final look back at the summit of Mt. Burke

Back down to the grassy slopes at the bottom of the ridge (and about to head into the trees)

The photo above is the last one I got before we hit the trees again because motivation to reach the parking lot was renewed once we left the views behind. It took us about an hour to bomb down the trail from this point.

Want to discover more first summits to tackle in the Canadian Rockies?


Thursday, October 07, 2021

Wind Ridge, Kananaskis - Family Hiking and First Summits in the Canadian Rockies

Wind Ridge is one of the prettiest ridge walks in Kananaskis and I've added it to my "I'd happily do this hike every summer" list - which is actually a very short list because we have so many amazing hiking trails here.

Expect steep hiking, some optional scrambling near the summit, and beautiful views over the Wind Valley on this uncrowded trail near Canmore.

Wind Ridge! One of the prettiest trails near Canmore

Stats for the Hike 

Distance:  14 km return


Height gain
: 950 metres 


Time it took us to complete the return hike:
It took us 6.5 hours (3.5 hours up, 30 minutes at the summit, and 2.5 hours down.)

I did the hike with two youth ages 10 and 12.


Best time to do this hike
: We did this hike at the beginning of July and everything was vibrant and bright green (almost glowing green!)  I'd choose to do it early season again for this reason. I'd expect the grass to be more yellow/brown later in the season.

Note that there is a wildlife closure for the area between December 1st and June 15th each year.

Also note that it is named Wind Ridge for a reason. Choose a calm day. And should you choose to hike in the "green season," bring all the bug spray!! We were eaten alive by black flies once we got out of the trees higher up on the ridge. If you don't like bug bites, consider hiking later in the season. 

One tip though if you are hiking in bug season, go early in the morning! The bugs got worse as the day got warmer. Fortunately they were fine while we were climbing so we were able to take rest breaks. On the way down we couldn't stop at all.


Rating
: This would be considered a difficult hike due to the steepness of the trail. There is also a cliff band near the summit that you must scramble up and down. Recently a bypass route has developed around the cliff band but it's not much better. (We did use it on descent though to avoid down climbing the cliff.)

Prerequisite hikes could include Ha Ling Peak, Sarrail Ridge, or King Creek Ridge.


Best Guide Book
Kananaskis Country Trail Guide, Volume 3, Gillean Daffern - Amazon affiliate link 


All Trails Link 
Wind Ridge Trail. I recommend using the All Trails app so you know where to park near Dead Man's Flats. By downloading the app you'll also be able to make sure you're heading in the correct direction the entire time because the Wind Valley trail system can be confusing.

Note to download the map, you'll need to have a premium paid subscription. I find it to be worthwhile, even just so I can see how far I am from the summit every time somebody asks "how much further?" 

Looking over the Bow Valley from Wind Ridge 


Finding the Trailhead for Wind Ridge 

You'll be starting from a large parking lot near the hamlet of Dead Man's Flats just beyond the Banff Gate Mountain Resort. You can see the Google Maps link to the parking lot here. 

You'll pass Dead Man's Flats as you drive from Calgary out to Canmore on the TransCanada Hwy. It is just 10 minutes east of Canmore.

This is also the parking lot for the Skogan Pass and Centennial Ridge Trails if you want to through hike them from Kananaskis Village. (Each one has a trailhead at the other end near the village.)

You'd also park here to climb Pigeon Mountain. (Read: First Summits - Pigeon Mountain


Looking over the Wind Valley from Wind Ridge

Hiking through the Wind Valley to the Wind Ridge Trail 

There is a fairly large trail network through the Wind Valley and you'll want to make sure you're heading towards Wind Ridge and not climbing up the Skogan Pass or Centennial Ridge trails. For this, we found the All Trails map to be very useful in the first hour!

You'll be hiking on old roads and wide flat trails for the first 45 minutes (that honestly could be traveled by bike.) 

At your first junction out of the parking lot you'll want to head west towards Canmore rather than going straight up the Skogan Pass Trail which follows the power lines. Cross the bridge that you'll come to over Pigeon Creek.

The West Wind Valley is a delightful forest walk

At the second junction you're going to continue heading west (right) rather than turning on to the Centennial Ridge Trail.

There are signs at the junctions so it's fairly obvious as you continue to follow roads to the SW. You'll cross a second bridge over Wind Creek as you get on the main exploration road through the West Wind Valley.

At another junction you turn to the north to follow the West Wind Creek Trail which climbs steeply up to the ridge where you turn to the west again.

Hiking through the Wind Valley was very beautiful

And again, if you're already confused by the directions, pay for the subscription to All Trails, download the map, and follow the blue dot. Hiking has gotten a lot easier over the years thanks to technology!

We actually really enjoyed the hike through the West Wind Valley and felt like we were walking through a magical fairy forest at times with vibrant green moss and the peaceful creek.

And as a bonus, the valley portion of the hike was a good warm up before the steep ridge climb that awaited us ahead (and a good cool down at the end.)

By the numbers:

The flat easy forest part is 3 km long (this is the part you could bike.) It took us 45 minutes on foot hiking.

The next 1.5 km is uphill but still on a wide easy trail. You wouldn't want your bike here so bring a lock if you're choosing to bike the first 45 minutes.

After that, the final 2.5 km is "real hiking" on a normal singletrack trail and this is where you gain the majority of your elevation.

Walking through the scenic West Wind Valley 


Climbing the Wind Ridge Trail

As mentioned above, the flat valley bottom ends and you begin climbing gradually for 1.5 km on a wide trail where you can still walk side by side and keep up a nice conversation.

You'll know when you've reached the ridge though because the trail suddenly goes UP. It becomes very steep and much more narrow (like a normal hiking trail.)

The beginning of the climb up the ridge

Following steep switch backs up the ridge

At first you have steep switchbacks and some pleasant traversing across the vibrant green slopes. Then you get into the long climb up the ridge where you honestly just need to take lots of breaks and enjoy the views. (So choose a nice sunny day.)

The grass was almost glowing it was so green!

Check out the funky tree! (It's not called Wind Ridge for nothing.)

Wind Ridge is a great early season training hike!

We took a LOT of breaks climbing the steep slope up to the ridge where you'll gain approximately 500 metres in 2 km.

Fortunately we always had a good trail to follow and it was equally good on the way down. There is no bad scree and it was never particularly loose.


Pretty much straight up the ridge!

As you hike up the ridge, you'll get great views of Windtower and Rimwall, two hikes that we've really enjoyed.

Read: West Wind Pass and Windtower - Family Hiking and First Summits in Kananaskis 

Read: Rimwall Summit (First Summits in the Canadian Rockies)

Windtower, West Wind Pass, and Rimwall Summit from the Wind Ridge Trail

Reaching the Cliff Bands on Wind Ridge 

As you start to get into the cliffy section of the trail, you'll be able to bypass most of them by just following the trail that skirts around them.

There is one however that requires climbing up the cliff using a series of easy ledges. There is a bypass trail but it is steep, rooty, muddy, and unpleasant. Use it on descent if you don't like down climbing, but I'd recommend taking the cliff up.

Reaching the one cliff band that you'll climb below the summit ridge

The cliff is like a big staircase with easy to climb ledges

Fortunately this cliff can be bypassed on descent if you prefer steep roots

At the top of the cliff there is a short narrow traverse

Above the biggest cliff you can see the rest of the trail up the ridge in front of you. It's not especially comforting to see that it's still straight up at a steep angle. However, there is a trail and the only real scrambling is now behind you.

Looking up at the ridge (The trail skirts the cliff band to the right)

Hiking the upper part of the ridge

The upper part of the ridge is steep and rocky

Almost at the top of the ridge (the final baby cliff band)

Reaching the Summit of Wind Ridge 

Upon reaching the top of the ridge you're rewarded with great views of the Three Sisters, the Wind Valley, and the summits of Rimwall and Windtower.

The Three Sisters as seen from Wind Ridge 

You can continue further along the ridge if you want (which would require hiking down from the summit and back up to another bump further along.) There is also an optional loop that can be made by continuing to the far end of the ridge. We returned the same way which is the easiest for route finding (lest you get lost in the Wind Valley trail network.)

On the summit of Wind Ridge

Keeners with lots of energy can continue to the second bump in the background

Wind Ridge Summit

Hiking back down

We followed the same route back down and the trail was great on descent. There was no nasty scree, no loose sections, and the dirt was grippy. Any rocky sections were easily hiked down as well.

Following the ridge down through the upper rocky section

The rocky parts were easy to descend

And for music lovers, here's some fun trivia: The Pink Floyd Video for "Learning to Fly" was filmed on Wind Ridge. Watch the video (YouTube link) and let me know if you recognize the rock slabs my son is hiking down in the photo above (about 1:47 into the song)

Following the steep ridge down to the top of the big cliff band

Upon reaching the big cliff band that we had climbed up, we decided to use the bypass route that shows up on All Trails. It wasn't especially fun and was extremely steep, muddy, and loose. However, it was relatively safe. A fall would have resulted in a skinned knee rather than a broken leg.

The cliff bypass route 

As you can see, the bypass route wasn't much fun!


At the bottom of the cliff, it was straight forward hiking again down the lower ridge until we reached the wide easy trail leading to the old road through the West Wind Valley.

Back on the grassy lower slopes

Descending the switchbacks at the beginning of the ridge trail

Looking back up at the ridge top

Back on the easy gravel trail that would descend to the Wind Valley

Back in the West Wind Valley (and how cool is that tree!)

Back on the road, 45 minutes to go (wishing we had our bikes)


Want to discover more first summits and great ridge walks to tackle in the Canadian Rockies?


ShareThis