Wednesday, June 15, 2016

Tour de Banff - The Ultimate Family Mountain Bike Loop

We've spent a lot of time biking the trails around Banff over the past month and have come up with a few amazing family tours. I wrote about our last tour in Tour de Banff - The Ultimate Family Bike Tour. The previous tour combines both paved and natural trails for an amazing 20 km loop where you can stop at playgrounds, go for ice-cream, and take numerous breaks along the way. Today's loop is for the more experienced riders in your family and takes you on the best single track mountain bike trails around the Tunnel Mountain Bench.

This mountain bike tour has two endings depending on whether you want to set up a vehicle shuttle or not. Sections could be ride-able by younger children on balance bikes (which will be indicated below,) but the loop is definitely not chariot-friendly. I also don't really recommend riding these trails with  young kids in child seats mounted to bikes. That being said however, a really good mountain biker would find it easy enough to do.

Single track riding on the Coastline section of the Tunnel Bench Loop

Overview of the Trails You'll be Riding


The loop that I'll be describing follows two main trails: The Tunnel Bench Loop (Coastline,Teddy Bear's Picnic, and the Spine,) and the Bow Falls-Hoodoo Trail. They can be found on the Trail Forks website

Minimum requirement for these trails would be a 20" bike with gears and hand brakes. I do not recommend using coaster brakes on these trails. Strong kids could try sections on a 16" bike but would struggle on a few hills without gears. Capable youngsters could also try riding some of the sections on a balance bike with supervision on the bigger hills.

Proud riders on the Tunnel Bench Loop

These trails are intermediate single track mountain bike trails, and good for the confident rider who's already mastered a few easier trails (see my full story on the Best Bike Trails in Banff to choose a few easier mountain bike trails.) The trails are cross country in nature and have rolling terrain. There are no steep relentless climbs (the ending of the Hoodoo Trail aside) and hills are always short enough to walk.

Not sure your child is ready yet? Go out as an adult and explore the loop first. Alternately, work up to doing the full loop with the Junior Tunnel Mountain Bench Loop. It includes sections of the Tunnel Bench Loop together with the easier Tunnel Campground Loop. My son road this easier loop when he was on a 16" bike.

One of the first steep hills my son learned to ride on the Tunnel Bench Loop

The Coastline Trail (Tunnel Bench Loop)


We always start riding on the Coastline section of the Tunnel Bench Loop. We are usually camping in the Tunnel Mountain Village 1 Campground for easy access. We jump on the Tunnel Campground Loop (a gravel trail that circles all three campgrounds on the bench) and jump off when we see the Tunnel Mountain Road beside us. The Coastline Trail starts on the opposite side of the road. It can be seen on Trail Forks. 

If you don't want to start here, you could start at the Hoodoo viewpoint parking lot (opposite the Tunnel Mountain Village 1 Campground) and proceed from here.

Scenery on the Coastline Trail

The Coastline Trail is a flowy trail that is best ridden towards the Hoodoos (riding the Tunnel Bench loop clockwise.)

Here is a map of the Coastline Trail with details on length and height gain. 

What you can expect:
  • Lots of roots

  • Short hills with no steep or sustained climbs

  • One hill down that you may choose to walk because of a root you have to drop over

  • Exposure and airy bits along the bank above the river (short sections could be walked)

  • Flat riding and downhill coasting along the bench until you get further into the trees. From here the trail climbs back up towards a paved service road (closed to the public.)

  • A short section of technical riding that has recently been changed (the trail used to be easier.) Just walk this short hilly section if you have to 

Below is a video of my son on the Coastline Trail. It should tell you if this trail is appropriate for your child.


Teddy Bear's Picnic (Tunnel Bench Loop)


Once you get to the service road you have two choices. If you're thoroughly freaked out and done, just bike down the road and you'll end up at the Hoodoo viewpoint. Here you can head back to camp or whatever and take a rest. (and yes, we've taken this escape route.)

If you're keen to keep riding, ride down the access road until you see the sign for Teddy Bear's Picnic. This short trail is relatively easy and would be one of the best sections for youngsters on balance bikes or smaller pedal bikes. Looped with the access road it could be a pleasant outing from the Hoodoo viewpoint parking lot.

For a map of this trail along with stats on distance and height gain, follow this link to the Teddy Bear's Picnic Trail.


One of the viewpoints on the Tunnel Bench Loop 


Don's Bypass Trail (Tunnel Bench Loop)


Teddy Bear's Picnic will take you to the Hoodoo Viewpoint Hiking Trail (a lovely little tourist trail that gives you awesome views of the Banff hoodoos and the Bow River below.) If you watch for it, you'll see a short connector trail called Don's Bypass. This trail takes you down to the parking lot without having to take the tourist hiking trail. Should you choose to take the hiking trail, please dismount your bikes and walk.

Don's Bypass Trail might just be the primary reason your are doing this loop clockwise! It is a sweet short downhill ride that is fast and very flowy! You might even be tempted to climb back up so you can ride it twice.

Hoodoo Viewpoint

Upper Hoodoo Trail (Tunnel Bench Loop)

Biker Boyz on the Hoodoo Trail along the Tunnel Bench

This next section of trail parallels the road and is an easy section of the loop. This is the first part of the Tunnel Bench Loop that we rode when my son was much younger combined with the easier Tunnel Campground Loop.

Read my Junior Tunnel Bench Loop story to find out how you can loop the campground trail with this section of the Tunnel Bench Loop.

This is also one of the most scenic sections of the Tunnel Bench Loop. To read the trail description with all stats on distance/height gain, go here to the Bow Falls - Hoodoos Trail. This is the full route we'll be following next, down to the Bow Falls viewpoint with a shuttle.


Trail Ending #1 - Lower Hoodoo Trail to Surprise Corner


This is where you have decisions to make. You can keep following the Hoodoo Trail on the Bow Falls - Hoodoos Trail or you can continue with the Tunnel Bench Loop. We personally love finishing the ride down to Surprise Corner. The ride is very diverse and has a few challenging moments.

Riding across the big meadow on the Hoodoo Trail


What you can expect from this section:

  • A long descent down to river level from the top of the bench. One loose section could/should be walked as even I wiped out on the loose gravel.

  • One challenging hill down a steep section with trail erosion you must work your way around (can be walked)

  • A lovely flat ride through a big open meadow beside the river

  • A pleasant forest ride along the river towards Surprise Corner

  • A challenging ending that involves pushing your bike up a couple of big hills and pushing your bike down a set of stairs
Playing on the bridge in the meadow

So, yeah, it's a bit challenging in spots but it's a very beautiful ride and worth doing at least once. Just set up a shuttle in advance because you are ending much lower than you started. You really don't want to bike back up!!

Reward the kids with a drive straight downtown for ice-cream at the end of this one.

One of the easier sections of the Hoodoo Trail down by the river


Total ride distance (Coastline to Surprise Corner):  10.6 km

The ride took us roughly 2 hours at a good pace and we gained just under 200 metres of height over the course of the ride.

Rad riders on the Hoodoo Trail

Trail Ending #2 - Upper Hoodoo Trail to the Spine Trail (Tunnel Bench Loop)


Orange pumpkin in the sky on the Spine
Don't want to set up a shuttle? Continue with the Tunnel Bench Loop and don't drop down onto the Lower Hoodoo Trail. Stay high along the Tunnel Mountain Road and follow the Upper Hoodoo Trail until you come to the Hidden Ridge Resort.

Here you will get onto the Tunnel Campground Loop for a short distance until you come to the Spine Trail. You can read about the Spine Trail here.

We've always found the Spine section of the Tunnel Bench Loop to be the hardest section. It is very rooty and there are numerous trees down across the trail at times. For this reason, we usually  bike it up until we reach the big orange water tower (I think that's what it is) and from there drop back onto the Campground Loop. You can follow the Campground loop back to where you started from.

Watch out for the fun "bike park" section on the spine, right below the big orange pumpkin as we call it. It's a lot of fun to play on with rollers, bumps, and banked corners.

Fun "Bike Park" section of the Spine Trail

Optional Loops


Try riding the Junior Version of the Tunnel Bench Loop combining the easy Campground Loop with the bench portion of the Upper Hoodoo Trail. My son has been riding this loop since he was 5 years old on a 6" bike. It could also be ride-able by children on balance bikes with heavy parent supervision at all times.

The Junior Version is approximately 7 km with 90 metres of height gain. As before, it is usually ridden clockwise.

Easy riding along the Upper Hoodoo Trail along the Tunnel Mt. Bench

Additional Resources


The Best Family Bike Trails in Banff National Park 


Easy riding on the Hoodoo Trail near the Banff Hostel


Wednesday, June 08, 2016

Ten Tips for Stress-Free Family Camping

We love camping but I won't lie and say that it's this easy peasy stress-free thing we look forward to every weekend.

- There are trips where we ask ourselves why we are going away for the fourth weekend in a row.

- There are stressful weeks where I can't believe I now have to pack up for camping Friday morning, knowing I still have a huge pile of work I haven't finished.

- And then there are those weeks where I feel like I'm in a constant state of packing and unpacking; No sooner have I finished the laundry and unpacking from one trip, and I'm immediately shopping, packing, and getting ready for the next one.

Frankly, it's exhausting at times!

Camping - when it's all worth it

Exhaustion and stress aside from traveling so much, there is not a single member of my family who would prefer to spend the whole weekend in the city.

We are the classic "weekend warrior" family, fleeing the city at the first chance we get Friday afternoon.

We bought a trailer to make camping easier (MUCH easier,) and we've managed to spend over 150 nights camping as a family over the past five years.

Through it all, we've learned a few things about how to make it easier and more enjoyable.

"Hammock City" on a recent camping trip in Banff


Ten Tips for Stress-Free Family Camping


One - Spend More Time at Camp


Friday is often a write-off where we arrive at camp in time to unpack and go to bed.

BIG TIP:

Camping is much more enjoyable if you take the afternoon off work Friday and arrive at camp early 

Arrive in time to make an easy dinner over the fire, unpack in time to go for an evening bike ride or hike, and actually enjoy the site you've paid for.

Also, plan to spend a minimum of two nights at your campsite.

You'll pack the same amount of stuff for one, two, or three nights anyway (with just a little more food) so why go through all the work of getting out to camp and setting up for one night only? It's a LOT of work to go camping for a short one-night outing. Make it more enjoyable by staying long enough to actually have fun.

Ideally, try to plan three-night trips and it gets even more enjoyable!

Now that you're here, stay long enough to enjoy your campsite

BIG TIP:

Along with actually enjoying the site your paid for on Friday by arriving earlier,
consider paying for an extra night on Sunday so that you can spend the whole day at camp and check out after having an early dinner. 

We did this last weekend and it was glorious! It was 25+ degrees outside and we had no desire to pack up and head home. Instead, we spent the day biking and hanging out at a beach, had a late afternoon dinner at camp (hot dogs over the fire,) packed up, and then headed home in time to get ready for school and work the next day. It was the most relaxing Sunday we've ever spent at camp and we thoroughly enjoyed packing up late afternoon rather than rushing around in the morning to do it.

If you choose to check out Sunday morning you'll be forced to check out mid-morning (slightly later if camping in an Alberta provincial park,) and then just have to drive home. Some families manage to still find activities to enjoy Sunday after packing up but we find everything to be so buried in the trailer/truck, it's just a pain to do anything after packing. Families with trailers will also find it challenging to find somewhere to park the trailer after leaving camp.

You could spend Sunday morning packing..... or you can go play and leave Sunday night

BIG TIP:

Finally, instead of taking a giant two-week vacation,
consider turning your summer into a series of long weekend camping trips

It'll be easier to convince your boss at work to let you spread your vacation time out over the whole summer and you won't be playing catch up after two weeks out of office. You'll also get to go camping a whole lot more if you plan several three or four-night trips rather than one big trip.

Plan several long weekend trips instead of one long vacation

Two - Camp Close to Home


Choose campgrounds that are less than two hours away for short weekend trips. 

Driving for 4 hours for a two-night trip is just crazy!

You'll spend as much time driving as you will camping. Short drives make for relaxing camping weekends. The kids are happier, the driver is smoother, and you'll arrive at camp much earlier Friday night. You'll also be able to stay around later on Sunday. Last weekend we didn't leave Banff until 5pm Sunday. We were still home in Calgary by 7:00 (after dropping off our trailer, washing the truck, and getting groceries for the week ahead.)

For suggestions close to Calgary check out this story, Our 5 Favourite Campgrounds (within a 3 hour drive of Calgary.)

Our Campsite in  Bow Valley Provincial Park, less than an hour from my house

Three - Always Have a Reservation


I know! You want to be spontaneous, you don't like planning, you don't want to be locked in if you decide you don't like the campground you booked, it's not fair that you should have to make a reservation 3 months in advance, you want to see what the weather is doing before you commit to camping, your work schedule doesn't allow for long range planning, organization isn't your "thing," you're outraged that people make reservations and then fail to show up, you don't know where you'll end up each night on our road trip...

It is possible to plan a road trip - with campsite reservations!

Whether planning in advance is your "style" or not, you only have a few options if you want to drive out and actually GET an official campsite that's not "off the grid" in the wilderness.

If you like "freedom camping" where you just drive out onto crown land looking for a spot to camp, by all means, enjoy spontaneous camping all you want. If however, you want an official campsite in a campground that has bathrooms and at least a few amenities, here are your options:
 
  • Make a reservation and know that you'll drive straight to your site without spending hours looping around trying to find a campground with room for your family

  • Go to a First come first serve (FCFS) campground mid-week, grab and pay for a site, set up your tent or trailer, and go back home. Come back Friday afternoon. And I know, it's slightly "dishonest" perhaps, but how many new campgrounds have been built in the last ten years near Calgary? (None that I know of!)  On the other hand, how much bigger has Calgary grown over the past ten years? See where I'm going? You do what you gotta do to get a site! There just aren't enough sites for everybody who wants one and so you're going to have to get creative if you want to go camping without a reservation.

  • Arrive at FCFS campgrounds Friday morning!! (Make sure you are there before people start checking out - if anybody does on a Friday morning) You can also limit FCFS camping to early/late season for better success rates (May/June,September/October)

  • Find a more "obscure" campground that is less popular. And when you find your hidden gem, don't tell anybody. ;)

  • Check reservation websites a few days before you want to go camping and choose a campground that still has availability. You'll get to make a reservation knowing what the weather will be like and what your short term plans are. On the down side though, long driving may be required and you likely won't get your first pick of campground.

  • Look for walk-in tent campsites (often less popular) or backcountry campgrounds that have a short approach. Information on walk-in or backcountry camping within Alberta Provincial Parks can be found on the Alberta Parks website.

Visit the Alberta Parks website for a complete list of Alberta Parks campgrounds with FCFS sites.

Read: 5 Tips for Getting a Campsite without a Reservation.


Consider Walk-In Tenting to get Prime Lakeside Sites


Four - Organization, organization, organization


Aside from buying a trailer (which seriously helps a lot) check out these other suggestions for making camping easier.

  1. Make a good packing list. You'll only have to make it once and then edit it from time to time when you think of something else you should add. Need inspiration to get started?  Check out my Pinterest Camping board and be prepared to spend an hour or two reading some great articles.

  2. Organize your gear into bins for easy storage and packing. Think "camp kitchen," "recreation  and toys," etc. For inspiration, Pinterest has it all! (Camp organization on Pinterest.)

  3. Make a food packing list with normal items you'd usually take camping. Contact me if you want mine as a template. I go through my list on Thursday, highlight the items I'll need for this upcoming trip, add anything new or different, and make my shopping list.

  4. Try to do your grocery shopping the day before so that you have one less thing to do the day you're leaving

  5. Buy perishable items, meat, or last minute items in a town near where you'll camp (also useful if you're camping for more than a few days and are using a cooler)

  6. Spread your packing and planning out over the week and don't leave it all for Thursday night

  7. Recruit help while you're packing. Perhaps a grandparent wants to take the kids for an afternoon while you get ready to go

The hammock is often the single-most important thing we remember to pack


Five- Go Camping with Friends and Family


Go camping with friends or family members and watch how much simpler camping becomes! Make communal meals where you only have to contribute one item towards a bigger feast, take turns cooking, and buddy up to watch the kids. We love group camping because the kids play and run around together, entertaining themselves for hours, while we adults sit back and chill. We still get out for big bike rides and hikes, but the time at camp is much more relaxing when there is a group  of children to play with each other.

Work as a team and have each family pick a couple things that they will do to entertain the troops over the course of the weekend. This could involve taking a group of kids to the playground, taking a few kids on a bike ride or on a short hike, riding around the campground with the children, or leading a craft, sport, or game. Teamwork also comes in handy when you're packing up Sunday if you assign some adults to packing and others to entertaining the kids.


Group Camping allows adults to take turns entertaining the troops

Not every adult needs to be "on duty" at the same time when camping with a group. While the men watch the kids, the women can go for a bike ride or a hike. Switch it up later and send  the men off for some free time.

Finally, take family members along to help with simple child care duties from watching or holding babies to pushing strollers around camp, staying back at the campsite while younger children nap, or even just taking the children to the playground while you cook dinner.


Kids will always have more fun camping with friends

Six - Cut Down on Meal Stress


There are a lot of great resources out there for making camp cooking easier. Below are my best tips:

  • Eat in the car on the way out to camp (we like stopping at Subway on the way out of town) and do dessert or second dinner over the campfire after setting up. (Alternately you find yourself rushing to set up your tent or trailer while starving - and just end up grumpy)

  • If arriving at camp in time to cook dinner Friday night, consider bringing a pizza from the store to cook over your bbq. It's not only quick, it's delicious.

  • Skip the early breakfast when mornings are cool (and you're still half asleep,) and plan a bigger brunch when it's warm and you're awake.  Have a first breakfast of cereal and coffee and hold off on the pancakes and bacon for second breakfast.

  • Eat out on the last morning at camp if checking out early. This avoids the mess and clean up from breakfast.

  • Team-cook with friends, do communal meals, and plan fun camp feasts.

  • Do a bunch of smaller meals or snacks rather than one big meal. I find that we are never hungry around dinner time but are always starving after a hike or bike ride mid-afternoon. Plan two smaller evening meals (mid-afternoon and later in the evening) and skip the massive prep/effort required to do a large dinner.

  • Skip cooking dinner and eat out in a local town on shorter trips. 

Camp pizza to perfection

Seven - Choose one Sport or Activity to Focus on for the Weekend


As tempting as it is to go away for the weekend with the boats, the bikes, hiking boots, climbing gear, etc., try to pick one main activity or sport and focus on that. You won't have time to do everything and it just adds to the amount of time it will take you to pack.

Last weekend we knew the weather was going to be gorgeous in Banff and we were tempted to bring our boats. Thinking about it though, we knew our focus was going to be mountain biking and we didn't want to go to all the effort of bringing out the large kayak, my board, and all of our paddling gear. We chose to focus on one sport and it was a lot easier. When we went to the beach afterwards to cool off, we just played in the water and tried not to think about our boats sitting at home in the garage. There will be time for boats and bikes when we do longer trips this summer.

Why the heck did we bring boats for a weekend of mountain biking??


Eight - Plan one Big Activity per Day


Plan a nice bike ride, a fun hike, a trip to a nearby beach, or some other fun outing, and plan your day around that activity. This is especially important if camping with friends when you'll want to come up with a rough departure time the night before for the next day's main activity. (Otherwise, there will always be somebody just walking out of their tent at 10am when you are ready to hit the trails.)

Plan one group or family activity and then aim to spend free time at camp playing. You might end up getting out for a second ride, paddle, hike, etc. but aim to be more flexible and spontaneous with all other plans and focus on the one main objective for the day.

Plan one big activity each day (not 5 as per my style!!)


Nine - Encourage Daily Periods of Quiet Time


Kids don't nap when camping or have long since stopped napping? They still need quiet time in the afternoon if they've been playing hard all day. We schedule in a good hour of "down time" every afternoon at camp before dinner. My son looks forward to some quiet time reading and I honestly don't even care if he plays a video game or watches a movie. In my opinion, you can do whatever you like for quiet time if you've just climbed a mountain or gone on a big mountain bike ride.

Make sure you, the adults, use this quiet period for some down time as well. Read a book in the hammock, catch up on work messages if you're expected to check in daily, or just chill with a beer in the shade.

Down time in the afternoon at camp

Ten -  Allow for "Free Weekends"


I find for myself that I can only go hard for a few weekends in a row and then I need a weekend at home to rest. It doesn't mean we'll stay in the city all weekend, or that we'll really stay "home," but we will at least sleep in our own beds and stick to day trips that require a minimal amount of packing and planning. This allows us some free time to be spontaneous and flexible as well since we always have a huge list of things we want to do each summer.

You don't need to go camping to plan an awesome day trip


Got tips now for me? I'd love to hear your suggestions for making camping simpler as a family.


Wednesday, May 25, 2016

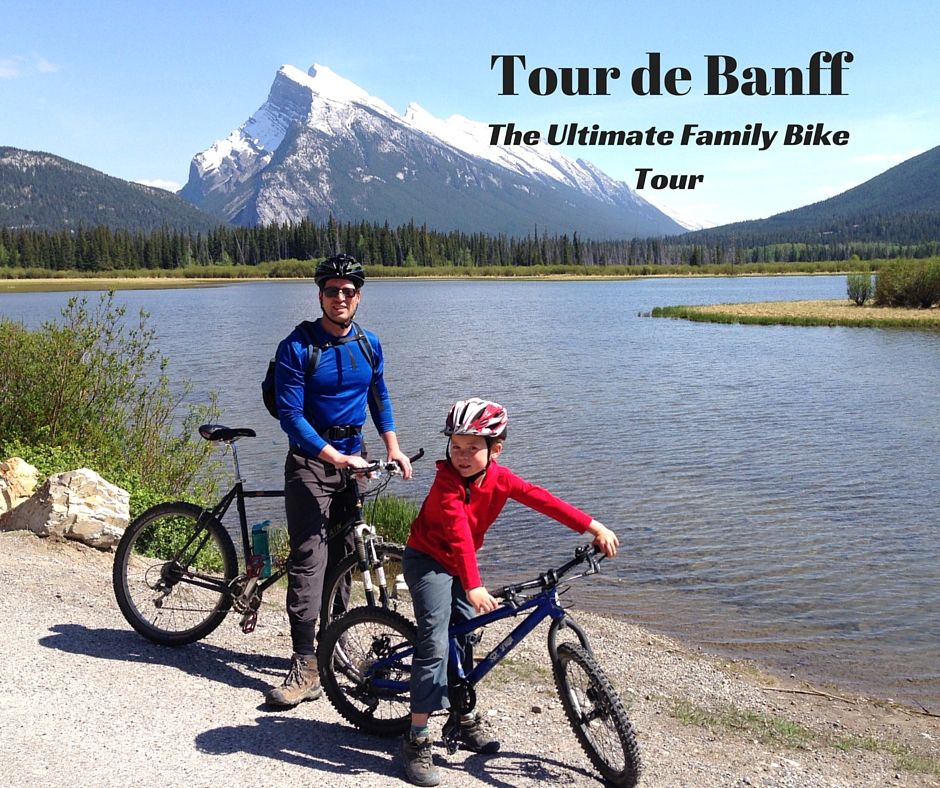
Tour de Banff - The Ultimate Family Bike Tour

We've biked around Banff a lot but recently set out to do a big loop around the whole Banff Town area. The goal would be to get from the Healy Creek trailhead at the bottom of the road up to Sunshine Village Resort back into town along Healy Creek and Sundance Canyon.

From there, we wanted to ride through town and head back towards our vehicles by riding on Vermillion Lakes Drive and a portion of the Legacy Trail. We'd end up a few kilometres from our vehicles and send a couple of adults ahead to finish a short section on the TransCanada Hwy. T

he loop ended up being just short of 20 km and only took an afternoon to ride with many stops.


Family Version of the "Bow Valley Bomber"


Doug Eastcott came up with the "Bow Valley Bomber" loop in his book, Backcountry Biking in the Canadian Rockies. Back when he first wrote about this circuit, the Legacy Trail had not been built yet and much more highway riding was involved.

Today, almost the whole loop can be completed on trails or quiet roads. There was only one section at the end that required some highway riding and we sent the dads to complete this part. They rode ahead while the kids played at the third Vermillion Lake and were back at the vehicles before we had even left the lake.

Family-friendly Bow Valley Bomber


Healy Creek to Sundance Canyon


Starting at the Healy Creek trailhead, we rode approximately 5 km to the junction with the Sundance Canyon Trail in Banff. The trail was wide, relatively easy with a few hills that could be walked by younger children, and was great for novice riders wanting an easy mountain bike ride.

This is wide doubletrack riding on a nice gravel/dirt surface with few roots. Chariot friendly even.

We chose to ride the trail in the direction towards Sundance Canyon from Healy Creek thinking it would be more downhill. In hind site though I don't think it matters which direction you ride the trail. You'll go up and down in both directions with roughly 94 to 98 metres of elevation gain in either direction.

See the Healy Creek Trail on Trail Forks. 

Easy mountain biking on the Healy Creek Trail

This was the most difficult part of the ride and once we reached the Sundance Canyon trail we had easy coasting on the paved trail back towards the Town of Banff.

Family biking on the Healy Creek Trail in Banff


Sundance Canyon to the Banff Townsite


The Sundance Trail is 3.5 km one way and starts at the Cave and Basin Historical Site. From where we entered the trail, we had perhaps 2.5 km to ride  and it was mostly downhill. The trail is paved, wide, and easy going after riding Healy Creek.

You'll be sharing the trail with horse traffic and with hikers so children need to be encouraged to be respectful of other trail users and to get over to the side as necessary. (especially when horses are passing)

See the Sundance trail on Trail Forks. 

Views on the Sundance Trail, Banff

Rather than climb up to the Cave and Basin site, we followed the horse trail down by the river leading towards the Banff Recreation Grounds and downtown Banff. 

Riding from the Sundance Trail to the Banff Recreation Grounds

We stopped at the Recreation Grounds to play at the bike park and playground. We then headed into the town to get ice-cream before getting back on the trails. Here is a map of the Banff Town trails if you'd like to see where you'll be heading.

Playing in the Banff Bike Park at the Banff Recreation Grounds

And NEW for 2018: There is a super awesome skatepark at the Banff Recreation Grounds now. And kids will love it as a rest stop before continuing the loop.

Playing at the new skatepark in Banff 


Central Park to the Fenland Loop


The next section was easy peasy and fun. We followed the paved pathway along the Bow River (map here) from Central Park over to the Banff Canoe docks. From here we got onto the Fenland Loop Trail which is an easy gravel/dirt mountain bike trail (wide and flat with a few roots) shared with hikers and dog walkers. Please be respectful and make way for folks on foot rather than running into them.

Easy riding along the river downtown Banff

We didn't do the entire Fenland Loop (though you certainly could as it's only 1.8 km in length and flat) as we were making our way over to Vermillion Lakes Drive. We tried to turn left at all junctions to head for the paved Vermillion Lakes Drive.

Once we got to the bridge leading to the Vermillion Lakes Drive, we jumped onto the paved road and continued our journey back towards the Healy Creek trailhead.

Family mountain biking doesn't get much easier than on the Fenland Trail

Vermillion Lakes Drive and the Legacy Trail


The Vermillion Lakes Drive Road is 4.3 km in length and you'll pass by three beautiful lakes on this section of your ride. The riding is easy, paved, and relatively flat. Note that you will be sharing the road with traffic but the speed limit is low and cars always give us wide berth on this section. We've never felt scared and we just remind the kids often to stay on the side of the road.

See a PDF map of trails here from the Banff National Park website. 

Road riding on Vermillion Lakes Drive

There are many docks to stop at along the way and children will be entertained at each one. Once you get to the end of the road, you'll get onto the farthest section of the Legacy Trail (the paved trail running between Canmore and Banff) and you'll ride it 1.6 kilometres to the junction with the Trans Canada HWY and the Highway 1A. (This will be the end with children and adults should bike back on the highway to reach the vehicles at Healy Creek.)

Finishing off our ride on the Legacy Trail which parallels the TransCanada Hwy

Ending our Ride


We hadn't quite reached 20 km and thought this would be a nice round number so we rode up the Highway 1A on the shoulder of the road for a couple of kilometres at the end.

The dads were waiting for us here after having ridden ahead to get the vehicles from Healy Creek. If you don't want to ride on the 1A, do the Fenland loop a couple of times instead to reach 20 km or else ride further up the Sundance Canyon trail.

Finishing our trip with a short ride along the 1A Highway

Safety Notes

Vermillion Lakes

Wildlife is plentiful in this area of Banff and many people see bears on these trails. Ride in a group, have bear spray handy, make noise (especially around water and when riding around blind corners,) and give all animals wide berth. I came across a couple of large elk and got off the pathway, going  around to give them space.


It's also wise to check trail reports and look for warnings before starting out. There are often bear warnings on the Fenland Trail and trails get closed on occasion if there is a problem animal in the area. 


Check the Banff National Park website for information on trail trail closures, trail reports, and safety bulletins.


More information on Biking in Banff


Tour de Banff: Vermillion Lakes Drive section


Thursday, May 19, 2016

Epic Family Bike Rides: Cat Creek Falls, Kananaskis via Highway 40

Want to take the family for a hike somewhere that's off the beaten path, almost "secret," and guaranteed to be quiet? Cat Creek is the place to go before Highway 40 opens on June 15th. With no road access, peace and quiet is guaranteed.

Biking Highway 40 in Kananaskis (solitude guaranteed!)


Directions


You'll be staging your adventure from the Town of Longview in Southern Alberta. From here, get onto Highway 541 heading west into the mountains. You'll drive approximately half an hour until you reach Highwood Junction where Hwy 541 turns into Highway 40. This is as far as you will drive and you can park on the side of the highway by the closed gate, blocking your way from driving further into Kananaskis Country. On June 15th, you'll be able to drive all the way from here towards Peter Lougheed Provincial Park over Highwood Pass. For now, you bike.

Our Bike Crew for the Cat Creek Ride on Highway 40


The Road Ride


I tried to track the distance we rode and it was approximately 4.5 km one way to the Cat Creek day use area from the road gate. I figure that we rode about 9 km total on the highway.

Know that there are a few BIG hills so this is not a beginner ride, nor was it easy. If going with young children, prep them ahead of time with encouragement that they can walk any hill that is too big. Bring candy or something to reward them if they do get up the big hills, and bring along a Chariot or bike trailer for younger kids who can't ride 9 km. We had children on our trip who were using balance bikes without pedals but they did not ride the full time, nor did they do any of the bigger hills.

Family-friendly spring riding on Highway 40

The first hill from the gate is the biggest. I reached a speed of 40km/h on the way back down to the truck on this hill. It's also a kilometre long - so it's not the friendliest way to start off a ride. Rest assured though, it does flatten out for a bit after that (and it can always be walked.)

Cruising back down to the vehicles at the end of our ride


Hiking or Biking to the Cat Creek Falls

Ride until you see the sign for the Cat Creek Day Use Area. From here you have two options for reaching the Cat Creek waterfalls. Option #1 is to hike. If you choose this, park your bikes beside the road bridge above the picnic area and find the hiking trail on the opposite side of the bridge. It goes up a slope beside the highway, enters the trees, climbs to a viewpoint, and then descends to the creek. From here there are a couple of nice little bridges and you'll reach the waterfalls in an easy 1.3 kms. Go to the Alberta Parks website to read more about this interpretive hiking trail.

Creek crossing if you choose "not" to take the official hiking trail

The second option is to bike most of the way to the falls on an old road. The old road is found on the near side of the road bridge (opposite side from the hiking trail.) Descend down off the highway into a big clearing, go into the bush a short distance and you will see the old road. Follow it until you see the hiking trail on the other side of the creek. Cross the creek on rocks, and it's a very short 2 minute walk to the falls from here.

Biking to Cat Creek Falls on the old road


Cat Creek Falls 


Cat Creek Falls are a magical place and I love visiting them in any season. Some day though I want to come back on a hot day and go swimming. There is a scramblers route above the falls using an old rope but we decided to play it safe and stay beside the falls rather than trust a rope we did not personally put up.

Cat Creek Falls

The ride back was quick and was definitely more downhill. Families wanting to hike the Cat Creek trail once the road is open will just have to wait until June 15th. For the rest of you, go now and enjoy a fun bike/hike outing.

Bike/Hike outing to Cat Creek


Saturday, April 23, 2016

Family Paddling on the Kananaskis River

If you've ever checked out the rapids between the Widow Maker day use area and the Canoe Meadows day use area along Highway 40 in Kananaskis you wouldn't say this was a particularly family-friendly stretch of river. Rafting companies like to guide clients down this stretch of the Kananaskis river and it's not exactly something you'd send your 7 year old down alone in his own little boat. (and don't worry - we didn't!)

Fortunately, we discovered a safe calm stretch of the Kananaskis River that's as family-friendly as it gets for river paddling. We felt completely safe sending our son down the river in his own kayak and I was very comfortable on my stand up paddleboard. The river was so calm we actually spent most of our time paddling UP stream.

Family-friendly paddling on the Kananaskis River


Where to Put in for Paddling the Kananaskis River with Kids


Park at the dam at Seebe along Hwy 1X just past the Willow Rock Campground in Bow Valley Provincial Park. Highway 1X is the first exit you will come to after you pass the Hwy 40 turnoff (coming from Calgary on the TransCanada Hwy,) and it is the same exit you'd take if going to Exshaw. You'll know you've reached the dam because you'll cross over the Bow River and will see a very small reservoir to your right. This is where you park.

From the reservoir, you have three options. Paddle around the small reservoir as a short practice session, paddle up stream on the Bow River (though you might not get very far,) or paddle up stream on the Kananaskis River - our focus here.

The start and end of your paddle at the Seebe Reservoir

Paddling Up Stream on the Kananaskis River


While the Bow River is big and wide, the Kananaskis River is much more narrow, making it ideal for paddling as a family. You won't get separated from one another or feel intimidated when you are in the middle of the river far from a bank. We were never more than a few paddle strokes away from a river bank at any given time and there were huge gravel banks to pull up at every twenty metres at most. We didn't get very far because my son kept wanting to pull over to the side to throw rocks and play - another reason to take the kids here. (You could spend two hours here and never paddle more than 500 metres.)


Gravel banks in abundance for the kids to stop and play

Note if you are going to paddle on the Kananaskis River that the flow rate is highly dependent on whether TransAlta has their nearby Barrier plant on or off, and whether water is being released from the Barrier Dam upstream. You can check the schedule for the Barrier Dam here to find out when TransAlta turns their plant on and off for the day.  It also shows flow rates. We chose to arrive at the Seebe Reservoir around 1:00pm so that the Kananaskis river would have had plenty of time to fill up without having a fresh flow from a morning release.

There was virtually no flow at all on the section we did from the Seebe Reservoir and it was actually harder paddling into the wind going down stream. Water was unfortunately a bit shallow so we had to be careful with rock islands (especially a concern on my board.) My son grounded his kayak a couple of times as well (not really a concern though in the ankle deep water where he got stranded.)


If I can paddle a stand up paddleboard both up and down stream you know it's a slow moving river!

We didn't get very far on the river before it became too shallow and narrow. At this point we were more than happy to turn around though since it was my son's first time out for the season and his arms were tired.

Easy paddling on the Kananaskis River

Family-friendly Paddling on the Kananaskis River


Children with previous paddling experience should have no problems in their own boat on this section of river. We let our son use a child-sized sit-on-top beach kayak because he has done a lot of kayaking and knows how to steer to reach a bank, knows how to keep the bow of the kayak going straight, and has the balance to stay afloat on calm stretches of water without going for a swim.

Family-friendly paddling on the Kananaskis River

If you have younger children or enjoy paddling together, you could certainly use a canoe or tandem kayaks. We chose to each paddle our own vessel though and it was a lot of fun.

Pack a picnic lunch for one of the gravel banks, load the boat with sand toys, and head out for a pleasant half day outing on the Kananaskis River! 

Paddling down the Kananaskis River

Safety Notes

The Kananaskis River is glacial in temperature. Go prepared. I wore neoprene booties on my board and my son was wearing long underwear under his rain pants (despite the temperature of 20+ degrees this day.) I also made my son wear a rain jacket just in case he fell in.

Starting him Young
Fortunately, you are never very far from the parking area should somebody fall in. There are also plenty of opportunities for pulling boats over to change clothes. Pack extra dry clothing in the boat in a dry bag and you'll be fine.


Bonus Reading and Resources


Paddling the Bow River in Banff with Kids

Paddling and Camping on the Columbia River with Kids

 Easy Overnight Paddling Trips for the Whole Family

Paddling in Waterton Lakes National Park

Family Canoeing and Kayaking in the Canadian Rockies

Touring the Canadian Rockies on a Stand Up Paddle Board