Thursday, September 06, 2018

Our Favourite Autumn Larch Hikes in the Canadian Rockies

A larch tree looks like a normal evergreen tree until mid September when the needles turn bright golden yellow and begin to slowly fall off for the winter. New needles come back the following spring, making this a very unusual "evergreen tree" since it's definitely not green year round. In winter, you'd just see a bare trunk and branches (like any deciduous tree.)

Hiking through golden larch trees, Kananaskis

Golden fall hiking at Highwood Pass, Kananaskis

When and Where to See Golden Larch Trees in the Canadian Rockies 


The peak time to see larch trees in all their autumn splendor is from mid to late September here in the Canadian Rockies. (And in my experience, they're absolutely magical around the third weekend of the month. Aim for the 22nd - 27th.


Golden larch trees in Banff National Park 

Want to do a fall hike and see golden larch trees? The trails I've featured below are the most popular trails (for very good reason.) They are also the busiest so if you can go mid-week, do it!! If you have to go on Saturday or Sunday, start crazy early!!


Larch Valley, Moraine Lake, Banff National Park 

Access for Moraine Lake and Lake Louise

If you want to hike in the Moraine Lake area of Banff, you will have to take a shuttle bus to Moraine Lake from the Lake Louise Ski Resort. The road has been closed to public vehicles.

You can also take a bus to Lake Louise from the ski hill to save the hassle of trying to find parking (and avoid having to pay for parking at the lake.)

Shuttles must be booked ahead of time at the link above. 


Larch Hikes around Lake Louise and Moraine Lake


Larch Valley, Moraine Lake (Lake Louise area of Banff National Park)


It's a 7 km return hike to reach the most magical valley at Lake Louise. Larch Valley is also referred to as "Valley of the Ten Peaks," and you'll quickly see why when you reach the first meadow. It is 11.6 km return if you go all the way to Sentinel Pass (which you should if you have the stamina for the 700 metres of height gain.) From the top of the pass, it's larch trees as far as the eyes can see in every direction.


You'll also see good routes on the popular All Trails app.

And to escape the crowds, consider hiking up the Eiffel Lakes valley from the same trailhead. (5.6 km one way with 370 metres of climbing.)

For a beautiful one-way traverse, check out this hike below:

Read: Hike Moraine Lake to Lake Louise (via Sentinel and Saddleback Pass)

Glorious golden colors in Larch Valley at Lake Louise


Saddleback Pass and Mount Fairview, Lake Louise (Banff National Park)


Not as popular as Larch Valley, this can be a great option on a busy weekend. It is 3.7 km to the pass from where you have two options. 

Option one: scramble an extra 100 metres up to the summit of Saddle Mountain (to your left) for a total of roughly 700 metres of height gain. 


Saddle Mountain Summit looking down on Saddleback Pass

Option two: hike to the summit of Fairview Mountain in a total height gain of 1000 metres. It takes a big push at the end but the views are worth it!! And don't worry about not seeing enough larch trees because that's all you'll see in every direction from either summit.

Recommended Reading: 


Read: Hike Moraine Lake to Lake Louise (via Sentinel and Saddleback Pass)

Mount Fairview Summit, Lake Louise

Lake Agnes Tea House, Lake Louise (Banff National Park)


While maybe not "as incredible" as Larch Valley or Saddleback Pass, this hike is much easier and better with young children. The hike is 6.8 km round trip to a beautiful tea house, small lake, and gorgeous little larch forest en route to the Big Beehive viewpoint above the lake. 

It is an extra 3.2 km round trip to reach the Big Beehive viewpoint above Lake Agnes with an extra 100 metres of height gain. (520 metres total)


Lake Agnes in late September


Follow this link for information on all hiking trails at Moraine Lake and Lake Louise on the Banff Lake Louise Tourism website.

- and note that there is sometimes a restriction for trails at Moraine Lake requiring you to hike in a tight group of 4 people. See trail reports here.

No filter, no editing required. This is why people hike at Lake Louise in September

Mount St. Piran, Lake Louise (Banff National Park)


This summit is reached via the trail to the Lake Agnes Tea House. The hike requires gaining 900 metres of elevation spread out over 12+km round trip (if you do the full loop off the back side as we did.)


Hiking up the slopes of Mount St. Piran with larch trees around us

The hike can be dangerous if there is too much snow on the slopes, but the larch trees along the way are magical. (Check in at the Visitor Centre for conditions before starting this hike.)

Read about our adventures on this hike here:  First Summits - Mount St. Piran, Lake Louise

And see the route on All Trails here


Mount St. Piran Summit in Late September


The Big Beehive and the Devil's Thumb, Lake Louise (Banff National Park)


We haven't done this hike in the fall yet, but we recently did it in the summer. The views are incredible as you look down on both Lake Agnes (above) and Lake Louise. 

First hike to Lake Agnes and then continue around the lake where you'll start to see larch trees. Climb up switchbacks to the Big Beehive lookout over Lake Louise. 

If you still have energy continue up another viewpoint, the Devil's Thumb where you'll be looking down on larch trees as far as you can see.

Devil's Thumb, Lake Louise (and most of those trees below are larch trees)


The entire hike is 12 km round trip with over 1000 metres of height gain.

For more information please read my previous story below.


Mirror Lake below the Big Beehive (you can hike to the very top!)


Larch Hiking in the Skoki Valley, Lake Louise


Another popular area to hike at Lake Louise is found across the highway from the Village near the Lake Louise Ski Resort.

For all Skoki Valley hikes, you'll park at the Fish Creek Parking Lot just east of the Village and on the same road you'd drive to reach the ski hill. See a map on the All Trails website here

Boulder Pass, Skoki Valley


And here begins the crux / challenge for all Skoki hikes: the trail that takes you into the Skoki Valley doesn't start at the parking lot. It starts just below Temple Lodge on the back side of the ski resort. And there's only one way to reach this trailhead - by walking the ski out road.

You'll begin your hike with a 3.5 km road walk before you reach the true trailhead. And there is no shuttle bus service provided to get here unless you're staying at the decadent Skoki Lodge

Most people either backpack the Skoki Loop, or hike around the area from one of the backcountry campgrounds located in the valley. Only strong day hikers will want to even consider hiking here as a day trip - and likely not with children unfortunately.

The Skoki Valley is larch heaven with thousands upon thousands of larch trees as far as the eye can see, but the price is 7 km of road walking to and from the trailhead.

Perched above the Skoki Lakes from Packers Pass

Once you reach the trailhead, the nearest objective is Boulder Pass and Ptarmigan Lake, a gorgeous location in larch season, reached in 10 km of hiking, round trip, from the end of the road. - For a total distance of 17 km.

Beyond Ptarmigan Lake, many people set their sites on Packers Pass and the Skoki Lakes which brings your day's distance up to 24 km with the road walk.

Ptarmigan Lake, Skoki

Boulder Pass, Skoki

On my recent hike into Skoki for larch season we visited Packers Pass to look down on the Skoki Lakes and our total distance was 24 km with 1000 metres of height gain. It was a beautiful day, but a long one, and not something I'd do with most children. 

My son joined us on our recent trip, but only because we biked the road - which is allowed, but it's one heck of a climb!! You'll save 7 km off your feet by biking the gravel road, but your lungs will pay for it on the way up. coming out of course is fast and fun. 

The Skoki Valley is filled with thousands of larch trees

Looking down on the Skoki Lakes from Packers  Pass

Other Larch Hikes in Banff National Park 


Arnica Lake, Banff 


You'll start from the Vista Lake trailhead off Highway 93 on the boundary of Banff and Kootenay National Parks. I like to call this the "Grand Lake Traverse" because you'll have the opportunity to visit Vista Lake, Arnica Lake, and then the Twin Lakes in a 17 km return hike.

Note this hike has a LOT of height gain in both directions. Fortunately you have several options for turnout points. The highest concentration of larch trees can be seen at Arnica Lake (and just above at the lookout) so make sure you get that far at least.

Arnica Lake late September

Also, this trail is VERY popular so arrive early to get parking in the small lot. And, honestly if you have to park on the highway it's kind of a sign that you were too late and you should have a backup plan. 

Rockbound Lake and Taylor Lake are both nearby in Banff and make for beautiful larch hikes if you need a plan B.

Frosted larch trees at Arnica Lake.

Trail information:

The trail to Arnica Lake begins by losing 137 metres of height as you descend to Vista Lake in 1.4 kilometres. You then climb 579 metres to reach Arnica Lake over 3.6 km.

Upon reaching Arnica Lake, you have another 138 metres to gain in less than a kilometre before you reach the high point above the Twin Lakes. Upon reaching the high point, I recommend following a faint trail to your right which will take you to a viewpoint over Arnica Lake. It's the only place where you can look down on the lake. It's a popular viewpoint in fall when you can see many golden larch trees above the lake.

Most day hikers turn around here. If you want to continue to the Twin Lakes, you'll descend 229 metres over 2.4 km to reach the first Twin Lake and a small backcountry campground. It's a short walk to the second lake.


Golden larch trees as far as you can see at the viewpoint above Arnica Lake

Gibbon Pass, Banff


Continue past the Twin Lakes above via the Arnica Lake trail to reach Gibbon Pass. Here you'll find hundreds of golden larch trees and the opportunity to climb to the summit of Little Copper if you still have energy.

Follow the directions to the Twin Lakes above. After reaching the two Twin Lakes, you begin to climb again to reach the top of Gibbon Pass. Fortunately, this is a very gradual section of trail and it's a breeze compared to the climb to Arnica Lake. And it's only 224 metres of very gradual climbing here spread out over 2.7 km.

Gibbon Pass, Banff National Park

Looking up at the snowy summit of Little Copper above Gibbon Pass

You'll know you're getting close to the pass when larch trees begin to surround you on all sides and the trail becomes simply golden late September.

If you still have energy, you can climb to the top of Little Copper which is another 300 - 400 metres above you.

Remember, what goes down on the way in, has to go UP on the way back out. So you'll still have two climbs ahead of you to reach the parking lot.

Look out over the Bow Valley from the summit of Little Copper

Look down over Gibbon Pass and Shadow Lake from Little Copper


Extend your Hike to Gibbon Pass with a stay at Shadow Lake Backcountry Lodge


From Gibbon Pass you can drop down the other side of the pass to reach another lake in only 3 additional kilometres (one way.)

Shadow Lake is my favourite backcountry lake in Banff and it's an easy extension from the pass if you don't have to climb back up! You'll lose 450 metres of height dropping down to the lake where you'll find a beautiful backcountry lodge waiting for you!

Gorgeous Shadow Lake in Backcountry Banff

Enjoy the luxury of going backpacking in the Canadian Rockies without a tent or sleeping bag, carrying nothing other than your regular day hiking gear, lunch for the first day, and basic overnight items.

Waiting for you at Shadow Lake is your own private cabin at the lodge, gourmet meals prepared by a culinary team on site, hot water + showers, and comfortable beds to sleep in!

Enjoy two nights at the lodge, explore around the area on your free day, and then head out for the return hike back over Gibbon Pass (with fresh energy and full bellies.)


And read about the Little Copper summit extension here (which makes a great day trip from the lodge.)

And read about staying at Shadow Lake Lodge here:


Private cabins at Shadow Lake Lodge in Banff


Larch Hikes in Kananaskis 


Ptarmigan Cirque, Kananaskis 


Located at Highwood Pass in Kananaskis, this is a 4.5 km loop hike with a gorgeous alpine basin and a small larch forest. It sees less traffic than the Banff/Lake Louise hikes, but is still exceptionally busy. Try to hike mid-week.


Larch trees on the Ptarmigan Cirque Trail

Read more about the hike on the Alberta Parks website. And I highly recommend checking the trail report because the trail is often closed for bears. 


Autumn at Highwood Pass: Ptarmigan Cirque

Pocaterra Cirque, Kananaskis


A lesser known alternative to Ptarmigan Cirque, this hike starts from the same parking lot. It is a favourite for us with more larch trees than Ptarmigan Cirque, a gorgeous pond, and fewer crowds.

Trail directions for this unofficial trail: Start from the same parking lot as for Ptarmigan Cirque at Highwood Pass on Highway 40. Head down the trail towards the Highwood Meadows interpretive trail (and don't cross the highway as you would for Ptarmigan Cirque.) 

Pocaterra Cirque in late September with Pocaterra Ridge in the background

Follow the interpretive trail until you reach a sign that mentions staying on the official trail and respecting the environment. There is a smaller dirt trail heading left here off of the interpretive trail. That is your trail. (And yes, you are allowed to hike it.)

Follow the unofficial trail into the cirque, heading for the pond shown in the photo above. The trail is relatively easy to follow for those who have good route finding skills. If you are inexperienced with hiking, please choose the well marked Ptarmigan Cirque trail instead.

The trail is roughly 7 km return to the pond and the cirque.


Larch trees in the upper Pocaterra Cirque 


Pocaterra Ridge, Kananaskis


This is an extension from the Pocaterra Cirque hike above. Total hiking distance from Highwood Pass to Little Highwood Pass along the ridge is approximately 11 km long. You'll also be gaining roughly 900 metres of height (and losing 600 metres.)


Glorious ridge walking on Pocaterra Ridge 


You can read about our adventure hiking this trail here: Pocaterra Ridge, Family Hiking in Kananaskis 

There are many larch trees along the Pocaterra Ridge hike

Arethusa Cirque, Kananaskis 


This is a quieter trail option than the Ptarmigan and Pocaterra Cirque trails. You'll still encounter a large number of hikers on a weekend though so get an early start.

The hike is 4.5 km in length (as a loop) with 378 metres of height gain. 


September snowball fight in Arethusa Cirque (it was an early winter!)


To add to your outing, consider hiking up to the summit of Little Arethusa.


Arethusa Cirque with Little Arethusa in the background

And read about our adventures here:


Little Arethusa Summit above Arethusa Cirque, Kananaskis

Chester Lake, Kananaskis


Chester Lake is a popular family day hike from Calgary and there is a beautiful larch forest if you hike above the lake to the Elephant Rocks. There are also larch trees beside the lake if that's as far as you get.

Chester Lake late fall 

We always hike above the lake to visit the Elephant rocks because they are super fun to scramble on. (why my son is wearing a helmet in the photos below!)


The hike is 9 km return with 400 metres of climbing. 

Views from the Elephant Rocks above Chester Lake

Bring helmets if you have crazy kids like mine!

Rummel Lake, Kananaskis


This is an easy hike in Kananaskis to a pretty lake. Late September you will also find larch trees in the forest around the lake.


The hike is 11km round trip with 400 metres of climbing.

Early season snow and larch trees at Rummel Lake

Rummel Lake with early season snow

Tent Ridge, Kananaskis


This is one of my favourite hikes in Kananaskis and you'll be treated to views of larch trees from the ridge. I like to do the full horseshoe loop (clockwise.) 

Note there is scrambling on this hike so read reviews carefully to determine if it's the right hike for your group. I also wouldn't recommend this hike if there's been fresh snow as it would be slippery on the steep trail.


And read about our family experience here: First Summits - Tent Ridge Horseshoe, Kananaskis

The distance is 10km as a loop with 800 metres of climbing.

Larch trees looking over the Spray Lakes Reservoir from Tent Ridge


Larch Hikes at Lake O'Hara in Yoho National Park 


There's little point mentioning the magical Lake O'Hara area in Yoho National Park (since you need incredible luck to get spots at either the backcountry cabin or in the backcountry campground here,) but if you want to add this trip to your list of "places I'd like to see in my lifetime," you can find more information on the Yoho National Park website

You can also try to reserve spots on the bus to visit Lake O'Hara as a day trip but you'll need to get spots in the spring or luck out with a cancelation later in the season.

If you did manage to get in to Lake O'Hara, read my guide below:

Read: The Best of Lake O'Hara in a Day 

Opabin Basin, Lake O'Hara, Yoho National Park 

More Suggestions for Larch Hikes in the Canadian Rockies


Check out these guides for more hiking suggestions:

8 Larch Hikes in the Canadian Rockies - Crowfoot Media

Best Larch Hikes in Kananaskis - Kananaskis Trails

Larch Hikes in Kananaskis - Friends of Kananaskis


Autumn hiking at Lake O'Hara, Yoho National Park


Accessing Larch Trees - Without Hiking! 


If you don't want to hike, or have a family member who can't hike, Toby Creek Adventures outside Invermere, BC runs guided ATV tours on their property, and in September you can take a "Larches in Paradise" Tour where you'll visit the historic Paradise Cabin overlooking a beautiful golden basin of larch trees! 

Afterwards you get to drive around the basin reveling in the oranges and yellows all around you - with no hiking required!! 

The tour even includes a BBQ lunch at the cabin. 

And for those not comfortable driving an ATV, they also offer side x side vehicles that you can use instead on your tour. Each vehicle holds four people and is perfect for families with kids.


The Paradise Cabin surrounded by golden larch trees (no hiking required!)

Drive instead of hike through a golden larch forest!


Save this story for future reference because I will add to it annually as my family discovers new favourite hikes each autumn.


Tuesday, September 04, 2018

Family Adventure in Rat's Nest Cave, Canmore Cave Tours

My son and I are always looking for fun adventures to fill our days, and so I jumped at the opportunity to take a cave tour in nearby Canmore. It had been years since I'd last explored Rat's Nest Cave under Grotto Mountain, and I couldn't wait to get back down there again - this time as a family trip.

Rat's Nest Cave Tour, Canmore

Introduction to Rat's Nest Cave


Canmore Cave Tours guides groups into Rat's Nest Cave, a large undeveloped cave under Grotto Mountain in Canmore, Alberta. The company has been introducing visitors to this cave since 1992 with the goal of "offering our guests the most extraordinary, unforgettable experience possible."

The people who work for Canmore Cave Tours describe themselves as the "custodians" of this provincial historic site. They are passionate cavers and cave advocates and they control entrance to the cave (for its protection.)

There is no way for the public to access the cave without joining a guided tour, and there is a locked gate across the cave entrance to ensure nobody sneaks in after hours.

Climbing up to the Rat's Nest Cave entrance

Directly from the Canmore Cave Tours Website:
"Rat’s Nest Cave is a special place. In 1987 it was designated a Provincial Historic Resource because of its incredible archaeological significance. It is home to ancient pictographs, 7000 year old bones, and beautiful cave formations. At over 4km long, Rat’s Nest Cave is one of the longest caves in Canada.
The water-sculpted passages of the cave offer us seemingly endless opportunities to learn and explore. At 5 degrees celsius, the cave is a cool but comfortable destination every day of the year, a trait enjoyed by cave residents like bushy-tailed wood rats, and North America’s smallest mammal - the pigmy shrew."
With no lights, handrails or walkways, we are left to enjoy the cave in its natural state, just as the original explorers did."

Visit the Canmore Cave tours website to look at a map of the cave system.

Helmets with bright lights help to guide explorers through the cave


What to Expect from Tours in the Rat's Nest Cave


This is a wild and natural, authentic cave tour. There are no handrails, no lights other than the ones you wear on your helmets, and the cave floor has not been changed or altered for easy walking. There are no staircases, no easy ramps to follow down to lower rooms in the cave, and you will be crawling on your hands and knees!

Remember the bum scoot that toddlers do while learning to walking? You'll get good at this move during your cave tour! You'll also perfect your crab walking and test the health of your knees as you crawl around on the cave floor (fortunately you'll be wearing knee pads!)

Also, know that it helps if you have some experience with rock climbing! You will be wearing a harness and clipping yourself to a safety line with a short length of rope through much of the cave. This is to protect you from falling into the giant pit that's right beside the tunnel entrance (filled with animal bones,) and protects you from taking a tumble down the steep pitches you must climb down (and back up) in the cave.

You'll be given an introduction at the beginning on how to clip and unclip from the safety lines, but it does help if you have some experience using carabiners and working with a rope.

Clipping and unclipping from safety lines in the cave


Introduction to The Explorer Tour that we did


We chose to do the 4.5 hour long Explorer Tour (roughly 2 hours spent inside the cave.) This tour is recommended for children 10 years of age and over.

The youngest person on our tour was my son, and the oldest person was 80! In between, we had three teenagers, myself, and one other adult.

Our tour ended up taking 5.5 hours (I think we were underground longer than 2 hours, and our group was slow on the hike as well.)

The Adventure Tour requires an 18m rappel (recommended only for youth 12+) but our tour involved just basic scrambling with the safety ropes.


Outline of Our Caving Day Schedule


11am: We met at the caving office in Canmore for 11am and I'm pretty sure we were at the office until noon. One family was having challenges with their credit card (which delayed the registration process) and we all had to fill out waivers. We also had to try on our red jumpsuits, helmets, and gloves, and get our bags ready to go.

One in two people would carry a backpack with two sets of coveralls, helmets, harnesses, ropes, gloves, and personal items. (If you want to make your pack lighter and split gear into two packs, or if you want to use your own backpack, bring a backpack with you.)

Noon: Around noon we convoyed our way to the trailhead roughly 10 minutes away, following our guide. (We'd be with the one guide all day.) And note, you need to drive to the trailhead in your own vehicle. (Shuttles can be arranged though for an additional fee.)

We got to the cave, packed last minute items into our packs (water, extra layers, and snacks) and headed up the steep hiking trail to the cave. It took us probably 30 to 40 minutes to hike up to the cave with many breaks. Overall, we were on a good trail until we reached the canyon below the cave. Here we put on our helmets and could use a fixed rope that had been placed along the edge of the trail to pull ourselves up.

1:30pm: By 1:30 we were heading into the cave after hanging and leaving our packs behind under a tarp near the cave entrance. We took nothing into the cave with us other than safety gear and the items on our bodies.

4:00pm: By 4:00 we were back outside and ready to hike down to the parking lot where we'd end our tour.

4:30pm: Back at the parking lot and ready to drive back to Calgary.

Times are all a rough estimate. 


Our caving group in Rat's Nest Cave


Is the Explorer Tour Family-Friendly? 


Yes, BUT....

Below are the basic requirements (and words of caution I'd give) before you sign up for the tour with your children:

Ready for action outside the cave!

  1. There are no bathroom breaks in the cave (though the guide can help you with this in the case of an emergency, hello pee bottle or squatting over a bag!)

  2. Every member of your group should be comfortable scrambling, and climbing up and down steep terrain while pulling themselves up and lowering themselves down with a rope.

  3. You need to be comfortable in confined, tight spaces. There are a few optional squeezes you can try, but even without these sections, there are tight spaces (including the box you need to climb up and down.)

  4. Fear of the dark would not be a good thing here! Even with the headlamps, it's still pretty dark in the cave. (Hence why most of my photos are a little blurry and lack the usual quality I strive for.)

  5. You'll carry nothing with you (and you have to be ok with this.) I was a bit worried about going into a cave for 2+ hours with no food, no water, no extra layers of clothes... - as a mom I'm used to always being prepared for every single thing that could ever happen on an outing (even to the playground!)

  6. Every member of your group should be in good physical shape and accustomed to regular exercise. A high amount of exertion is required on the hike up alone. My son did fine here because we regularly go for long bike rides, spend 7 hour days hiking, and enjoy rock climbing as a family.

  7. Fear of heights would also be a bad thing for this tour. There are many steep climbs/descents in the cave (and it was extremely hard to climb out at the end.) My son was in tears at the end because he couldn't pull himself up the final polished rock section and required help. Myself, I was certainly nervous at times lowering myself down the safety ropes, knowing the rock I was sliding down was polished with few holds - and that a fall would hurt. (And nobody is belaying you down each steep pitch. You are sliding down the polished rock on your bum while using the safety rope as a brake with your hands to slow down your slippery descent to the cave floor below.)

One of the tight spaces my son squeezed through in our tour

Tips and Suggestions for Doing the Explorer Tour with Your Children


Below are just a few additional tips and suggestions:

  • Bring snacks inside the cave!! Kids can not be told "it's ok, we'll be out soon." When they're hungry, they're hungry NOW. My son was upset near the end because he was hungry and I hadn't packed a granola bar into one of my pockets. (Totally my mistake on that one!)

  • Wear something with good pockets underneath your overalls. Fortunately I had a light vest underneath with a good pocket for my cell phone. I also could have carried a granola bar or two.

  • Make sure you all go to the bathroom before entering the cave! I made my son eat high fibre cereal the whole drive out so that he'd go to the bathroom before we got to the cave (and success, he did!) - We also tried not to drink a lot before entering the cave.

  • Wear good grippy shoes! We had hiking shoes on and they were necessary for the hike up/down, along with the scrambling inside the cave.

  • Dress for the temperature in the cave. It is only 5 degrees Celsius inside the cave. We both had fleece sweaters on underneath our overalls, and I also had a light vest on. - And you can carry extra layers with you (that you'll leave in your backpack outside the cave) if you don't want to hike up wearing everything.

  • Bring lunch with you. You can eat it in the office while signing waivers and getting your introduction, or eat it right before you enter the cave. (I recommend a snack before entering the cave too.)

  • Discuss anything particular to your children with your guide before starting your tour.  I was nervous about the bathroom situation so discussed this with our guide. In hindsight I should have also discussed food.

  • Explain to your children the "group factor" before your tour. The tour might not always go as fast as your kids would like. You will move at the pace of the slowest person. They might have to take breaks on the hiking trail (when they don't need one) and they might get stuck behind somebody having problems in the cave (and will have to be ok with that.) The reality is that you are with a group, and you'll be going at the pace of the group.

  • Bring enough adults to supervise/keep your kids safe. The guide is not going to spot your kids from below when they are climbing down the steep sections. He's not going to pull them up the steep climbs either on the way out. You are the one that is responsible for protecting your kids (beyond what the safety ropes can do,) helping them if they struggle, and for offering extra support. For me, I wish in hindsight that my husband had done the tour with us. I would have appreciated his help on the steep sections (and it freaked me out that my son was always ahead of me with nobody spotting him from a fall from below.)

Crawling through one of the tighter sections of the cave

Final Recommendation


We had a great day, and ended our tour exhausted and starving (usually a sign of a day well spent in the mountains.) I was also very sore the next day, which for me, means I got my workout and that this wasn't some cute little "tourist tour."

Our tour definitely felt like the "real deal" for caving, and I'd recommend it to other families or groups looking for an adventurous way to spend a day in Canmore.

The tour was also the perfect activity for a rainy overcast day, and made for an enjoyable way to spend a chilly day in the mountains - especially since it's always the same temperature in the cave year round.

The Rat's Nest Cave Tour is fabulous for families with older youth or teens

Please visit the Canmore Cave Tours website for full information on the tours they offer, cost of each tour, and minimum age requirements.

Our tour was offered to us in exchange for this review, but as always, all opinions and words are my own. 


Thursday, August 23, 2018

Family Downhill Mountain Biking at Fernie Alpine Resort

We travel to Fernie Alpine Resort every winter for ski vacations, and we've visited in summer for lift-accessed hiking. Recently though, we got the opportunity to return, this time to try the lift-accessed mountain biking so popular at the resort.


IMPORTANT UPDATES FOR 2019

The Timber Chair will be closed for the 2019 summer season. Most families will be riding off the easier Elk Chair anyway, so it's not a big deal, but if you were looking for some advanced runs off Timber (as adults,) that won't be happening. 
The biggest complication for families will be that you won't be able to go up to the Lost Boys Cafe at the top of Timber (mentioned below as a good spot to hang out if family members finish biking early.) Fortunately, there are coffee shops and other places to wait at the bottom of the Elk Chair (you just won't be on top of a mountain.)


Fernie is an amazing mountain town in  the East Kootenay region of southeastern British Columbia, and is an easy three hour drive from Calgary. (I'm not sure why we don't spend more weekends here, actually!)

We discovered the incredible mountain bike trail network around Fernie years ago and my son is a huge fan of the town bike park. We also love camping at nearby Surveyors Lake were we can paddle around the lake looking for painted turtles.

Read more about Fernie and the surrounding area here:


The Best Family Bike Trails in Fernie, British Columbia 

First Summits - Polar Peak, Fernie Alpine Resort

Camping in British Columbia: Kikomun Creek Provincial Park (Surveyors Lake)

Another Great Camping Trip to Surveyors Lake, BC 


Fernie is an Adventure Meca for Outdoor Enthusiasts

Family Downhill Mountain Biking at Fernie Alpine Resort 


I wasn't sure what to expect from Fernie Alpine Resort as a destination for "family" downhill mountain biking. I'd been told to stay away from the Timber Chair (and to use it purely for sightseeing or hiking,) but beyond that, we didn't know if the downhill trails would be suitable for families (or if it was crazy to think about biking down a big ski hill!)

What we discovered was that there are progressions for all levels of skill and ability. I could have happily spent the entire day doing laps on "Deer Trail," my favourite run of the day, and my boys quickly fell in love with "Duff Dynasty."

Riding along the Cedar Trail to access some of the single track trails lower down

What You Need to Know Before You Visit 


Below are just some of my recommendations (things I wish we would have done differently) and general thoughts on how to make the most of your day at the resort (and how to stay safe!)

  • Rent the padding!!! I took a bad fall on one of the gravel connector roads and banged myself up pretty good. Padding might not have saved my chest, but it would have protected my knees (one of which took a big hit.) My son was wearing protective gear, but both my husband and I should have rented for the day.  I also recommend renting full face helmets if you don't have them.

  • Know that children must be at least 6 years old to bike at Fernie Alpine Resort. All children between 6-12 years of age must also be accompanied by a parent / legal guardian (18 years of age or older) or be registered in a Mountain Biking program.

  • Children must have a mountain bike with front suspension and a minimum of 20" wheels.

  • Make sure you have good downhill bikes with full suspension. Again, the hill rents downhill bikes and I recommend taking advantage of this service if you only have cross-country bikes or don't have full suspension. - Note: kids will do fine with just front shocks unless they are doing big jumps and getting a lot of air. They do need a good mountain bike though with disc brakes. (definitely no coaster brakes!!)

  • "Green" doesn't mean "easy." It just means "easier than the blue intermediate runs." Start off on the green beginner runs (even if you normally ride harder trails at home.) My son spends a lot of time biking at our local ski hill in Calgary, and does well on the intermediate/advanced trails. At Fernie though, my boys only tried one intermediate (blue) run the entire day. The green beginner runs were sufficiently challenging enough that they never had to progress to the next stage up.

  • Have a plan in case members of your family finish biking early. I knew I wouldn't last as long as my boys, so I had packed a book, had my credit card in my backpack, and was fully prepared to spend an hour or two on top of the Timber Chair at the Lost Boys Cafe.

  • Be very careful on the gravel connector roads. Several gravel roads connect you from the top of the Elk Chair to various runs (and have loose rocky sections.) This is where I fell (and where my son took a fall as well.) Take it slow on these roads and walk your bike if they ever get too loose for you.

  • Reconsider the recommended "easiest trail." The "Boom/Cedar Trail Traverse" is recommended as the first trail progression for beginners. Know in advance that these are gravel roads, and that there is an uphill section on the Boom Trail (my son freaked out that he was riding uphill after riding up a chairlift to avoid all climbing.) Also, know that there is a very sketchy section of steep, loose, singletrack riding that connects the Boom and Cedar Trails. I had to walk most of it and wouldn't call it a "typical beginner" trail at all (for that one section.) The only reason I'd recommend doing this traverse is for connecting to other runs such as "Eville" and "Honey Bee" lower down.

  • Prepare for long rides on the Elk Chair. This is not the fastest chair, and my son got a little bored riding it so many times. I'd think about bringing a book for him next time to read while on the lift.

  • Carry a small backpack with you while riding. You'll want water with you, and you might even want some granola bars or other small snacks in case energy levels crash. Carrying your lunch will also save you a trip back to the car between rides. I'd also recommend  bringing your own personal first aid kit. (You'll want band-aids at the very least in case somebody falls.)
Great views from the top of the Elk Chair at Fernie 

Our Recommended Progression of Trails to Ride


One. Warm up and test your skills on the Deer Trail


Take the Elk Chair up (all runs mentioned here will be off Elk) and head straight for "Deer Trail," the easiest trail at the resort - and a lot of fun!!

Fernie winter visitors will recognize parts of this trail because you'll actually be biking down the Minute Maid Kids' Ski Trails!!

Lots of flowy berms and banked corners on "Deer Trail"

Biking down the Minute Maid Kids Trails on "Deer Trail"
To get to "Deer Trail" from the top of the Elk Chair, you'll have to first brave the top of "Ben's Big Rig" (which for a beginner is a steep trail with tricky bermed corners - I had to walk it.)

This was the one place where I'd really recommend some changes because the Deer Trail was fully within my ability (and a lot of fun) but I was terrified to ride down the first part of "Ben's Big Rig" (as I imagine other novice riders would be.) It would be great if there was an easier way to connect to Deer Trail from the top of the chair.

Once you arrive on the actual Deer Trail though, you follow a wide easy gravel road (a bit loose in spots) until you reach the easy single track section of this trail.

The section through the Minute Maid Kids Trails was a lot of fun and I was able to improve my riding down an easy, smooth, flowy, trail with gentle banked corners. I could have ridden this trail all day.

Easy riding on a wide road en route to the Deer Trail

My son liked the extra trail features he found off the Deer Trail as well (that were totally optional.) - I didn't even touch them.

Fun trail features on the Deer Trail 

Two. Take Ben's Big Rig down to Duff Dynasty 


These are both rated "green" beginner runs but they will feel challenging if you're more used to "cross-country style" trails. My boys loved these flowy trails though, abundant with berms and banked corners. They found them to be smooth and fun to ride. 

My boys said Duff Dynasty was their favourite trail on the hill. 

After you've tried these two trails, you might want to try some of the other recommended green beginner trails (Eville is a good one that you can access from the Cedar Traverse or from Duff Dynasty.) 

Playing on some fun jumps at the bottom of Duff Dynasty 

Three. Try one or two of the blue intermediate trails 


The Fernie Resort trail map is very helpful in that it lists the trails in order of most difficult down to easiest. The easiest blue/intermediate run is Mr. Berms, and my boys liked it. My son was begging to ride it from his first ride up the Elk Chair (since you can see most of the run weaving its way down the slope beneath you.) And true to its name, it's full of berms and banked corners.

Beyond that, you can try Top Gun, Black Forest or Ewok, as time (and skill) allows. 

There's no shortage of trails to try at Fernie Alpine Resort

For the Non-Riders in your Group 


NOTE THAT THE TIMBER CHAIR WILL BE CLOSED FOR THE 2019 SUMMER SEASON

Non-riders, or families with young children where one parent might choose not to bike, will find plenty of hiking trails at Fernie Alpine Resort to enjoy. You can read about the various hiking trails here

You can also enjoy scenic chairlift rides on either the Elk Chair or the Timber Chair (with casual dining and drinks available at the Lost Boys Cafe at the top of Timber.)

You may also want to check out the free kids' aerial park near the base of the resort. (For more information, ask at customer service when buying your lift passes.)

Patio of the Lost Boys Cafe on top of the Timber Chair

And, regardless of whether you bike or not, you can take a scenic ride up the Timber Chair at the end of your day (both chairs are included in a day pass to bike or hike.) We appreciated this since the terrain for biking off the Timber Chair was too difficult for children. It was nice to go up to the cafe though.

Riding up the Timber Chair 

Please visit the Fernie Alpine Resort website for more information on biking at the resort (along with prices and hours.)

Information on everything else in the surrounding area can be found on the Tourism Fernie website


Disclaimer: Our lift tickets to bike at Fernie Alpine Resort were supplied for us by the resort. As always, all words and opinions are my own and I was not compensated in any other way. 

Tuesday, August 07, 2018

Day Trip to the Columbia Icefields Centre to Walk on a Glacier

Back in my more adventurous days I used to wake up at ungodly hours to trudge up glaciers for what's known in the mountaineering world as an "alpine start." Fast forward several years, and an alpine start becomes a more respectable 6am for a family glacier day.

Day Trip to the Columbia Icefields Centre to Walk on a Glacier


Day Trip to the Columbia Icefields Centre


We took an overnight trip to the Columbia Icefields Centre back in April but got snowed out for our glacier adventure tour (and as it turns out, visibility is highly desirable for glacier walks.)

We still wanted to do the tour and to get out on the Athabasca Glacier this year, so we decided to make a "power trip" up to Jasper, leaving at 6am the morning of our tour, and returning later that afternoon (after stopping a few times to explore on the way home.)

Power Day Trip to walk on the Athabasca Glacier, Jasper National Park 

Is it Really Possible to Visit the Icefields Centre as a Day Trip from Calgary?? 


From Calgary, it is roughly a 3.5 hour drive to the Columbia Icefields Centre on the border of Banff and Jasper National Parks. We had a glacier adventure tour booked for 10:00 am, so for us, that meant leaving Calgary around 6:00 am so that we'd have time to check in and get ready for our tour.

So, yes, it's doable to make it to the Icefields Centre from Calgary as a day trip, but I would recommend booking a later tour time so you don't have to speed! (and so you have time to enjoy the drive along the Icefields Parkway without stressing out over slow drivers in front of you, that you can never seem to pass.)

With views like this, you want to take your time on the drive (photo: Glacier Skywalk Viewpoint)

Our Glacier Adventure Tour


We'd booked our tour ahead of time and already had our tour time selected for us. This made it very easy to show up 10-15 minutes early, walk straight up to the loading area, and wait for the staff to call our tour time. (You do not have to go anywhere near the crowded tour desk.)

We then loaded a tour bus which drove us to the staging area for the Athabasca Glacier. From the staging area, we stepped onto a giant snow coach ice explorer which would drive us up the glacier to a safe cleared area, free of crevasses, and relatively flat for walking around on.

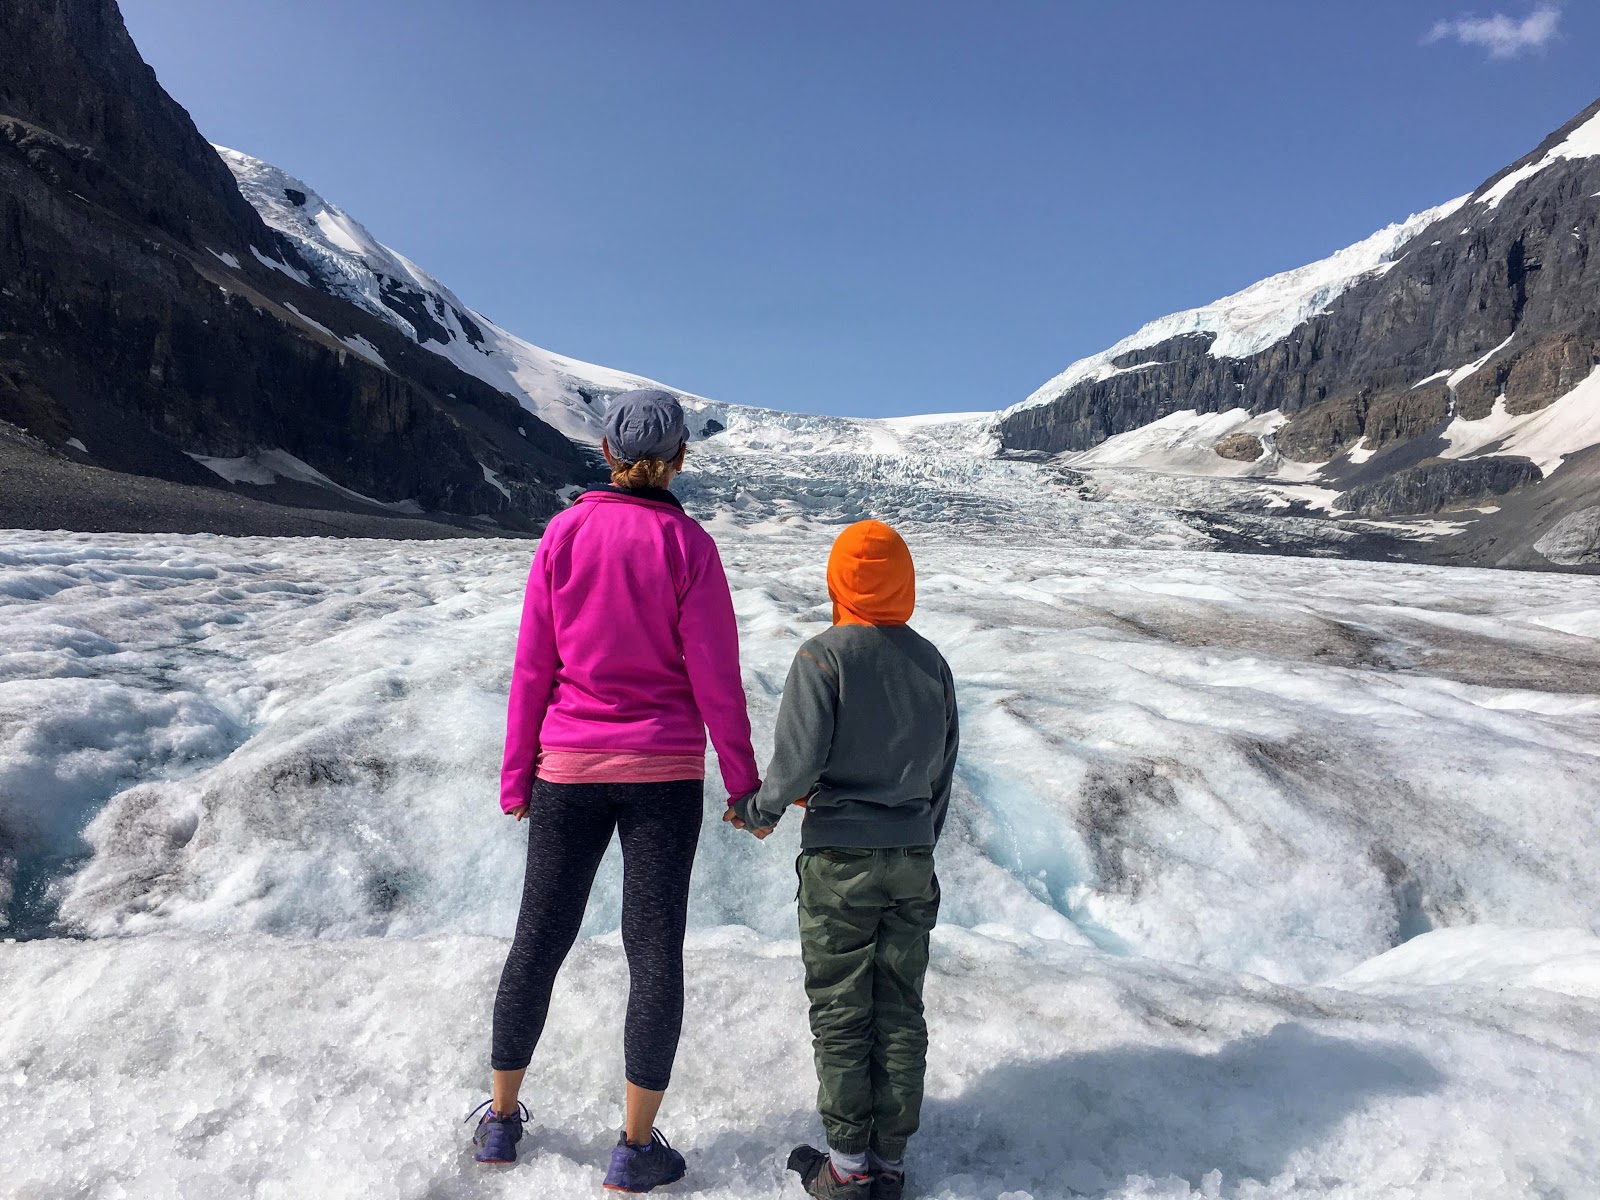
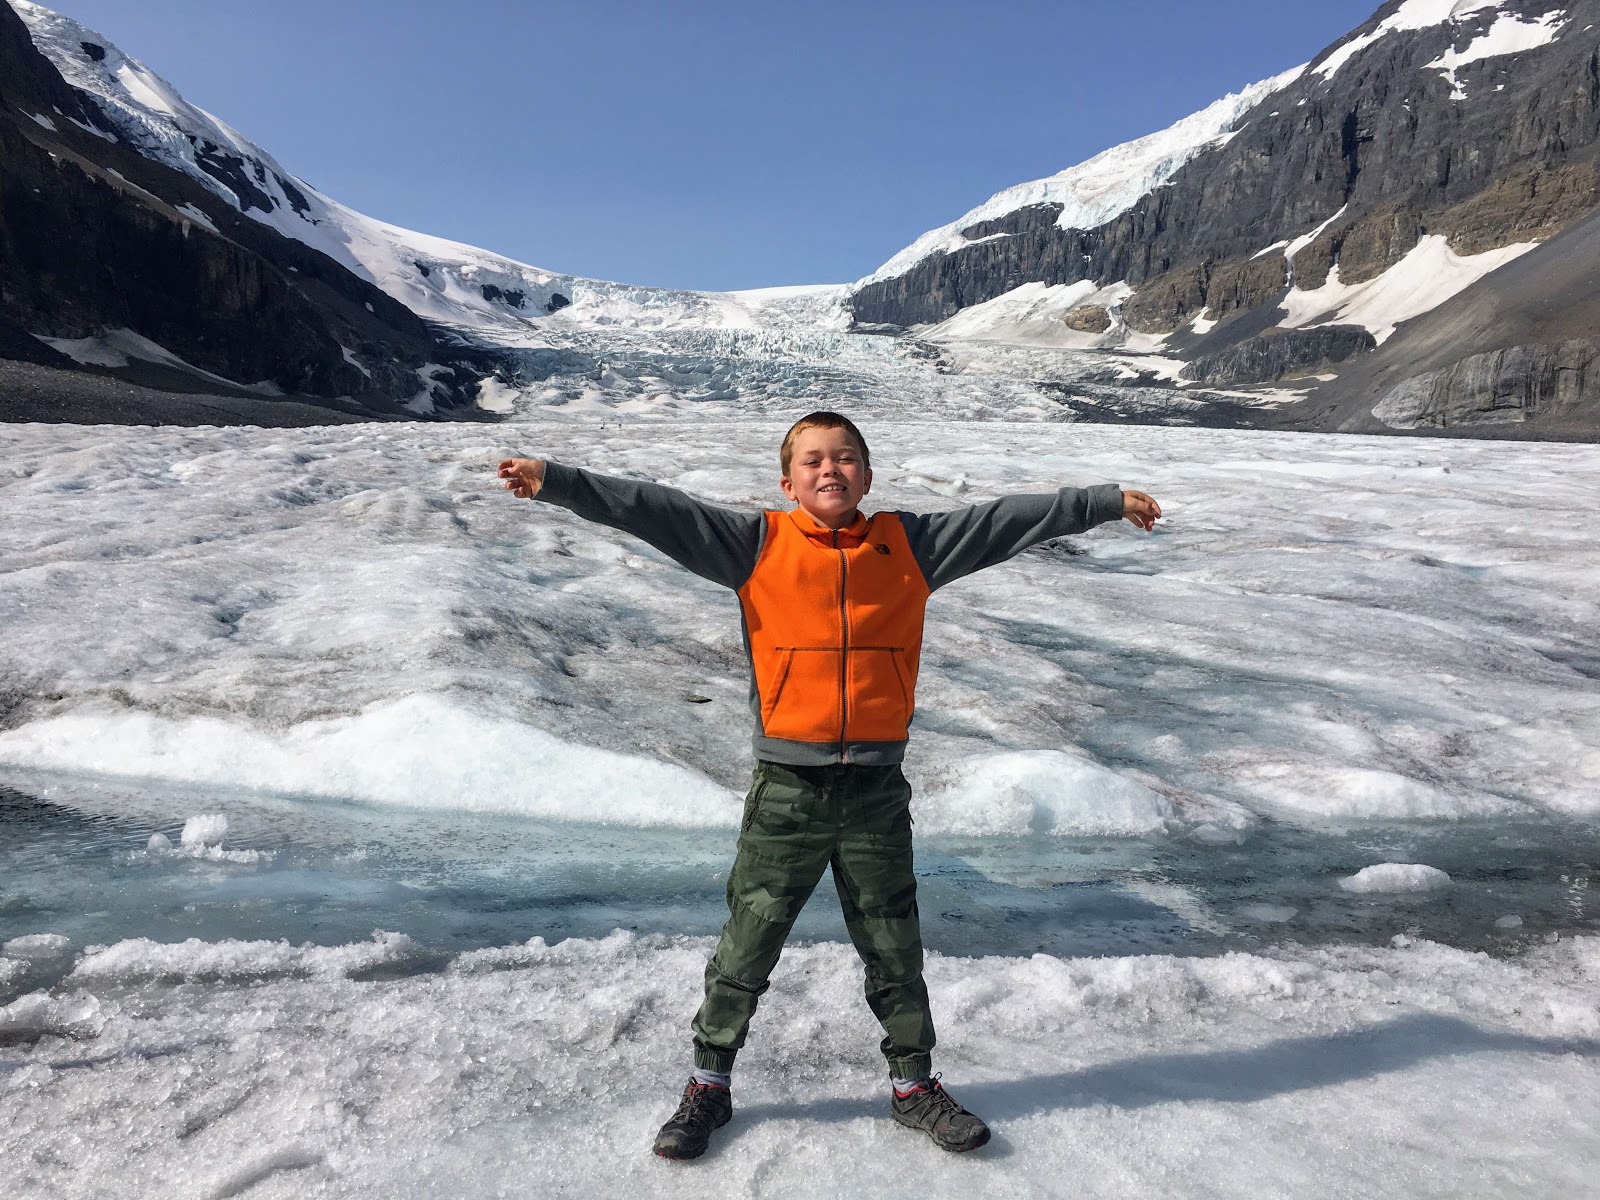
Walking on the Athabasca Glacier, Jasper National Park 

We had half an hour on the glacier (which is plenty of time) to take photos, walk around, check out the interpretive displays, and examine the giant ice explorers (You've got to try fitting inside one of the bus tires just for fun.)

Our Glacier Transportation on a giant Ice Explorer

After our glacier adventure, we drove back down to the staging area, boarded the tour bus again, and then headed for the Skywalk Adventure, next up on our itinerary.

Read more about the Glacier Adventure here on the Pursuit Banff Jasper Collection website. 

A very BIG Ice Explorer to travel on the glacier 

Our Glacier Skywalk Tour 


Our tour bus drove us a short ways up the highway to a viewpoint where we could walk out on a glass sidewalk over the edge of a cliff. The views from here are amazing and the experience has a high education component for those who want to borrow a set of headphones and listen to the interpretive tour as they walk the sidewalk up to the viewpoint.

Hanging out on the glass sidewalk of the Glacier Skywalk 

With high energy boys, we didn't really stop to read any of the interpretive signs (and didn't use the headphones,) but we still had a lot of fun on the glass sidewalk.

And as with all visitors, the boys had to sit and lie down on the sidewalk, staring at the ground far below.

Views from the Glacier Skywalk 

5 Reasons we LOVE the Columbia Icefields Glacier Adventure 


The easiest way for a family to walk on a glacier
  1. When was the last time you walked on a glacier? This is the easiest chance you'll get in the Canadian Rockies unless you want to sign up for a mountaineering expedition to go climb something.

  2. You could wake up at 4am and spend hours trudging your way up a glacier, or you can show up at a time that suits your schedule and let a giant bus climb the glacier for you! This is a family-win in my books.

  3. The scenery at the Columbia Icefields Centre is some of the most beautiful in all of Banff and Jasper National Parks. I highly recommend taking family and friends here if they're visiting you this summer.

  4. There are interpretive signs on the glacier explaining different parts of a glacier and hazards for those who dare to venture out across them. The staff are very knowledgeable and they point out all the surrounding mountains, talk about the different kinds of moraines around the glacier, and explain why the landscape looks the way it does. Honestly, it's all very fascinating.

  5. We love stopping here as a rest stop en route to Jasper if we're heading up there for a long weekend. By booking your tour online ahead of time, you can be in and out in less than 2 hours.
Glacier Adventure with my Boo 


Other Fun Hikes, Attractions, and Activities to Enjoy on the Icefields Parkway 


Panther Falls, Banff National Park 
  • Hike the Wilcox Pass Trail, right up above the Icefields Centre (2.4 km return to the first viewpoint)

  • Hike the Parker Ridge Trail, 5.4 km return

  • Stop in for a short hike down to Panther Falls, 1.6 km return from the uppermost parking lot on the big bend

  • Hike Mistaya Canyon, 1.5 km return

  • Hike the Bow Summit Lookout Trail from the Peyto Lake Viewpoint, 5.8 km return

  • Hike around Bow Lake to Bow Glacier Falls, 9.2 km return

  • Stop in for some swimming at Herbert Lake 

Herbert Lake, Banff National Park 

Recommended Reading 


Wilcox Pass Hike, Icefields Parkway, Jasper National Park 


Bow Summit Lookout Hike, Banff National Park 

Tips for Visiting the Columbia Icefields Centre 


- Always book a tour time ahead of your visit. Otherwise, you risk showing up to find a 3 hour wait ahead of you (or all tour times sold out for the day.)

- Dress for snow and ice! Pack a light pair of gloves, a warm hat, a sweater, and maybe even an insulated jacket. We lucked out and it was warm the day of our visit. This is not always the case.

- Expect wind. It is always windy at the Icefields Centre

- Pack a cooler with food, snacks, and lunch. The cafeteria gets very overcrowded. I also recommend bringing drinks and a large thermos with coffee so you don't have to wait in line for that either.

- Make a day of it! Plan a hike after your tour, stop at a viewpoint or two, or even bring the swimsuits and stop in at Herbert Lake on your way home (everybody's favourite swimming lake on the Icefields Parkway.)

Peyto Lake, Icefields Parkway 

Disclaimer: Our tour was provided for us by Pursuit. As always, all words and opinions are my own.